
How to use TensorFlow with Google VertexAI
Hello everyone, today I will discuss how to deploy a training pipeline which uses TensorFlow on Vertex AI and deploy an endpoint for the model in the cloud using Vertex AI for online prediction.
The dataset used for this tutorial is the MNIST dataset from TensorFlow Datasets. The version of the dataset you will use is built into TensorFlow. The trained model predicts which type of class (digit) an image is from ten classes (0-9)
The steps performed include:
- Create a Vertex AI custom job for training a model in distributed fashion.
- Train the model using TensorFlow’s
MirroredStrategy. - Deploy the
Modelresource to a servingEndpointresource. - Make a prediction.
- Undeploy the
Modelresource.
Let us create a custom-trained model from a Python script in a Docker container using the Vertex SDK for Python, and then do a prediction on the deployed model by sending data.
- Train a model using distribution strategies on Vertex AI using the SDK for Python
- Deploy a custom image classification model for online prediction using Vertex AI
Introduction
Vertex AI Workbench is the single environment for data scientists to complete all of their ML work, from experimentation, to deployment, to managing and monitoring models. It is a Jupyter-based fully managed, scalable, enterprise-ready compute infrastructure with security controls and user management capabilities.
TensorFlow is an open-source library developed by Google primarily for deep learning applications. It also supports traditional machine learning.
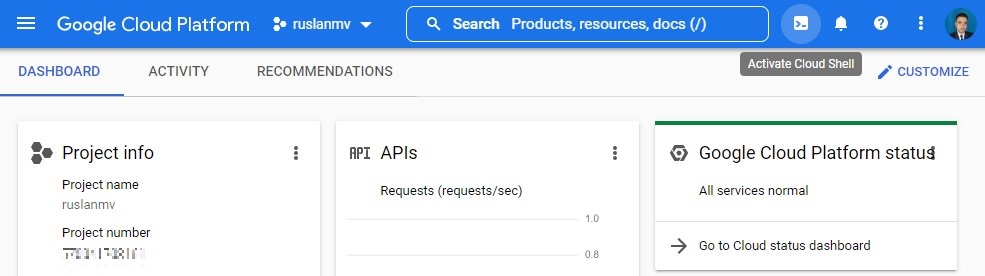
Step 1 - Activate Cloud Shell
First we login into our console of Google Cloud Platform (GCP) account

Then after you login to your Cloud Console in the top right toolbar, click the Activate Cloud Shell button.
Click Continue.
It takes a few moments to provision and connect to the environment. When you are connected, you are already authenticated, and the project is set to your PROJECT_ID. For example:

gcloud is the command-line tool for Google Cloud. It comes pre-installed on Cloud Shell and supports tab-completion.
You can list the active account name with this command:
gcloud auth list
then you should authorize
you will have something like
ACTIVE: *
ACCOUNT: [email protected]
To set the active account, run:
    $ gcloud config set account `ACCOUNT`
You can list the project ID with this command:
gcloud config list project
for example the output may be similar like
[core]
project = <project_ID>
Step 2 Enable Google Cloud services
- In Cloud Shell, use
gcloudto enable the services used in the lab
gcloud services enable \
  compute.googleapis.com \
  iam.googleapis.com \
  iamcredentials.googleapis.com \
  monitoring.googleapis.com \
  logging.googleapis.com \
  notebooks.googleapis.com \
  aiplatform.googleapis.com \
  bigquery.googleapis.com \
  artifactregistry.googleapis.com \
  cloudbuild.googleapis.com \
  container.googleapis.com
You will obtain something like
Operation "operations/acf.p2-258289527804-d749b4a5-9esb2-4f84-a549-3b6274273ba1" finished successfully.
- Create a custom service account
SERVICE_ACCOUNT_ID=vertex-custom-training-sa
gcloud iam service-accounts create $SERVICE_ACCOUNT_ID  \
    --description="A custom service account for Vertex custom training" \
    --display-name="Vertex AI Custom Training"
- Set the Project ID environment variable
PROJECT_ID=$(gcloud config get-value core/project)
you will get
Your active configuration is: [cloudshell-2853]
- Grant your service account the
aiplatform.userrole.
gcloud projects add-iam-policy-binding $PROJECT_ID \
    --member=serviceAccount:$SERVICE_ACCOUNT_ID@$PROJECT_ID.iam.gserviceaccount.com \
    --role="roles/aiplatform.user"
This will allow access to running model training, deployment, and explanation jobs with Vertex AI.
Step 3 Deploy Vertex Notebook instance
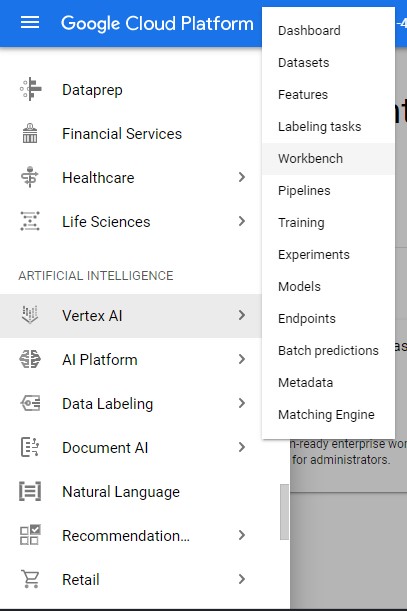
To launch Notebooks with Vertex AI:
-
Click on the Navigation Menu and navigate to Vertex AI, then to Workbench.
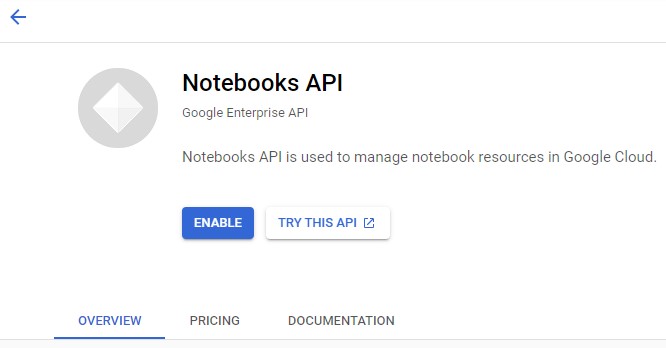
then we activate the API
-
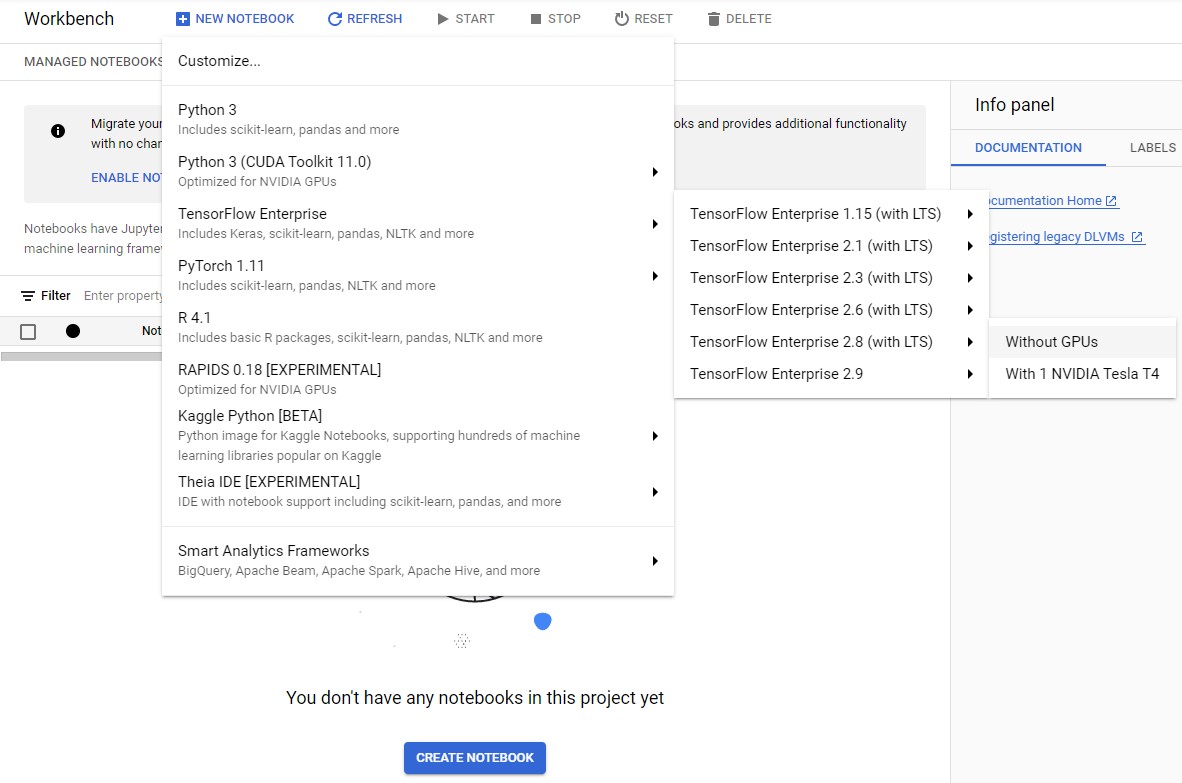
On the Notebook instances page, click New Notebook.
-
In the Customize instance menu, select TensorFlow Enterprise and choose the latest version of TensorFlow Enterprise 2.x (with LTS) > Without GPUs.
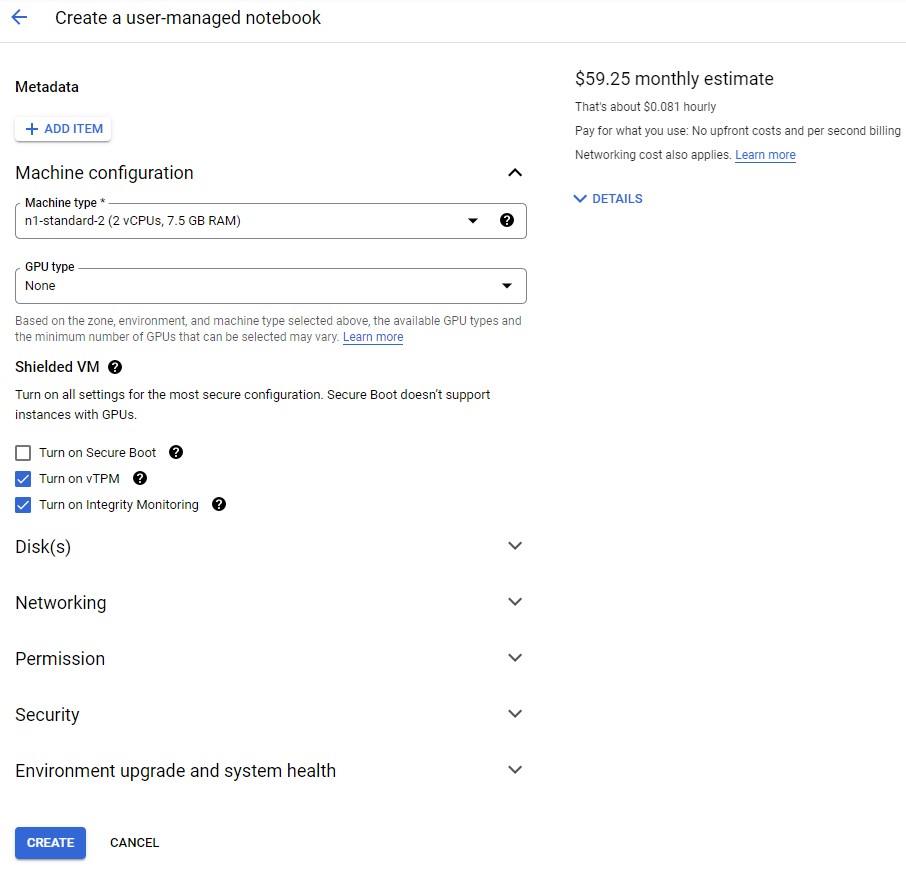
- In the New notebook instance dialog, click the pencil icon to Edit instance properties.
- For Instance name, enter a name for your instance.
- For Region, select
us-central1and for Zone, select a zone within the selected region.
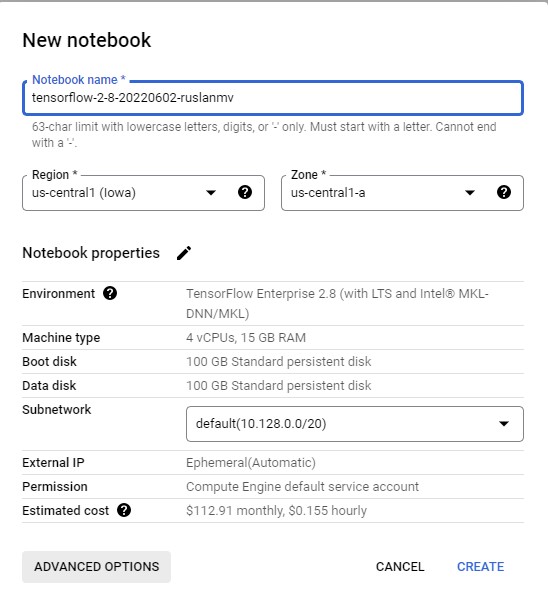
-
Then we click on Advanced options and scroll down to Machine configuration and select n1-standard-2 for Machine type.
-
Leave the remaining fields with their default and click Create.
after create you will see
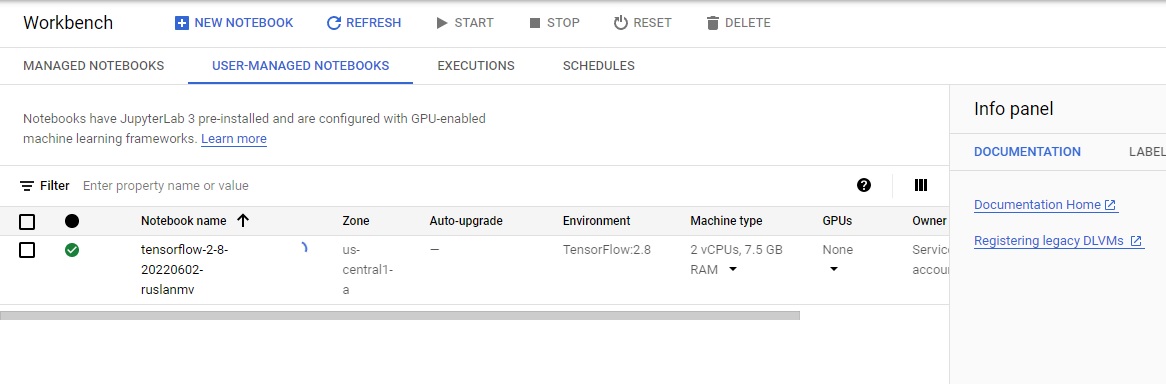
After a few minutes, the Vertex AI console will display your instance name, followed by Open JupyterLab.
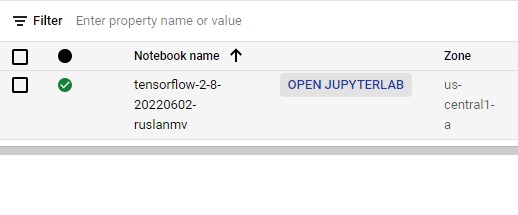
Click Open JupyterLab. A JupyterLab window will open in a new tab.
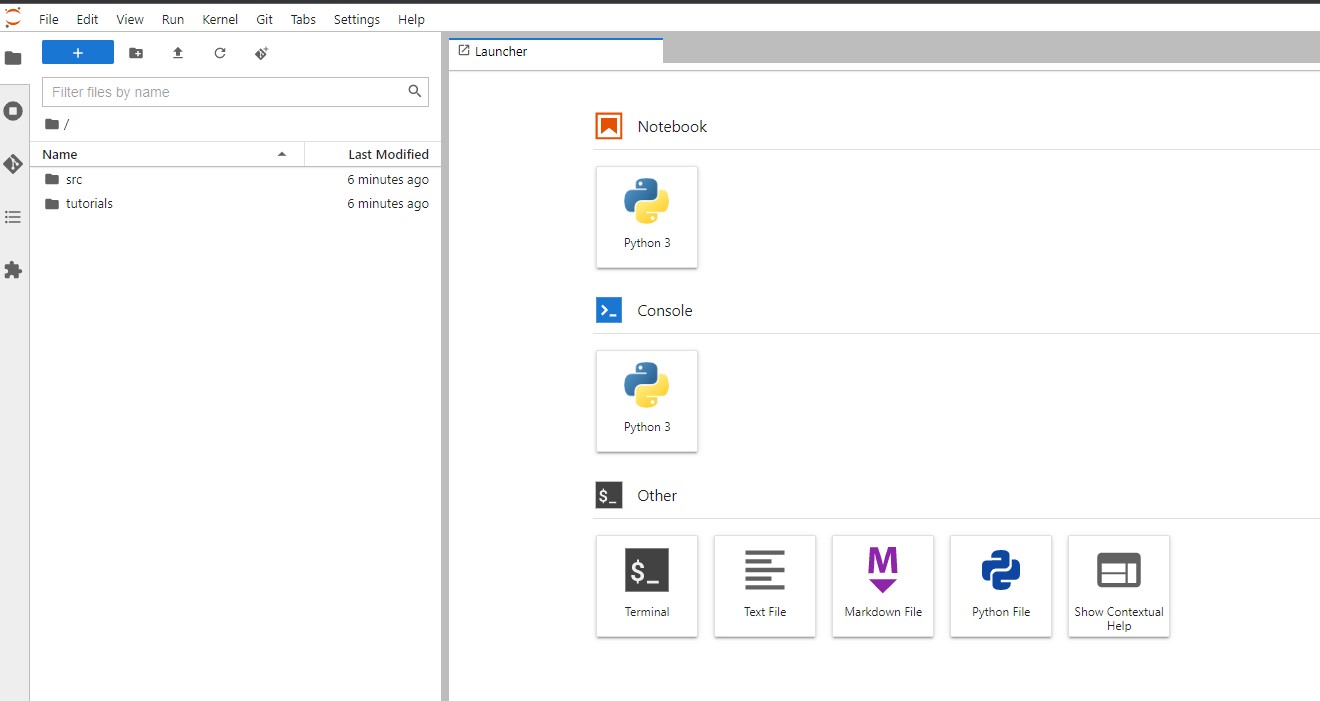
Step 4 - Creation of the Notebook
Let us create a new notebook Python 3 and we install the latest (preview) version of Vertex SDK for Python.
import os
!pip3 install --user --upgrade google-cloud-aiplatform
Install the latest GA version of google-cloud-storage library as well.
!pip3 install --user --upgrade google-cloud-storage
Install the pillow library for loading images.
!pip3 install --user --upgrade pillow
Requirement already satisfied: pillow in /opt/conda/lib/python3.7/site-packages (9.1.1)
Install the numpy library for manipulation of image data.
!pip3 install --user --upgrade numpy
Requirement already satisfied: numpy in /opt/conda/lib/python3.7/site-packages (1.21.6)
You can safely ignore errors during the numpy installation.
Restart the kernel
Once you’ve installed everything, you need to restart the notebook kernel so it can find the packages.
import os

if not os.getenv("IS_TESTING"):
    # Automatically restart kernel after installs
    import IPython

    app = IPython.Application.instance()
    app.kernel.do_shutdown(True)
Set your project ID
If you don’t know your project ID, you may be able to get your project ID using gcloud.
import os

PROJECT_ID = ""

if not os.getenv("IS_TESTING"):
    # Get your Google Cloud project ID from gcloud
    shell_output=!gcloud config list --format 'value(core.project)' 2>/dev/null
    PROJECT_ID = shell_output[0]
    print("Project ID: ", PROJECT_ID)
Project ID: yourproject-xxxx-id
Timestamp
If you are in a live tutorial session, you might be using a shared test account or project. To avoid name collisions between users on resources created, you create a timestamp for each instance session, and append it onto the name of resources you create in this tutorial.
from datetime import datetime

TIMESTAMP = datetime.now().strftime("%Y%m%d%H%M%S")
Create a Cloud Storage bucket
The following steps are required, regardless of your notebook environment.
When you submit a training job using the Cloud SDK, you upload a Python package containing your training code to a Cloud Storage bucket. Vertex AI runs the code from this package. In this tutorial, Vertex AI also saves the trained model that results from your job in the same bucket. Using this model artifact, you can then create Vertex AI model and endpoint resources in order to serve online predictions.
Set the name of your Cloud Storage bucket below. It must be unique across all Cloud Storage buckets.
You may also change the REGION variable, which is used for operations
throughout the rest of this notebook. Make sure to choose a region where Vertex AI services are available. You may
not use a Multi-Regional Storage bucket for training with Vertex AI.
BUCKET_NAME = "gs://test_bucket_ruslanmv1230"
REGION = "us-central1"  # @param {type:"string"}
if BUCKET_NAME == "" or BUCKET_NAME is None or BUCKET_NAME == "gs://test_bucket_ruslanmv1230":
    BUCKET_NAME = "gs://" + PROJECT_ID
Only if your bucket doesn’t already exist: Run the following cells to create your Cloud Storage bucket.
!gsutil mb -l $REGION $BUCKET_NAME
Set up variables
Next, set up some variables used throughout the tutorial.
Import Vertex SDK for Python
Import the Vertex SDK for Python into your Python environment and initialize it.
import os
import sys

from google.cloud import aiplatform
from google.cloud.aiplatform import gapic as aip

aiplatform.init(project=PROJECT_ID, location=REGION, staging_bucket=BUCKET_NAME)
Set hardware accelerators
Here to run a container image on a CPU, we set the variables TRAIN_GPU/TRAIN_NGPU and DEPLOY_GPU/DEPLOY_NGPU to (None, None) since this notebook is meant to be run in a Qwiklab environment where GPUs cannot be provisioned.
Note: If you happen to be running this notebook from your personal GCP account, set the variables TRAIN_GPU/TRAIN_NGPU and DEPLOY_GPU/DEPLOY_NGPU to use a container image supporting a GPU and the number of GPUs allocated to the virtual machine (VM) instance. For example, to use a GPU container image with 4 Nvidia Tesla K80 GPUs allocated to each VM, you would specify:
(aip.AcceleratorType.NVIDIA_TESLA_K80, 4)
See the locations where accelerators are available.
TRAIN_GPU, TRAIN_NGPU = (None, None)
DEPLOY_GPU, DEPLOY_NGPU = (None, None)
Set pre-built containers
Vertex AI provides pre-built containers to run training and prediction.
For the latest list, see Pre-built containers for training and Pre-built containers for prediction
TRAIN_VERSION = "tf-cpu.2-6"
DEPLOY_VERSION = "tf2-cpu.2-6"

TRAIN_IMAGE = "us-docker.pkg.dev/vertex-ai/training/{}:latest".format(TRAIN_VERSION)
DEPLOY_IMAGE = "us-docker.pkg.dev/vertex-ai/prediction/{}:latest".format(DEPLOY_VERSION)

print("Training:", TRAIN_IMAGE, TRAIN_GPU, TRAIN_NGPU)
print("Deployment:", DEPLOY_IMAGE, DEPLOY_GPU, DEPLOY_NGPU)
Training: us-docker.pkg.dev/vertex-ai/training/tf-cpu.2-6:latest None None
Deployment: us-docker.pkg.dev/vertex-ai/prediction/tf2-cpu.2-6:latest None None
Set machine types
Next, set the machine types to use for training and prediction.
- Set the variables
TRAIN_COMPUTEandDEPLOY_COMPUTEto configure your compute resources for training and prediction. machine typen1-standard: 3.75GB of memory per vCPUn1-highmem: 6.5GB of memory per vCPUn1-highcpu: 0.9 GB of memory per vCPU
vCPUs: number of [2, 4, 8, 16, 32, 64, 96 ]
Note: The following is not supported for training:
standard: 2 vCPUshighcpu: 2, 4 and 8 vCPUs
Note: You may also use n2 and e2 machine types for training and deployment, but they do not support GPUs.
MACHINE_TYPE = "n1-standard"

VCPU = "4"
TRAIN_COMPUTE = MACHINE_TYPE + "-" + VCPU
print("Train machine type", TRAIN_COMPUTE)

MACHINE_TYPE = "n1-standard"

VCPU = "4"
DEPLOY_COMPUTE = MACHINE_TYPE + "-" + VCPU
print("Deploy machine type", DEPLOY_COMPUTE)
Train machine type n1-standard-4
Deploy machine type n1-standard-4
Step 5 Distributed training and deployment
Now you are ready to start creating your own custom-trained model with MNIST and deploying it as online prediction service.
Train a model
There are two ways you can train a custom model using a container image:
-
Use a Google Cloud prebuilt container. If you use a prebuilt container, you will additionally specify a Python package to install into the container image. This Python package contains your code for training a custom model.
-
Use your own custom container image. If you use your own container, the container needs to contain your code for training a custom model.
Define the command args for the training script
Prepare the command-line arguments to pass to your training script.
args: The command line arguments to pass to the corresponding Python module. In this example, they will be:"--epochs=" + EPOCHS: The number of epochs for training."--steps=" + STEPS: The number of steps (batches) per epoch."--distribute=" + TRAIN_STRATEGY": The training distribution strategy to use for single or distributed training."single": single device."mirror": all GPU devices on a single compute instance."multi": all GPU devices on all compute instances.
JOB_NAME = "custom_job_" + TIMESTAMP
MODEL_DIR = "{}/{}".format(BUCKET_NAME, JOB_NAME)

if not TRAIN_NGPU or TRAIN_NGPU < 2:
    TRAIN_STRATEGY = "single"
else:
    TRAIN_STRATEGY = "mirror"

EPOCHS = 20
STEPS = 100

CMDARGS = [
    "--epochs=" + str(EPOCHS),
    "--steps=" + str(STEPS),
    "--distribute=" + TRAIN_STRATEGY,
]
TRAIN_STRATEGY
'single'
Training script
In the next cell, you will write the contents of the training script, task.py. In summary:
- Get the directory where to save the model artifacts from the environment variable
AIP_MODEL_DIR. This variable is set by the training service. - Loads MNIST dataset from TF Datasets (tfds).
- Builds a model using TF.Keras model API.
- Compiles the model (
compile()). - Sets a training distribution strategy according to the argument
args.distribute. - Trains the model (
fit()) with epochs and steps according to the argumentsargs.epochsandargs.steps - Saves the trained model (
save(MODEL_DIR)) to the specified model directory.
%%writefile task.py
# Single, Mirror and Multi-Machine Distributed Training for MNIST

import tensorflow_datasets as tfds
import tensorflow as tf
from tensorflow.python.client import device_lib
import argparse
import os
import sys
tfds.disable_progress_bar()

parser = argparse.ArgumentParser()
parser.add_argument('--lr', dest='lr',
                    default=0.01, type=float,
                    help='Learning rate.')
parser.add_argument('--epochs', dest='epochs',
                    default=10, type=int,
                    help='Number of epochs.')
parser.add_argument('--steps', dest='steps',
                    default=200, type=int,
                    help='Number of steps per epoch.')
parser.add_argument('--distribute', dest='distribute', type=str, default='single',
                    help='distributed training strategy')
args = parser.parse_args()

print('Python Version = {}'.format(sys.version))
print('TensorFlow Version = {}'.format(tf.__version__))
print('TF_CONFIG = {}'.format(os.environ.get('TF_CONFIG', 'Not found')))
print('DEVICES', device_lib.list_local_devices())

# Single Machine, single compute device
if args.distribute == 'single':
    if tf.test.is_gpu_available():
        strategy = tf.distribute.OneDeviceStrategy(device="/gpu:0")
    else:
        strategy = tf.distribute.OneDeviceStrategy(device="/cpu:0")
# Single Machine, multiple compute device
elif args.distribute == 'mirror':
    strategy = tf.distribute.MirroredStrategy()
# Multiple Machine, multiple compute device
elif args.distribute == 'multi':
    strategy = tf.distribute.experimental.MultiWorkerMirroredStrategy()

# Multi-worker configuration
print('num_replicas_in_sync = {}'.format(strategy.num_replicas_in_sync))

# Preparing dataset
BUFFER_SIZE = 10000
BATCH_SIZE = 64

def make_datasets_unbatched():
  # Scaling MNIST data from (0, 255] to (0., 1.]
  def scale(image, label):
    image = tf.cast(image, tf.float32)
    image /= 255.0
    return image, label

  datasets, info = tfds.load(name='mnist',
                            with_info=True,
                            as_supervised=True)
  return datasets['train'].map(scale).cache().shuffle(BUFFER_SIZE).repeat()


# Build the Keras model
def build_and_compile_cnn_model():
  model = tf.keras.Sequential([
      tf.keras.layers.Conv2D(32, 3, activation='relu', input_shape=(28, 28, 1)),
      tf.keras.layers.MaxPooling2D(),
      tf.keras.layers.Conv2D(32, 3, activation='relu'),
      tf.keras.layers.MaxPooling2D(),
      tf.keras.layers.Flatten(),
      tf.keras.layers.Dense(10, activation='softmax')
  ])
  model.compile(
      loss=tf.keras.losses.sparse_categorical_crossentropy,
      optimizer=tf.keras.optimizers.SGD(learning_rate=args.lr),
      metrics=['accuracy'])
  return model

# Train the model
NUM_WORKERS = strategy.num_replicas_in_sync
# Here the batch size scales up by number of workers since
# `tf.data.Dataset.batch` expects the global batch size.
GLOBAL_BATCH_SIZE = BATCH_SIZE * NUM_WORKERS
MODEL_DIR = os.getenv("AIP_MODEL_DIR")

train_dataset = make_datasets_unbatched().batch(GLOBAL_BATCH_SIZE)

with strategy.scope():
  # Creation of dataset, and model building/compiling need to be within
  # `strategy.scope()`.
  model = build_and_compile_cnn_model()

model.fit(x=train_dataset, epochs=args.epochs, steps_per_epoch=args.steps)
model.save(MODEL_DIR)
Writing task.py
Step 6 Train the model
Define your custom training job on Vertex AI.
Use the CustomTrainingJob class to define the job, which takes the following parameters:
display_name: The user-defined name of this training pipeline.script_path: The local path to the training script.container_uri: The URI of the training container image.requirements: The list of Python package dependencies of the script.model_serving_container_image_uri: The URI of a container that can serve predictions for your model — either a prebuilt container or a custom container.
Use the run function to start training, which takes the following parameters:
args: The command line arguments to be passed to the Python script.replica_count: The number of worker replicas.model_display_name: The display name of theModelif the script produces a managedModel.machine_type: The type of machine to use for training.accelerator_type: The hardware accelerator type.accelerator_count: The number of accelerators to attach to a worker replica.
The run function creates a training pipeline that trains and creates a Model object. After the training pipeline completes, the run function returns the Model object.
You can read more about the CustomTrainingJob.run API here
job = aiplatform.CustomTrainingJob(
    display_name=JOB_NAME,
    script_path="task.py",
    container_uri=TRAIN_IMAGE,
    requirements=["tensorflow_datasets==1.3.0"],
    model_serving_container_image_uri=DEPLOY_IMAGE,
)

MODEL_DISPLAY_NAME = "mnist-" + TIMESTAMP

# Start the training
if TRAIN_GPU:
    model = job.run(
        model_display_name=MODEL_DISPLAY_NAME,
        args=CMDARGS,
        replica_count=1,
        machine_type=TRAIN_COMPUTE,
        accelerator_type=TRAIN_GPU.name,
        accelerator_count=TRAIN_NGPU,
    )
else:
    model = job.run(
        model_display_name=MODEL_DISPLAY_NAME,
        args=CMDARGS,
        replica_count=1,
        machine_type=TRAIN_COMPUTE,
        accelerator_count=0,
    )
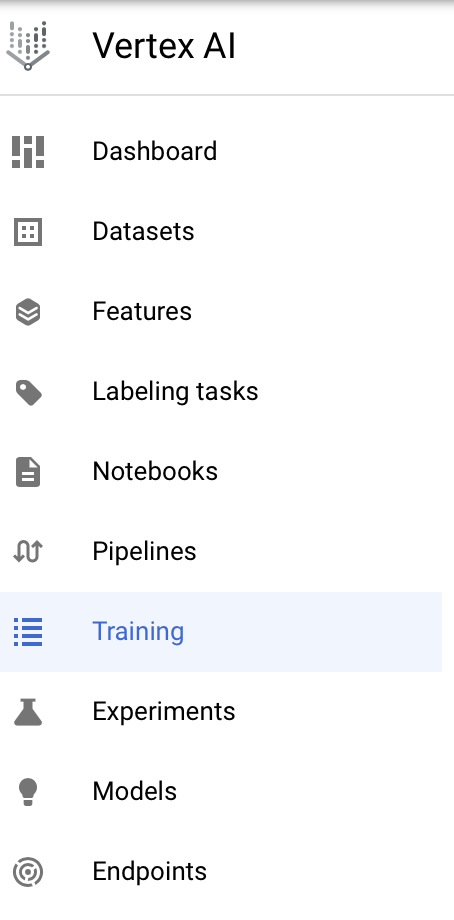
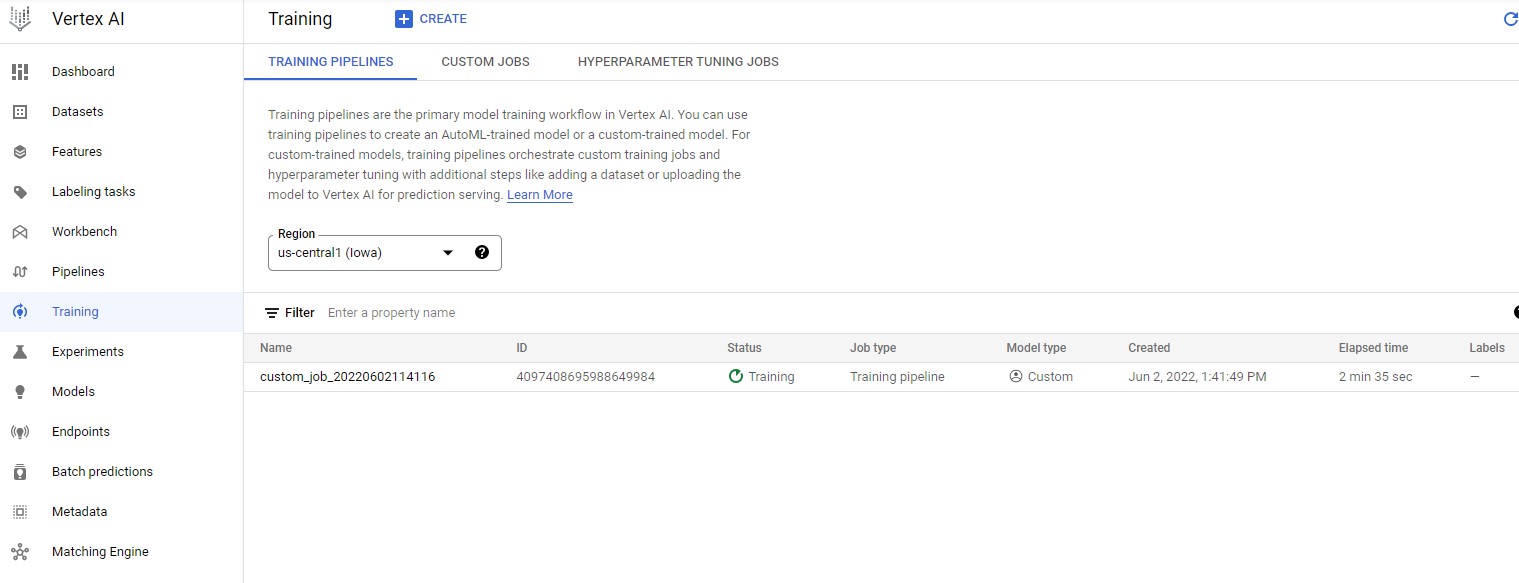
To view the training pipeline status, you have to navigate to Vertex AI ➞ Training
You can see the status of the current training pipeline as seen below
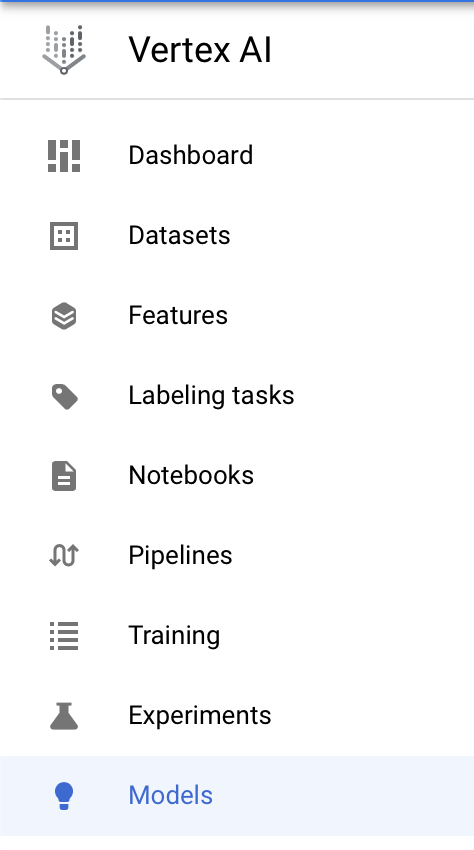
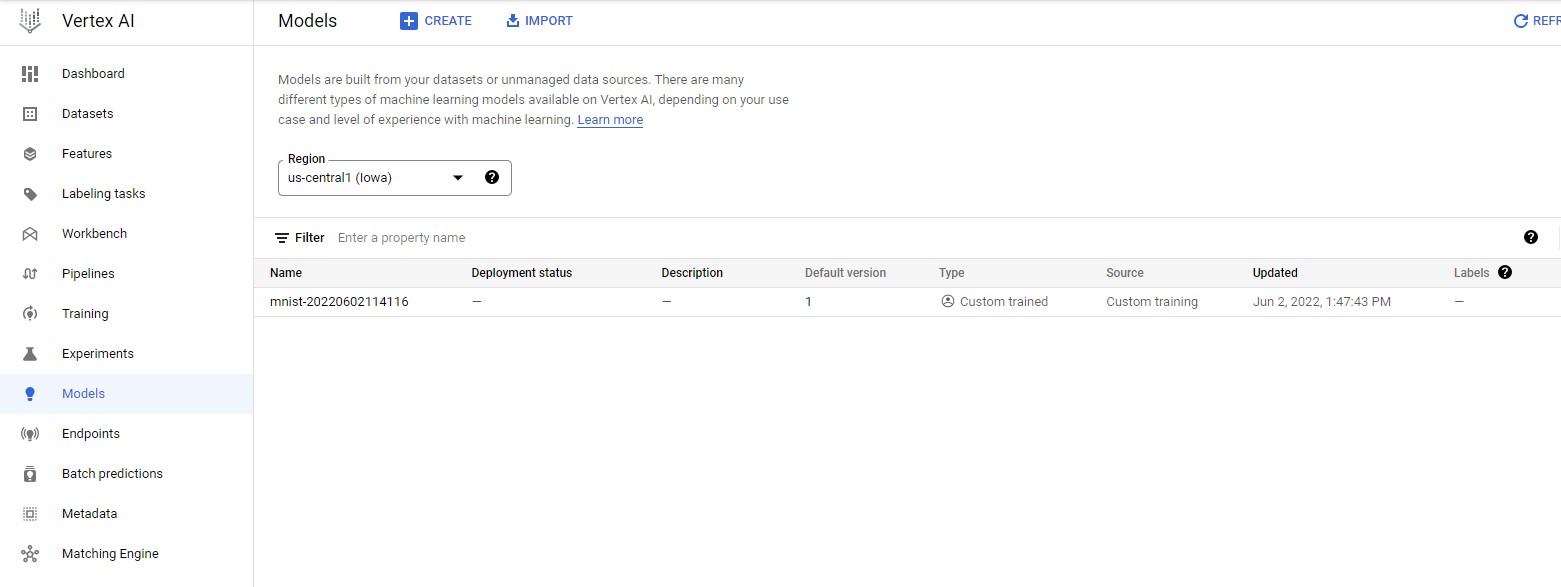
Once the model has been successfully trained, you can see a custom trained model if you head to Vertex AI ➞ Models
Step 7 Deploy the model
Before you use your model to make predictions, you need to deploy it to an Endpoint. You can do this by calling the deploy function on the Model resource. This will do two things:
- Create an
Endpointresource for deploying theModelresource to. - Deploy the
Modelresource to theEndpointresource.
The function takes the following parameters:
deployed_model_display_name: A human readable name for the deployed model.traffic_split: Percent of traffic at the endpoint that goes to this model, which is specified as a dictionary of one or more key/value pairs.- If only one model, then specify as { “0”: 100 }, where “0” refers to this model being uploaded and 100 means 100% of the traffic.
- If there are existing models on the endpoint, for which the traffic will be split, then use
model_idto specify as { “0”: percent, model_id: percent, … }, wheremodel_idis the model id of an existing model to the deployed endpoint. The percents must add up to 100.
machine_type: The type of machine to use for training.accelerator_type: The hardware accelerator type.accelerator_count: The number of accelerators to attach to a worker replica.starting_replica_count: The number of compute instances to initially provision.max_replica_count: The maximum number of compute instances to scale to. In this tutorial, only one instance is provisioned.
Traffic split
The traffic_split parameter is specified as a Python dictionary. You can deploy more than one instance of your model to an endpoint, and then set the percentage of traffic that goes to each instance.
You can use a traffic split to introduce a new model gradually into production. For example, if you had one existing model in production with 100% of the traffic, you could deploy a new model to the same endpoint, direct 10% of traffic to it, and reduce the original model’s traffic to 90%. This allows you to monitor the new model’s performance while minimizing the distruption to the majority of users.
Compute instance scaling
You can specify a single instance (or node) to serve your online prediction requests. This tutorial uses a single node, so the variables MIN_NODES and MAX_NODES are both set to 1.
If you want to use multiple nodes to serve your online prediction requests, set MAX_NODES to the maximum number of nodes you want to use. Vertex AI autoscales the number of nodes used to serve your predictions, up to the maximum number you set. Refer to the pricing page to understand the costs of autoscaling with multiple nodes.
Endpoint
The method will block until the model is deployed and eventually return an Endpoint object. If this is the first time a model is deployed to the endpoint, it may take a few additional minutes to complete provisioning of resources.
DEPLOYED_NAME = "mnist_deployed-" + TIMESTAMP

TRAFFIC_SPLIT = {"0": 100}

MIN_NODES = 1
MAX_NODES = 1

if DEPLOY_GPU:
    endpoint = model.deploy(
        deployed_model_display_name=DEPLOYED_NAME,
        traffic_split=TRAFFIC_SPLIT,
        machine_type=DEPLOY_COMPUTE,
        accelerator_type=DEPLOY_GPU.name,
        accelerator_count=DEPLOY_NGPU,
        min_replica_count=MIN_NODES,
        max_replica_count=MAX_NODES,
    )
else:
    endpoint = model.deploy(
        deployed_model_display_name=DEPLOYED_NAME,
        traffic_split=TRAFFIC_SPLIT,
        machine_type=DEPLOY_COMPUTE,
        accelerator_type=None,
        accelerator_count=0,
        min_replica_count=MIN_NODES,
        max_replica_count=MAX_NODES,
    )
Creating Endpoint
In order to view your deployed endpoint, you can head over to Vertex AI ➞ Endpoints
You can check if your endpoint is in the list of the currently deployed/deploying endpoints.
To view the details of the endpoint that is currently deploying, you can simply click on the endpoint name.
Once deployment is successfull, you should be able to see a green tick next to the endpoint name in the above screenshot.

Step 8 Make an online prediction request
Send an online prediction request to your deployed model.
Testing
Get the test dataset and load the images/labels.
Set the batch size to -1 to load the entire dataset.
import tensorflow_datasets as tfds
import numpy as np
datasets, info = tfds.load(name='mnist',
                            with_info=True,
                            batch_size=-1,
                            as_supervised=True)

test_dataset = datasets['test']
Load the TensorFlow Dataset as NumPy arrays (images, labels)
x_test, y_test = tfds.as_numpy(test_dataset)

# Normalize (rescale) the pixel data by dividing each pixel by 255.
x_test = x_test.astype('float32') / 255.
Ensure the shapes are correct here
x_test.shape, y_test.shape
#@title Pick the number of test images
NUM_TEST_IMAGES = 20 #@param {type:"slider", min:1, max:20, step:1}
x_test, y_test = x_test[:NUM_TEST_IMAGES], y_test[:NUM_TEST_IMAGES]
Send the prediction request
Now that you have test images, you can use them to send a prediction request. Use the Endpoint object’s predict function, which takes the following parameters:
instances: A list of image instances. According to your custom model, each image instance should be a 3-dimensional matrix of floats. This was prepared in the previous step.
The predict function returns a list, where each element in the list corresponds to the corresponding image in the request. You will see in the output for each prediction:
- Confidence level for the prediction (
predictions), between 0 and 1, for each of the ten classes.
You can then run a quick evaluation on the prediction results:
np.argmax: Convert each list of confidence levels to a label- Compare the predicted labels to the actual labels
- Calculate
accuracyascorrect/total
predictions = endpoint.predict(instances=x_test.tolist())
y_predicted = np.argmax(predictions.predictions, axis=1)

correct = sum(y_predicted == np.array(y_test.tolist()))
accuracy = len(y_predicted)
print(
    f"Correct predictions = {correct}, Total predictions = {accuracy}, Accuracy = {correct/accuracy}"
)
Undeploy the model
To undeploy your Model resource from the serving Endpoint resource, use the endpoint’s undeploy method with the following parameter:
deployed_model_id: The model deployment identifier returned by the endpoint service when theModelresource was deployed. You can retrieve the deployed models using the endpoint’sdeployed_modelsproperty.
Since this is the only deployed model on the Endpoint resource, you can omit traffic_split.
deployed_model_id = endpoint.list_models()[0].id
endpoint.undeploy(deployed_model_id=deployed_model_id)
Step 10 Cleaning up
To clean up all Google Cloud resources used in this project, you can delete the Google Cloud project you used for the tutorial.
Otherwise, you can delete the individual resources you created in this tutorial:
- Training Job
- Model
- Endpoint
- Cloud Storage Bucket
delete_training_job = True
delete_model = True
delete_endpoint = True

# Warning: Setting this to true will delete everything in your bucket
delete_bucket = True

# Delete the training job
job.delete()

# Delete the model
model.delete()

# Delete the endpoint
endpoint.delete()

if delete_bucket and "BUCKET_NAME" in globals():
    ! gsutil -m rm -r $BUCKET_NAME
Your can download this How-to-use-TensorFlow-with-VertexAI notebook in your JupyterLab instance.
- In JupyterLab, click the Terminal icon to open a new terminal.
- To clone the training-data-analyst Github repository, type in the following command, and press Enter.
git clone https://github.com/ruslanmv/How-to-use-TensorFlow-with-VertexAI.git
In your notebook, navigate to this folder:
How-to-use-TensorFlow-with-VertexAI/self-paced-labs/vertex-ai/vertex-distributed-tensorflow
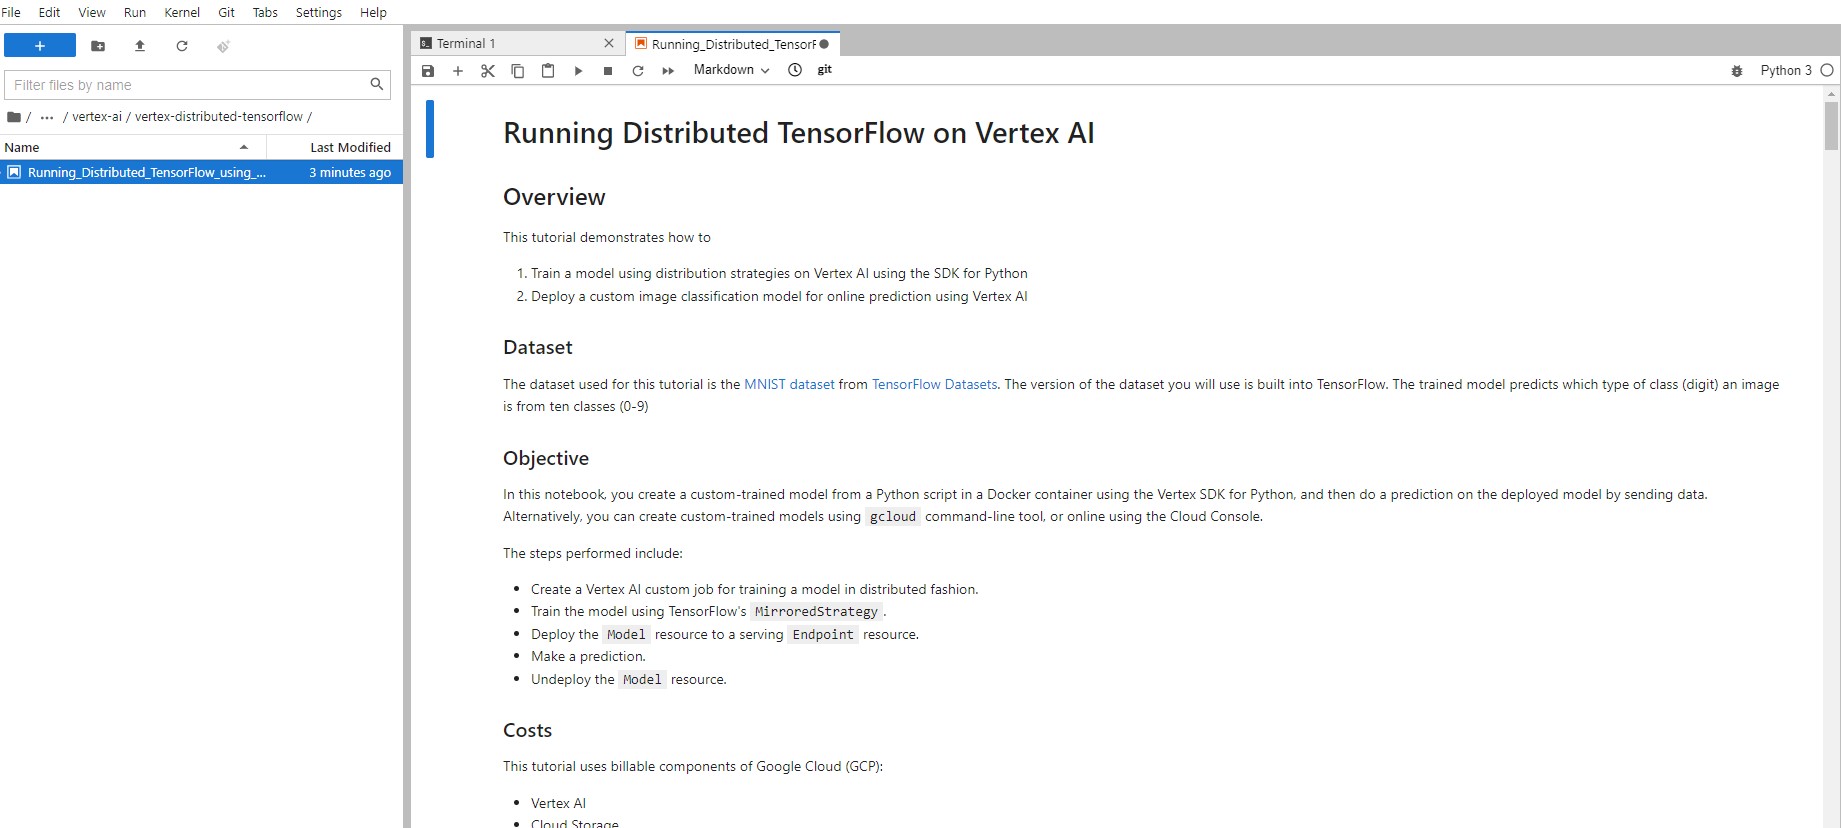
Continue the lab in the notebook, and run each cell by clicking the Run icon at the top of the screen. Alternatively, you can execute the code in a cell with SHIFT + ENTER.
Congratulations!
Congratulations! In this lab, you walked through a machine learning experimentation workflow using TensorFlow’s distribution strategies and Vertex AI’s machine learning services to train and deploy a TensorFlow model to classify images from the CIFAR-10 dataset.
Leave a comment