Watsonx.ai Agent to MCP Gateway
Have you ever felt like you’re trying to build something amazing with AI, but you spend most of your time wrestling with different APIs, models, and tools that just don’t want to talk to each other? It feels like trying to connect a dozen different devices with unique plugs—a tangled, frustrating mess.
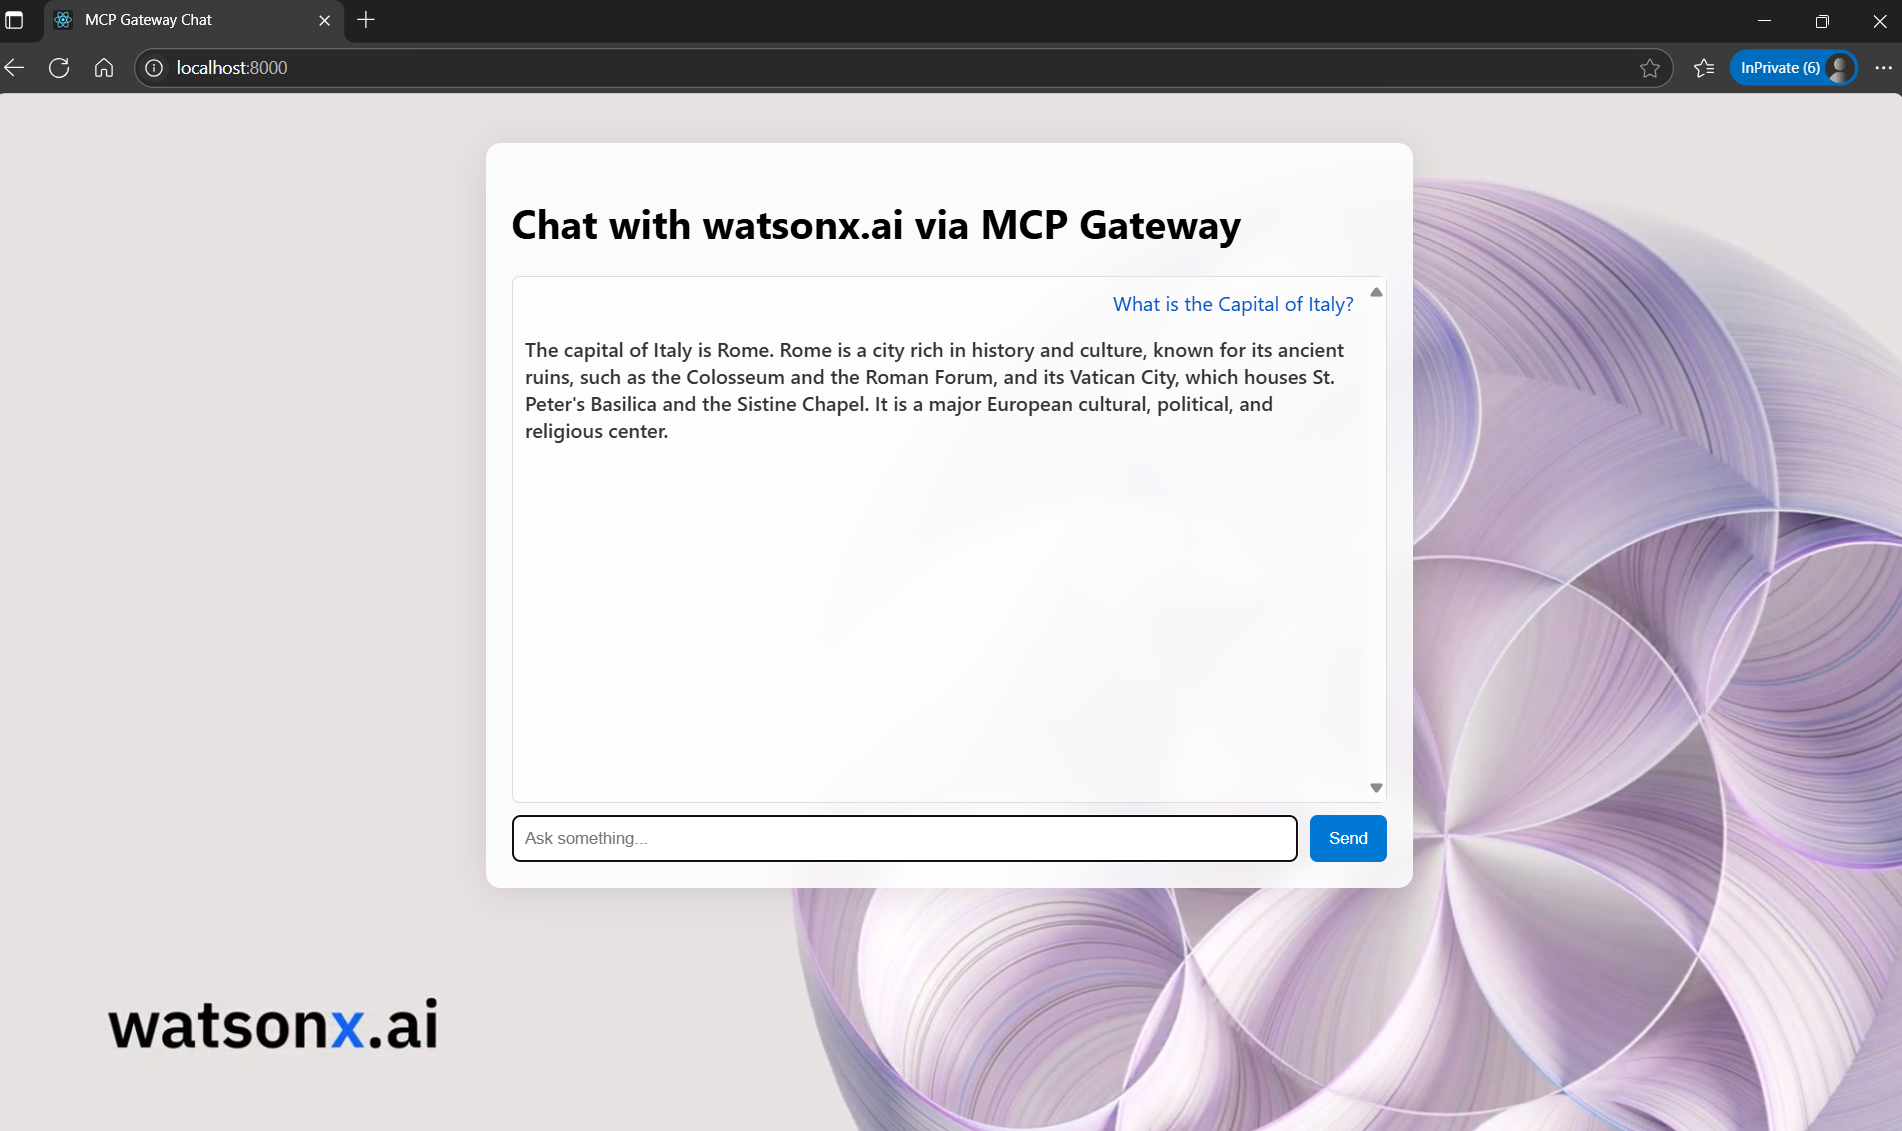
In this series, we’re going to build our way out of that mess. Our final destination is a sleek, full-stack application: a custom frontend that talks to a powerful Watsonx.ai agent, all orchestrated seamlessly by the Model Context Protocol (MCP) Gateway.
But every great journey starts with a single step. Before we integrate a sophisticated model like Watsonx, we’re going to start with the basics. We’ll build a simple “Hello World” agent. This isn’t just a detour; it’s how we’ll learn the core concepts, set up our workshop, and ensure we have a solid foundation before building the skyscraper.
What’s the Big Idea? The Magic of MCP
So, what is this magic that promises to untangle our AI services?
Think of the Model Context Protocol (MCP) as a universal language for AI tools. It’s like a universal translator that allows any model, tool, or service to communicate with any other, no matter how they were built or where they’re running. It standardizes the conversation, making different AI components interchangeable.
The MCP Gateway (also known as Context Forge) is the central hub for this conversation—the “air traffic controller” for all your services. Instead of connecting everything point-to-point, you simply register each service with the Gateway. The Gateway then handles everything else: discovering what tools are available, routing requests to the right place, and providing a single dashboard to manage it all. It transforms chaos into a robust, scalable system.
Getting Our Workshop Ready 🛠️
Before we can start building, we need to set up our workspace. The first step is getting the MCP Gateway itself.
First, clone the official repository from GitHub. We’ll put it in a folder named mcpgateway to keep things tidy.
git clone https://github.com/IBM/mcp-context-forge.git mcpgateway
cd mcpgateway
For this guide, we’ll lock into a specific version to ensure we’re all on the same page. Run this command to check out the exact commit we’ll be using:
git checkout d5a5019a6b0622f81728cc5a25bbdbcb3d5b3735
Next, let’s create a dedicated Python virtual environment right inside this folder. This keeps our project dependencies clean and isolated.
python3 -m venv .venv
source .venv/bin/activate
With our environment active, let’s upgrade pip and install all the project dependencies with a single command:
pip install --upgrade pip
pip install -e .
Finally, the Gateway needs some basic credentials to secure itself. Create a file named .env in your mcpgateway directory and add the following lines. This sets up a default user and a secret key for signing security tokens.
export BASIC_AUTH_USERNAME=admin
export BASIC_AUTH_PASSWORD=changeme
export JWT_SECRET_KEY=my-test-key
With our setup complete, it’s time to bring the Gateway to life. Make sure you are in the mcpgateway directory with your virtual environment activated, and then run the start script:
./run.sh
Alternatively, you can start it and tell it to be accessible from other machines on your network (which is useful for when we build our frontend later):
mcpgateway --host 0.0.0.0 --port 4444 &
You should see log messages indicating that the MCP Gateway is up and running. Our workshop is now open for business! We have our central hub running, and we’re ready for our first project: building the simple “Hello World” agent that will teach us the ropes.
The Keys to the Kingdom: Generating Your First Admin JWT
Before we can build our first agent and introduce it to the MCP Gateway, we need to learn how to talk to the Gateway as an administrator. Think of the Gateway as a busy workshop. While anyone can knock on the front door, only those with the right keys can access the control room—the place where you can see all the tools, register new ones, and manage the floor.
Getting into this control room requires a special kind of two-factor security. It’s not enough to have the main key; you also need a temporary, one-time-use passcode.
- The Main Key (Basic Auth): This is your permanent admin username and password. It proves you’re a trusted user.
- The Temporary Passcode (JWT): This is a short-lived JSON Web Token. It’s a cryptographically signed token that proves your request is fresh and hasn’t been intercepted. It expires quickly (usually in 60 seconds) for extra security.
To perform administrative tasks, like telling the Gateway about a new agent we’ve built, we need to present both of these at the same time. Let’s walk through the ritual of creating this temporary passcode.
The Four Steps to Gaining Admin Access
Step 1: Enter the Workshop (Activate the Environment)
First, we need to be in the right place with the right tools. In our world, this means activating the Python virtual environment that the Gateway itself uses. This ensures we have access to all the same libraries and utilities.
Bash
source ./mcpgateway/.venv/bin/activate
Step 2: Gather Your Credentials (Export Environment Variables)
Next, we need to have our main key and the secret ingredient for our passcode ready. We’ll load our admin credentials into our terminal’s environment.
export BASIC_AUTH_USER="${BASIC_AUTH_USER:-admin}"
export BASIC_AUTH_PASSWORD="${BASIC_AUTH_PASSWORD:-changeme}"
export JWT_SECRET_KEY="${JWT_SECRET_KEY:-my-test-key}"
Step 3: Create the Magic Passcode (Generate the Token)
Now for the exciting part. We’ll use a built-in utility from the mcpgateway library to generate our JWT. This command creates a token that’s valid for just 60 seconds and saves it into a variable called ADMIN_TOKEN.
ADMIN_TOKEN=$(
  python3 -m mcpgateway.utils.create_jwt_token \
    --username "$BASIC_AUTH_USER" \
    --secret   "$JWT_SECRET_KEY" \
    --exp 60
)
echo "🔑 Generated Admin JWT"
Step 4: Unlock the Door (Call an Admin Endpoint)
With both our main key and our temporary passcode in hand, we can finally make an authenticated request. We’ll use curl to ask the Gateway to list all the servers it knows about. We provide our Basic Auth credentials with the -u flag and our JWT passcode in an Authorization: Bearer ... header.
curl -u "$BASIC_AUTH_USER:$BASIC_AUTH_PASSWORD" \
  -H "Authorization: Bearer $ADMIN_TOKEN" \
  http://localhost:4444/servers | jq .
Success! The Gateway recognizes our authority and responds with the information we requested. We’ve successfully entered the control room.
A Script to Make it Effortless
Doing those four steps manually is great for learning, but it can be tedious. To make life easier, we can bundle this entire process into a single, reusable shell script. This script will handle activating the environment, loading the credentials, and generating a fresh token every time you run it.
Now that we have the keys to the kingdom and know how to perform administrative tasks, we’re ready for the main event. In the next section, we will build our very first “Hello World” agent and use our newfound admin powers to introduce it to the Gateway.
The get_token.sh Script
Save this as get_token.sh, make it executable with chmod +x get_token.sh, and you’ll have a reusable tool for generating admin tokens whenever you need them.
#!/usr/bin/env bash
set -euo pipefail

# -----------------------------------------------------------------------------
# 1) Activate the project’s Python virtualenv
# -----------------------------------------------------------------------------
if [ -f "./mcpgateway/.venv/bin/activate" ]; then
  # shellcheck disable=SC1090
  source ./mcpgateway/.venv/bin/activate
  echo "✅ Activated Python environment"
else
  echo "❌ Virtualenv not found at ./mcpgateway/.venv/bin/activate; please run setup first." >&2
  exit 1
fi

# -----------------------------------------------------------------------------
# 2) Load env-vars (or use defaults)
# -----------------------------------------------------------------------------
export BASIC_AUTH_USER="${BASIC_AUTH_USER:-admin}"
export BASIC_AUTH_PASSWORD="${BASIC_AUTH_PASSWORD:-changeme}"
export JWT_SECRET_KEY="${JWT_SECRET_KEY:-my-test-key}"

# -----------------------------------------------------------------------------
# 3) Generate and print the JWT (valid for 60 seconds)
# -----------------------------------------------------------------------------
python3 -m mcpgateway.utils.create_jwt_token \
  --username "$BASIC_AUTH_USER" \
  --secret   "$JWT_SECRET_KEY" \
  --exp 60
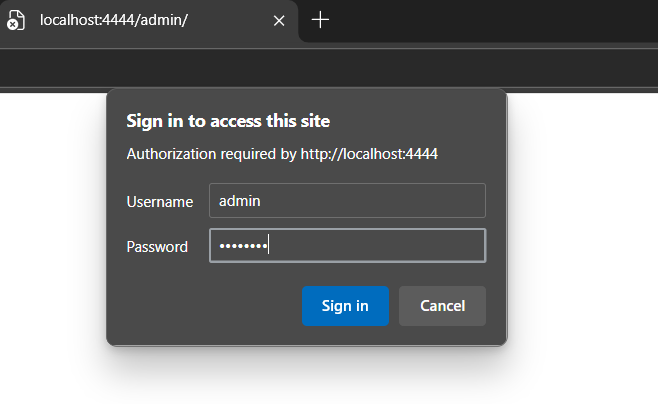
Now, let’s take a peek inside the Gateway’s control room. Point your browser to
http://localhost:4444/admin/ and log in with the username admin and password changeme.
 and you will get
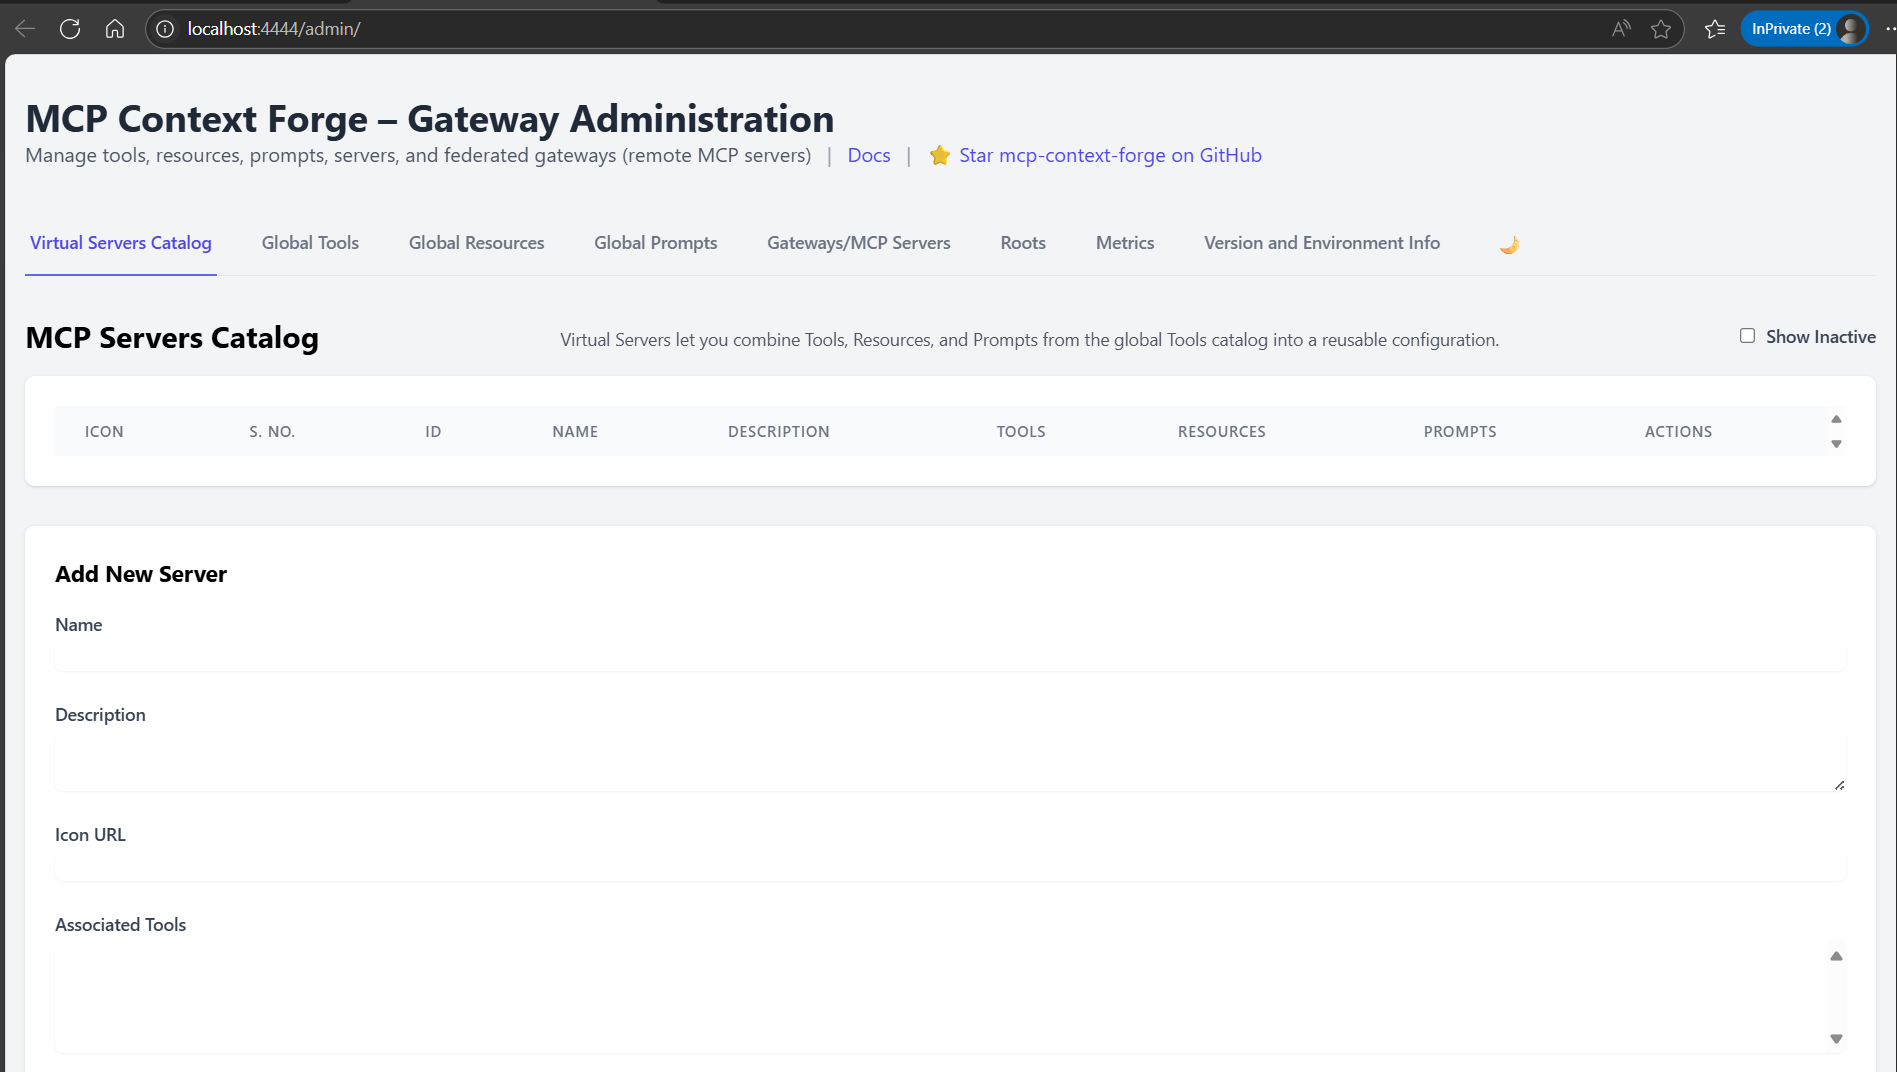
You’ll land on the main dashboard. As you can see, it’s a blank slate for now. Our list of agents is empty because we haven’t introduced any to the Gateway yet
Your First Agent: From Silence to “Hello, World!”
So, you’re ready to build your first MCP agent. It’s an exciting moment! You write a simple script, hit run, and… nothing happens. The Gateway doesn’t see it. You’ve just encountered the classic “silent agent” problem, a rite of passage for every developer entering the MCP world. Let’s walk through why this happens and build your first agent the right way.
The Handshake That Wasn’t
Imagine the MCP Gateway is a friendly host at a party. Its job is to walk around, greet new guests (your agents), and ask them what they can do (their “tools”). This greeting process is a specific sequence, a kind of digital handshake: initialize ➡️ list_tools.
But for this to work, the guest has to be able to talk back over the network. When you run a standard Python script, it does its work quietly, without opening a network port for the Gateway to connect to. The Gateway tries to call your agent at its address, say http://127.0.0.1:6277, but it’s like knocking on a door with no one home. All it finds is a silent, unresponsive TCP socket. The connection times out, and the Gateway sadly marks your agent as “failed to register.”
To join the party, our agent needs to learn to speak a language the Gateway understands over the web. We’ll teach it Server-Sent Events (SSE).
Building the “Hello World” Agent (SSE Edition)
Let’s create an agent that knows how to announce itself. We’ll make a new file, agents/hello_world/hello_server_sse.py, and give it a voice.
First, we set up some basic logging and import our key component, FastMCP. Then, we create our agent.
import logging
from typing import Union
from mcp.server.fastmcp import FastMCP

# Readable logs for our journey
logging.basicConfig(level=logging.INFO,
                    format="%(asctime)s [%(levelname)s] %(message)s")

PORT = 6274  # The port our agent will listen on
mcp = FastMCP(name="hello-world-agent", port=PORT)
Think of the FastMCP line as giving our agent its name and a dedicated phone number (PORT). Now, it has an identity.
Next, we need to teach our agent its first skill. We’ll use the @mcp.tool decorator to define a simple echo function. This is the “trick” our agent will tell the Gateway it can do.
@mcp.tool(description="Echo back whatever you send (str or int)")
async def echo(text: Union[str, int]) -> dict:
    """
    Accept both strings and integers so the Gateway's test dialog
    (which auto-fills 0) passes validation.
    """
    logging.info("echo(%r)", text)
    return {"reply": str(text)}
We make it accept either a string or an integer (Union[str, int]). This is a small but clever trick to make sure it works perfectly with the Gateway’s Admin UI, which sometimes tests tools by sending the number 0.
Finally, the most important part. We tell our agent to run, but specifically using the SSE transport. This is the key that unlocks communication.
if __name__ == "__main__":
    logging.info("🚀 Serving on http://127.0.0.1:%d/sse", PORT)
    mcp.run(transport="sse")  # ⭐ The magic line: use SSE!
By changing mcp.run() to mcp.run(transport="sse"), we’ve transformed our silent script into a web-savvy agent that is ready to be discovered.
The Complete Agent Code
Here is the full code for your hello_server_sse.py file.
import logging
from typing import Union
from mcp.server.fastmcp import FastMCP

# readable logs
logging.basicConfig(level=logging.INFO,
                    format="%(asctime)s [%(levelname)s] %(message)s")

PORT = 6274                                     # the port you'll register
mcp  = FastMCP(name="hello-world-agent", port=PORT)

@mcp.tool(description="Echo back whatever you send (str or int)")
async def echo(text: Union[str, int]) -> dict:
    """
    Accept both strings and integers so the Gateway's test dialog
    (which auto-fills 0) passes validation.
    """
    logging.info("echo(%r)", text)
    return {"reply": str(text)}

if __name__ == "__main__":
    logging.info("🚀 Serving on http://127.0.0.1:%d/sse", PORT)
    mcp.run(transport="sse")                    # ⭐  key line: use SSE
How to Run Your Agent
It’s time to bring our agent to life! Follow these steps in your terminal.
-
Activate Your Environment: First, you need to be in the same Python environment as your MCP Gateway. This ensures you have all the necessary libraries.
Bash
source ./mcpgateway/.venv/bin/activate -
Navigate to the Directory: Change into the folder where you saved your agent script.
Bash
cd agents/hello_world -
Run the Script: Now, simply execute the Python file.
Bash
python hello_server_sse.py
You’ll see output that feels like a launch sequence, ending with a line that says Uvicorn running on http://127.0.0.1:6274.
🚀 Serving on http://127.0.0.1:6274/sse
INFO:     Started server process [94661]
INFO:     Application startup complete.
INFO:     Uvicorn running on http://127.0.0.1:6274 (Press CTRL+C to quit)
That’s it! Your agent is now running and broadcasting its availability. It’s on the network, waiting for the Gateway to come by, perform the handshake, and officially welcome it to the party.
3 Register it in the Gateway
Open Admin UI → Federated Gateways → Add New Gateway and fill:
- Name
hello-world-dev - URL
http://127.0.0.1:6274/sse - Transport Type
SSE - Auth
None
Click Add Gateway. You should instantly see:
hello-world-dev http://127.0.0.1:6274/sse Active <timestamp>
Opening the entry shows Capabilities and a single Echo tool.
4 Test the tool from the UI
- Navigate to Tools → find
hello-world-dev-echo. - Click Test.
- Replace the default
0with any text, e.g.Hello Gateway. - Press Run Tool.
The response pane shows:
{
  "reply": "Hello Gateway"
}
- STDIO agents are great for piping output in a terminal, but the Gateway speaks HTTP streams.
- Switching
mcp.run()totransport="sse"(or"streamable-http") gives the Gateway a live URL to open, negotiate, and keep healthy. - Once registered, the agent’s tools behave just like native ones—ready to
combine into virtual servers or call via the Gateway’s
/rpcendpoint.
5 Publish in the Virtual Servers Catalog
Once your Hello World agent is federated as an MCP Server (under Federated Gateways) and its echo tool appears in the Global Tools catalog, the final step is to bundle it into a Virtual Server—a single endpoint that exposes one or more tools (and any resources or prompts) under your own chosen name.
-
Open the Admin UI and navigate to Virtual Servers Catalog → Add New Server.
-
Fill in the form fields:
- Name:
hello-world-dev - Description: (optional, e.g. “Demo echo server”)
- Icon URL: (leave blank or supply a link to a 64×64 PNG)
- Associated Tools: select both
watsonx-agent-chat hello-world-dev-echo-
Associated Resources: type the resource IDs you registered earlier, comma-separated, e.g.
hello-world-dev -
Associated Prompts: leave empty for this demo
- Name:
-
Click Add Server.
Your Virtual Servers Catalog now lists:
hello-world-dev Demo echo server Active <timestamp>
Under Tools you’ll see the combined toolset:
hello-world-dev-echo   Echo back whatever you send (str or int)
watsonx-agent-chat     Chat with IBM watsonx.ai (dummy)
6 Calling your Virtual Server from the CLI
With the virtual server in place, you can invoke its tools from any script or terminal—no UI required. Below is a standalone Bash script, call_echo.sh, that demonstrates:
- Minting a short-lived admin JWT
- Building a JSON-RPC request to the
/rpcendpoint - Calling the
hello-world-dev-echotool with a prompt - Pretty-printing the response
#!/usr/bin/env bash
# call_echo.sh – invoke any federated MCP tool via Gateway /rpc
set -euo pipefail

# ─── Configuration ──────────────────────────────────────────────────────────
GATEWAY_URL="${GATEWAY_URL:-http://localhost:4444}"
RPC_URL="${GATEWAY_URL}/rpc"

# First argument: full tool name as shown in Admin UI
TOOL_NAME="${1:-hello-world-dev-echo}"
# Second argument: the text to echo
PROMPT="${2:-Hello, world!}"

# Basic Auth credentials for /rpc (if still enabled)
BASIC_AUTH_USER="${BASIC_AUTH_USER:-admin}"
BASIC_AUTH_PASS="${BASIC_AUTH_PASS:-changeme}"

# JWT secret (must match Gateway’s JWT_SECRET_KEY)
JWT_SECRET_KEY="${JWT_SECRET_KEY:-my-test-key}"

# ─── Mint an admin token (valid 60s) ────────────────────────────────────────
ADMIN_TOKEN=$(python3 -m mcpgateway.utils.create_jwt_token \
  --username "$BASIC_AUTH_USER" \
  --secret   "$JWT_SECRET_KEY" \
  --exp      60)

# ─── Build JSON-RPC payload via jq (proper quoting) ─────────────────────────
JSON_PAYLOAD=$(jq -n \
  --arg method "$TOOL_NAME" \
  --arg txt    "$PROMPT" \
  '{jsonrpc:"2.0",id:1,method:$method,params:{text:$txt}}')

# ─── Invoke and display the response ────────────────────────────────────────
echo
echo "🚀 Calling tool: $TOOL_NAME"
echo "   Prompt: \"$PROMPT\""
echo

curl -s -u "${BASIC_AUTH_USER}:${BASIC_AUTH_PASS}" \
     -H "Authorization: Bearer ${ADMIN_TOKEN}" \
     -H "Content-Type: application/json" \
     -d "$JSON_PAYLOAD" \
     "$RPC_URL" \
  | jq .

echo
7 Example run
chmod +x call_echo.sh
./call_echo.sh

🚀 Calling tool: hello-world-dev-echo
   Prompt: "Hello, world!"

{
  "content": [
    {
      "type": "text",
      "text": "{\n  \"reply\": \"Hello, world!\"\n}"
    }
  ],
  "is_error": false
}
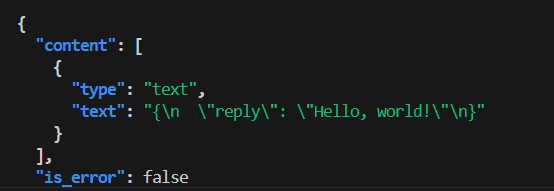
The "content" array holds the structured tool output. In this demo the
tool returned {"reply":"Hello, world!"} and the Gateway wrapped it in an
MCP-compliant notification envelope.
With that, you have:
- Built an SSE-based Hello World agent
- Federated it into the MCP Gateway
- Bundled it into a Virtual Server
- Invoked its tool via a simple CLI script
8) Next up: Watsonx.ai Agent
With the Hello World demo behind you, you’re ready to plug in our full Watsonx.ai agent exactly the same way—just substitute:
- Tool name:
chat - Server code: your
agents/watsonx-agent/server_sse.py - Associated Tools:
chat
Everything else (JWT, UI, CLI) stays identical. Enjoy building your multi-agent workflows!
Building a Watsonx.ai Agent
Now let’s build and register a real-world agent that wraps IBM Watsonx.ai.
Phase 1: Bootstrapping the Agent
-
Provision Watsonx.ai
- In IBM Cloud, create or reuse a Watsonx.ai inference service.
- Generate an API key and note your service URL (e.g.
https://api.us-south.watsonx.ai). - Retrieve your Project ID.
-
Initialize Project
mkdir watsonx-agent && cd watsonx-agent python3.11 -m venv .venv source .venv/bin/activate -
Define Dependencies in
requirements.txt:python-dotenv>=0.21.0 ibm-watsonx-ai>=1.3.8 mcp[cli]>=1.6.0Install them:
pip install --upgrade pip pip install -r requirements.txt -
Secure Credentials Create
.env(add to.gitignore):WATSONX_API_KEY=YOUR_API_KEY WATSONX_URL=https://api.us-south.watsonx.ai PROJECT_ID=YOUR_PROJECT_ID MODEL_ID=ibm/granite-3-3-8b-instruct -
Write
server_sse.py(stdio transport):
# server.py  – lenient Watsonx agent
import os, logging
from typing import Union
from dotenv import load_dotenv

from mcp.server.fastmcp import FastMCP
from ibm_watsonx_ai import APIClient, Credentials
from ibm_watsonx_ai.foundation_models import ModelInference
from ibm_watsonx_ai.metanames import GenTextParamsMetaNames as GenParams

# ─── Load env vars ───────────────────────────────────────────────
load_dotenv()
API_KEY    = os.getenv("WATSONX_API_KEY")
URL        = os.getenv("WATSONX_URL")
PROJECT_ID = os.getenv("PROJECT_ID")
MODEL_ID   = os.getenv("MODEL_ID", "ibm/granite-3-3-8b-instruct")
PORT       = int(os.getenv("PORT", 6288))

for name, val in [("WATSONX_API_KEY", API_KEY),
                  ("WATSONX_URL",     URL),
                  ("PROJECT_ID",      PROJECT_ID)]:
    if not val:
        raise RuntimeError(f"{name} is not set")

logging.basicConfig(
    level=logging.INFO,
    format="%(asctime)s [%(levelname)s] %(message)s"
)

creds  = Credentials(url=URL, api_key=API_KEY)
client = APIClient(credentials=creds, project_id=PROJECT_ID)
model  = ModelInference(model_id=MODEL_ID,
                        credentials=creds,
                        project_id=PROJECT_ID)

# ─── Define MCP server ───────────────────────────────────────────
mcp = FastMCP("Watsonx Chat Agent", port=PORT)

@mcp.tool(description="Chat with IBM watsonx.ai (accepts str or int)")
def chat(query: Union[str, int]) -> str:
    # Coerce to string so int → str
    query = str(query).strip()
    # Substitute a real prompt if UI sent the placeholder 0
    if query == "0":
        query = "What is the capital of Italy?"

    logging.info("chat() got %r", query)

    params = {
        GenParams.DECODING_METHOD: "greedy",
        GenParams.MAX_NEW_TOKENS:   200,
    }
    resp  = model.generate_text(prompt=query, params=params, raw_response=True)
    reply = resp["results"][0]["generated_text"].strip()
    logging.info("→ %r", reply)
    return reply

# ─── Run ─────────────────────────────────────────────────────────
if __name__ == "__main__":
    logging.info(f"Starting Watsonx MCP server at http://127.0.0.1:{PORT}/sse")
    mcp.run(transport="sse")   # SSE endpoint is /sse
- Test Locally
python server_sse.py

or with the MCP Inspector:
mcp dev server_sse.py
# Inspector UI: http://localhost:6274
Or tell mcp dev to use different ports
mcp dev server_sse.py --inspect-port 6280 --proxy-port 6281
Phase 2: Starting and Testing Your Agent Locally
Before the MCP Gateway can see our agent, we need to get it running and confirm it works on its own.
1. Start the Watsonx Agent
This script navigates to the agent’s directory, activates its dedicated Python virtual environment, and starts the SSE (Server-Sent Events) server, which will listen for requests from the Gateway.
5-start-watsonx-agent.sh
#!/bin/bash
# A simple script to start the watsonx-agent server.

# --- Configuration ---
# Set the full path to your project directory.
PROJECT_DIR="./agents/watsonx-agent"

# --- Script Execution ---

echo "Navigating to the project directory..."
cd "$PROJECT_DIR" || { echo "Error: Could not change to directory $PROJECT_DIR. Please check the path."; exit 1; }

echo "Activating Python virtual environment..."
source .venv/bin/activate || { echo "Error: Failed to activate the virtual environment. Make sure it exists at '.venv/bin/activate'."; exit 1; }

echo "Starting the watsonx-agent server..."
# The script will run python sse.py until manually stopped (Ctrl+C).
python server_sse.py

echo "Server has been stopped."
Run this script and leave it running in a terminal. It is now ready to be registered.
2. Run Local Tests
It’s always good practice to run local tests to ensure the agent’s logic is sound before connecting it to the Gateway.
# agents/watsonx-agent/test_sse.py

import anyio
from mcp.client.sse import sse_client
from mcp.client.session import ClientSession
import logging

# --- Configuration ---
# This should match the port your server.py is running on.
# FastMCP defaults to 6288 if not specified.
PORT = 6288
SERVER_URL = f"http://127.0.0.1:{PORT}/sse"
SAMPLE_QUERY = "What are the main attractions in Rome?"

logging.basicConfig(level=logging.INFO, format="%(asctime)s [%(levelname)s] %(message)s")

async def main():
    """
    Connects to the Watsonx Chat Agent server and calls its `chat` tool.
    """
    logging.info(f"Connecting to Watsonx agent at {SERVER_URL}...")

    try:
        # 1) Open the SSE transport to the server
        async with sse_client(SERVER_URL) as (read_stream, write_stream):

            # 2) Start the MCP session
            async with ClientSession(read_stream, write_stream) as session:

                # 3) Handshake with the server
                await session.initialize()
                logging.info("Session initialized successfully.")

                # 4) Call the 'chat' tool with the sample query
                logging.info(f"Invoking chat(query='{SAMPLE_QUERY}')...")
                try:
                    # Use session.call_tool to interact with the server's tool
                    result = await session.call_tool("chat", {"query": SAMPLE_QUERY})

                    # The response text is in the 'content' attribute of the result object
                    if result and not result.isError and result.content and result.content[0].text:
                        response_text = result.content[0].text
                        logging.info("Received response from Watsonx:")
                        print(f"\n---\n{response_text}\n---\n")
                    else:
                        logging.warning("Received an empty or error response from the tool.")
                        logging.warning(f"Full response object: {result}")

                except Exception as e:
                    logging.error(f"An error occurred while calling the 'chat' tool: {e}")

    except anyio.exceptions.ConnectError:
        logging.error(f"Connection failed. Is the server.py script running on port {PORT}?")
    except Exception as e:
        logging.error(f"An unexpected error occurred: {e}")


if __name__ == "__main__":
    anyio.run(main)
This script runs the agent’s internal test suite.
6-Test-WatsonX-agent.sh
#!/bin/bash
# A simple script to run the watsonx-agent tests.

# --- Configuration ---
PROJECT_DIR="./agents/watsonx-agent"

# --- Script Execution ---

echo "Navigating to the project directory..."
cd "$PROJECT_DIR" || { echo "Error: Could not change to directory $PROJECT_DIR. Please check the path."; exit 1; }

echo "Activating Python virtual environment..."
source .venv/bin/activate || { echo "Error: Failed to activate the virtual environment. Make sure it exists at '.venv/bin/activate'."; exit 1; }

echo "Navigating to the test directory..."
cd test || { echo "Error: Could not change to directory 'test'. Make sure it exists inside $PROJECT_DIR."; exit 1; }

echo "Running the Python test script..."
python test_sse.py

echo "Test script has finished."
Phase 3: Registering the Watsonx.ai Agent in the Gateway
Now that our agent is running, we’ll register it in the Gateway using the Admin UI.
Via Admin UI
-
Add the Agent as a Federated Gateway: The MCP Gateway treats external agents like ours as “Federated Gateways.”
- Navigate to the Admin UI (
http://localhost:4444/admin). - Go to the Gateways/MCP Servers section.
- Click Add New Gateway and fill in the details:
- Name:
watsonx-agent - URL:
http://127.0.0.1:6288/sse - Description:
watsonx agent demo - Transport Type:
SSE - Authentication Type:
None
- Name:
- The agent will now appear in the list with an Active status.
- Navigate to the Admin UI (
-
Verify Tool Discovery: The Gateway automatically discovers the tools exposed by the agent.
- Navigate to Global Tools. You will see
watsonx-agent-chathas been automatically discovered. - You can click View to inspect its details and even Test it directly from the UI to confirm end-to-end connectivity.
- Navigate to Global Tools. You will see
-
Create a Virtual Server: The final step is to bundle the tool into a “Virtual Server,” which provides a clean endpoint for clients.
- Go to Virtual Servers Catalog.
- Click Add New Server and fill out the form:
- Name:
watsonx-agent - Associated Tools: Select
watsonx-agent-chatfrom the list.
- Name:
- The server is now created and will be assigned a unique ID.
Phase 3: Verifying and Using Your Agent
With the agent running and registered, we can now interact with it through the Gateway.
1. Verify Registration via API
You can programmatically verify that the Gateway sees your new virtual server. This script mints a temporary admin token and uses it to list all active servers.
verify-servers.sh
#!/usr/bin/env bash
set -euo pipefail

# 1) Activate venv
source ./mcpgateway/.venv/bin/activate

# 2) Ensure creds
export BASIC_AUTH_USER="${BASIC_AUTH_USER:-admin}"
export JWT_SECRET_KEY="${JWT_SECRET_KEY:-my-test-key}"

# 3) Mint JWT
ADMIN_TOKEN=$(
  JWT_SECRET_KEY="$JWT_SECRET_KEY" \
    python3 -m mcpgateway.utils.create_jwt_token \
      --username "$BASIC_AUTH_USER" \
      --secret   "$JWT_SECRET_KEY" \
      --exp      60
)

# 4) List servers & their tools
echo "Verifying active servers in the Gateway..."
curl -s \
  -H "Authorization: Bearer $ADMIN_TOKEN" \
  http://localhost:4444/servers \
| jq .
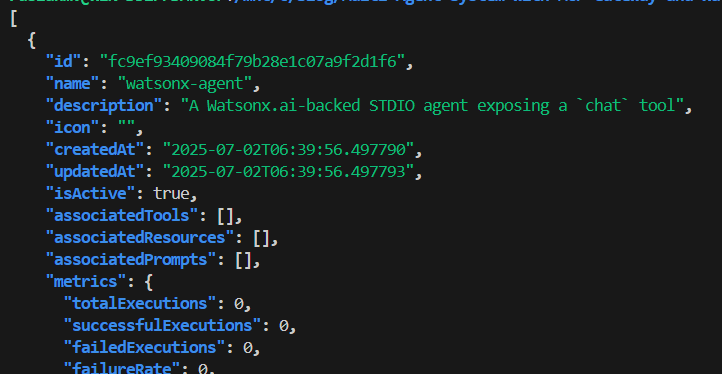
Running this will show a JSON output containing your watsonx-agent object, confirming it’s ready.
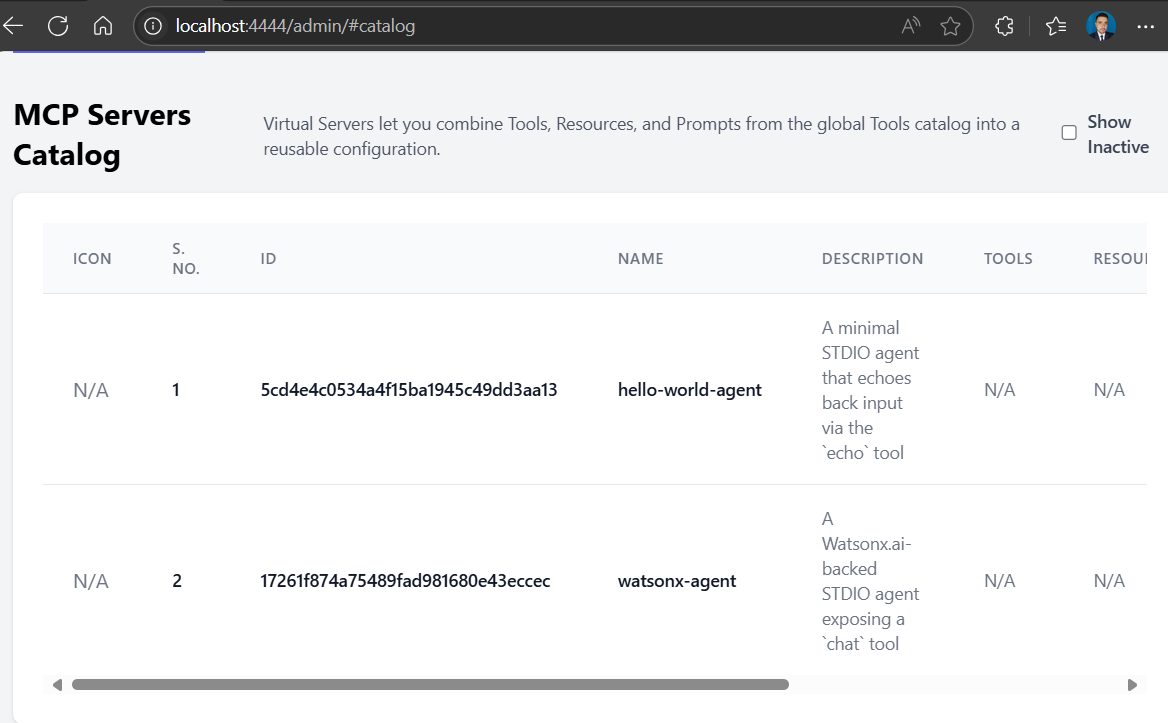
MCP Servers Catalog
Virtual Servers let you combine Tools, Resources, and Prompts from the global Tools catalog into a reusable configuration.
Show Inactive
| Icon | S. No. | ID | Name | Description | Tools | Resources | Prompts | Actions |
|---|---|---|---|---|---|---|---|---|
| N/A | 1 | ed4d915a5ad2461795010e5e28af4848 |
watsonx-agent | A Watsonx.ai-backed SSE agent exposing a chat tool |
N/A | N/A | N/A | Deactivate · View · Edit · Delete |
2. Run an End-to-End Test
This final script, query-agent.sh, provides a complete, interactive, end-to-end test of the entire system.
Script Description
The query-agent.sh script is a powerful tool for testing your MCP Gateway setup. Here’s how it works:
- Authentication: It begins by minting a short-lived JSON Web Token (JWT) to securely authenticate with the Gateway’s API.
- Agent Discovery: It calls the
/serversendpoint to get a list of all active virtual servers (agents) currently registered in the Gateway. - Interactive Selection: It presents you with a numbered list of these agents and prompts you to pick one. It then does the same for the tools associated with your chosen agent.
- Request Crafting: Once you enter a text prompt, the script builds a valid JSON-RPC request payload, correctly setting the
methodto the full name of the tool you selected (e.g.,watsonx-agent-chat). - Execution & Response: Finally, it sends the request to the Gateway’s
/rpcendpoint and prints both the complete JSON response and just the clean, extracted reply text from the Large Language Model.
The Script
query-agent.sh
#!/usr/bin/env bash
# mcp_tool_tester.sh – choose an agent, choose a tool, send a prompt
set -euo pipefail

GATEWAY="http://localhost:4444"
RPC_URL="${GATEWAY}/rpc"          # ← Gateway’s JSON-RPC endpoint
VENV_PATH="./mcpgateway/.venv"

# ───────── 1) Activate venv ─────────
if [[ -f "${VENV_PATH}/bin/activate" ]]; then
  # shellcheck disable=SC1090
  source "${VENV_PATH}/bin/activate"
else
  echo "❌ Virtual environment not found at ${VENV_PATH}"
  exit 1
fi

# ───────── 2) Credentials ─────────
export BASIC_AUTH_USER="${BASIC_AUTH_USER:-admin}"
export BASIC_AUTH_PASSWORD="${BASIC_AUTH_PASSWORD:-adminpw}"
export JWT_SECRET_KEY="${JWT_SECRET_KEY:-my-test-key}"

# ───────── 3) Mint JWT ─────────
echo "🔑 Minting admin token ..."
ADMIN_TOKEN=$(
  python -m mcpgateway.utils.create_jwt_token \
    --username "$BASIC_AUTH_USER" \
    --secret   "$JWT_SECRET_KEY" \
    --exp      60
)

jget() { curl -s -H "Authorization: Bearer ${ADMIN_TOKEN}" "$@"; }

# ───────── 4) Pick an agent ─────────
echo -e "\n📡 Active agents:"
mapfile -t AGENTS < <(jget "${GATEWAY}/servers" |
  jq -r '.[] | select(.isActive) | "\(.name) (\(.id))"')

if ((${#AGENTS[@]} == 0)); then
  echo "❌ No active agents in the Gateway."
  exit 1
fi

select AGENT_LINE in "${AGENTS[@]}"; do
  [[ $AGENT_LINE ]] && break
done
SERVER_ID=$(awk -F'[()]' '{print $2}' <<<"$AGENT_LINE")
SERVER_NAME=$(awk '{print $1}' <<<"$AGENT_LINE")
echo "✅ You picked: $SERVER_NAME  (ID=$SERVER_ID)"

# ───────── 5) Pick a tool ─────────
echo -e "\n🛠  Tools in $SERVER_NAME:"
mapfile -t TOOLS < <(jget "${GATEWAY}/servers/${SERVER_ID}/tools" | jq -r '.[].name')

if ((${#TOOLS[@]} == 0)); then
  echo "❌ No tools exposed by this agent."
  exit 1
fi

select TOOL_LIST_NAME in "${TOOLS[@]}"; do
  [[ $TOOL_LIST_NAME ]] && break
done
echo "✅ You picked: $TOOL_LIST_NAME"


# ───────── 5.5) Set the JSON-RPC Method [FIXED] ─────────
# The JSON-RPC method is the exact name of the tool.
METHOD="$TOOL_LIST_NAME"


# ───────── 6) Prompt text ─────────
read -r -p $'\n💬 Enter your prompt: ' PROMPT
PROMPT=${PROMPT:-What is the capital of Italy?}

# ───────── 7) Build JSON-RPC payload safely ─────────
RPC_BODY=$(jq -n \
  --arg method "$METHOD" \
  --arg q      "$PROMPT" \
  '{jsonrpc:"2.0",id:1,method:$method,params:{query:$q}}')

# ───────── 8) Call the Gateway ─────────
echo -e "\n🚀 Sending request ..."
RESPONSE=$(curl -s \
  -u "${BASIC_AUTH_USER}:${BASIC_AUTH_PASSWORD}" \
  -H "Authorization: Bearer ${ADMIN_TOKEN}" \
  -H "Content-Type: application/json" \
  -d "$RPC_BODY" \
  "$RPC_URL")

# ───────── 9) Pretty-print result ─────────
echo -e "\n📨 Full JSON response:"
echo "$RESPONSE" | jq .

echo -e "\n💡 LLM reply text:"
echo "$RESPONSE" | jq -r '.result.reply // .result.content[0].text // "-- no text field --"'
Example Execution
Running the script provides a seamless, interactive experience:
bash query-agent.sh
🔑 Minting admin token ...

📡 Active agents:
1) watsonx-agent (afe82182b99b43a889f8971b78788454)
#? 1
✅ You picked: watsonx-agent  (ID=afe82182b99b43a889f8971b78788454)

🛠  Tools in watsonx-agent:
1) watsonx-agent-chat
#? 1
✅ You picked: watsonx-agent-chat

💬 Enter your prompt: How are you ?

🚀 Sending request ...

📨 Full JSON response:
{
  "content": [
    {
      "type": "text",
      "text": "I'm an artificial intelligence and don't have feelings, but I'm here and ready to assist you. How can I help you today?"
    }
  ],
  "is_error": false
}

💡 LLM reply text:
I'm an artificial intelligence and don't have feelings, but I'm here and ready to assist you. How can I help you today?
Phase 5: From Zero to Chat: Wiring a FastAPI Micro-Frontend to MCP Gateway
Ever had that feeling? You’re staring at a sleek, beautiful frontend on one screen and a powerful, complex backend API on the other, wondering how to get them to talk to each other without a mountain of boilerplate. I’ve been there. This is the story of how a single Python file, powered by FastAPI, can become the perfect translator between your user’s browser and the mighty MCP Gateway. It’s less of a formal tutorial and more of a travel log from that journey.
Setting the Stage
Our adventure begins in a file we’ll call frontend.py. Like any good trip, it starts with packing the essentials. We import our libraries and, most importantly, we set our coordinates by loading environment variables.
load_dotenv()
GATEWAY_RPC     = os.getenv("GATEWAY_RPC", "http://localhost:4444/rpc")
BASIC_AUTH_USER = os.getenv("BASIC_AUTH_USER", "admin")
BASIC_AUTH_PASS = os.getenv("BASIC_AUTH_PASS", "changeme")
JWT_SECRET_KEY  = os.getenv("JWT_SECRET_KEY", "my-test-key")
Think of these as the address of our destination (GATEWAY_RPC), the secret handshake to get in the door (BASIC_AUTH_USER, BASIC_AUTH_PASS), and the key to the treasure chest (JWT_SECRET_KEY). Getting these right is the first step to making sure our micro-frontend knows exactly where it’s going and how to announce itself.
Rolling Out the Welcome Mat 🏡
A backend service isn’t much use if a browser can’t find the front door. Our app needs to serve the actual user interface—the HTML, CSS, and JavaScript that users will interact with. FastAPI makes this incredibly simple.
FRONTEND_DIR = Path(__file__).parent / "frontend"
app = FastAPI()

app.mount(
    "/static",
    StaticFiles(directory=FRONTEND_DIR / "static"),
    name="static"
)

@app.get("/", include_in_schema=False)
async def homepage():
    index = FRONTEND_DIR / "index.html"
    if not index.exists():
        raise HTTPException(404, "index.html not found")
    return FileResponse(index)
With these few lines, we’ve essentially hung up a sign that says, “All UI assets served here!” We tell FastAPI to serve our index.html when someone visits the root URL and to make everything in the /static directory available. Just like that, our application has a face.
The Secret Passport: Minting JWTs 🤫
Our MCP Gateway is a secure, protected resource. We can’t just send it requests; we need to prove we’re allowed in. We do this with a JSON Web Token (JWT), which acts like a short-lived, single-use passport. Instead of building the token logic from scratch, we cleverly reuse the mcpgateway library’s own tools.
def mint_jwt() -> str:
    cmd = [
        sys.executable, "-m", "mcpgateway.utils.create_jwt_token",
        "--username", BASIC_AUTH_USER,
        "--secret",   JWT_SECRET_KEY,
        "--exp",      "60",
    ]
    token = subprocess.check_output(cmd, text=True).strip()
    if not token:
        raise RuntimeError("Failed to mint JWT")
    return token
By running a subprocess, we guarantee the token is signed exactly as the Gateway expects. We also set it to expire in 60 seconds, which is great for security. Each request will get its own freshly minted passport, valid just long enough to complete its mission.
The Bridge: The /call Endpoint 🌉
This is where the real magic happens. All the user’s prompts, questions, and commands will funnel through a single /call endpoint. This endpoint is the heart of our micro-frontend, acting as the crucial bridge.
First, when a request arrives from the browser with a tool and a prompt, we package it into the formal JSON-RPC format that the Gateway understands. It’s like putting a handwritten note into a very specific type of formal envelope. Notice the small but important detail: some tools expect the prompt in a field named "query", while others look for "text". Our code handles both.
@app.post("/call", response_model=ChatResponse)
async def call_tool(req: ChatRequest):
    # ...
    payload = {
        "jsonrpc": "2.0",
        "id":      1,
        "method":  req.tool,
        "params":  {param_key: prompt}
    }
Next, we mint our passport (the JWT) and use the httpx library to forward the request to the Gateway, with the token included in the authorization header.
When the Gateway replies, the answer might be tucked away in one of several places. To be robust, our code patiently checks each possible pocket—result.reply, result.content[0].text, or content[0].text—until it finds the text.
    # ...
    data = resp.json()
    # Extract reply in whichever field it lands
    text = (
        data.get("result", {}).get("reply")
        or (data.get("result", {}).get("content") or [{}])[0].get("text")
        or (data.get("content") or [{}])[0].get("text")
        or ""
    )
Finally, we clean up any stray punctuation and send the clean result back to the browser. We also wrap our logic in try...except blocks to handle things gracefully. If the Gateway is down, the browser gets a clear “Gateway connection error” (a 502 status), not a cryptic failure.
Tying It All Together
With our bridge built, the only thing left is to open it for traffic. The final piece of the puzzle is starting the server.
if __name__ == "__main__":
    uvicorn.run(app, host="0.0.0.0", port=8000)
And that’s the whole story! What started as two separate systems—a frontend and a backend—are now connected by a lightweight, secure, and intelligent Python service. This micro-frontend does one job, and it does it well: it translates, authenticates, and relays messages, allowing your UI to seamlessly tap into the power of the MCP Gateway.
Now, you can take this code, drop it into your project, and let your own frontend start a conversation.
The Complete Code
#!/usr/bin/env python3
"""
frontend.py – FastAPI micro-frontend for MCP Gateway
"""

import os, sys, subprocess, logging, re
from pathlib import Path
from typing import Union
from contextlib import asynccontextmanager

import httpx
import uvicorn
from dotenv import load_dotenv
from fastapi import FastAPI, HTTPException
from fastapi.responses import FileResponse
from fastapi.staticfiles import StaticFiles
from pydantic import BaseModel

# ─── Configuration & Logging ────────────────────────────────────────────────
load_dotenv()
GATEWAY_RPC     = os.getenv("GATEWAY_RPC", "http://localhost:4444/rpc")
BASIC_AUTH_USER = os.getenv("BASIC_AUTH_USER", "admin")
BASIC_AUTH_PASS = (
    os.getenv("BASIC_AUTH_PASS")
    or os.getenv("BASIC_AUTH_PASSWORD")
    or "changeme"
)
JWT_SECRET_KEY  = os.getenv("JWT_SECRET_KEY", "my-test-key")

logging.basicConfig(
    level=logging.INFO,
    format="%(asctime)s [%(levelname)s] %(name)s: %(message)s"
)
logger = logging.getLogger("frontend")

# ─── Static Files Setup ─────────────────────────────────────────────────────
FRONTEND_DIR = Path(__file__).parent / "frontend"
app = FastAPI()

app.mount(
    "/static",
    StaticFiles(directory=FRONTEND_DIR / "static"),
    name="static"
)

@app.get("/", include_in_schema=False)
async def homepage():
    index = FRONTEND_DIR / "index.html"
    if not index.exists():
        raise HTTPException(404, "index.html not found")
    return FileResponse(index)

# ─── Request / Response Models ──────────────────────────────────────────────
class ChatRequest(BaseModel):
    tool: str
    prompt: str

class ChatResponse(BaseModel):
    result: str

# ─── JWT Minting Helper ─────────────────────────────────────────────────────
def mint_jwt() -> str:
    cmd = [
        sys.executable, "-m", "mcpgateway.utils.create_jwt_token",
        "--username", BASIC_AUTH_USER,
        "--secret",   JWT_SECRET_KEY,
        "--exp",      "60",
    ]
    token = subprocess.check_output(cmd, text=True).strip()
    if not token:
        raise RuntimeError("Failed to mint JWT")
    return token

# ─── Chat Invocation Endpoint ───────────────────────────────────────────────
@app.post("/call", response_model=ChatResponse)
async def call_tool(req: ChatRequest):
    tool   = req.tool
    prompt = req.prompt.strip()
    logger.info("Invoking %s with prompt: %r", tool, prompt)

    # Build JSON-RPC payload; use "text" or "query" depending on the tool
    param_key = "query" if "chat" in tool else "text"
    payload = {
        "jsonrpc": "2.0",
        "id":      1,
        "method":  tool,
        "params":  {param_key: prompt}
    }

    # Mint a fresh token
    try:
        jwt_token = mint_jwt()
    except Exception as e:
        logger.exception("JWT mint failed")
        raise HTTPException(500, "Authentication error")

    headers = {
        "Authorization": f"Bearer {jwt_token}",
        "Content-Type":  "application/json"
    }

    # Forward the request to the Gateway
    async with httpx.AsyncClient(timeout=30.0) as client:
        try:
            resp = await client.post(GATEWAY_RPC, json=payload, headers=headers)
            resp.raise_for_status()
        except httpx.HTTPStatusError as exc:
            logger.error("Gateway HTTP error: %s", exc.response.text)
            raise HTTPException(exc.response.status_code, exc.response.text)
        except Exception as exc:
            logger.exception("Connection failed")
            raise HTTPException(502, "Gateway connection error")

    data = resp.json()
    # Extract reply in whichever field it lands
    text = (
        data.get("result", {}).get("reply")
        or (data.get("result", {}).get("content") or [{}])[0].get("text")
        or (data.get("content") or [{}])[0].get("text")
        or ""
    )

    # Clean up stray punctuation
    text = re.sub(r"^\?\s*", "", text).strip()
    logger.info("Received reply: %r", text)

    if not text:
        raise HTTPException(500, "No reply from agent")

    return ChatResponse(result=text)

# ─── Entrypoint ─────────────────────────────────────────────────────────────
if __name__ == "__main__":
    uvicorn.run(app, host="0.0.0.0", port=8000)
This is the final result:

This project is just the beginning. You can easily extend this chatbot with more advanced features, such as building an agent selector or implementing custom orchestrators.
To explore these concepts and access the complete, feature-rich code, visit the full project repository:
https://github.com/ruslanmv/watsonx-agent-to-mcp-gateway
Where We Go From Here: Your Journey with MCP
And just like that, we’ve reached the end of our journey for today. Take a moment and look back at the ground we’ve covered together. What started with a simple idea has blossomed into a fully-realized, end-to-end AI application.
We began with the basics, teaching a humble “Hello World” agent to speak the right language—SSE—so it could introduce itself to the world. We learned how to become system administrators, generating the secure JWTs needed to manage the Gateway’s inner workings. We then officially registered our agent, transforming it from a standalone script into a trusted member of our new AI ecosystem.
From there, we built a bridge for our users, crafting a sleek FastAPI frontend that acts as a secure proxy, allowing browser-based applications to tap into the power of our backend tools. Finally, we put all these skills to the test by graduating from our simple echo agent to integrating a powerful, real-world model with the Watsonx.ai agent.
This pattern an SSE agent, federated through the Gateway, and exposed via a lightweight proxy UI—is more than just a one-off tutorial; it’s a blueprint. It’s a playbook you can use to integrate any AI service or tool into a unified, secure, and observable system. Whether you’re wrapping a massive cloud LLM, an on-premise data tool, or even a legacy script, the MCP Gateway provides the consistent architecture you need to compose and share those capabilities with the world.
Congratulations! on building, testing, and integrating a powerful AI agent into your MCP Gateway. The tangled mess of APIs is now a clean, organized, and powerful ecosystem. The workshop is yours, and you now have the skills to build anything you can imagine. Happy coding!
Leave a comment