AWS Machine Learning Models in SageMaker for free
Hello, today I will teach you how to create your own SageMaker Notebook on your local-machine.
Contents
- Introduction
- Installation of Conda
- Set region
- IAM role
- Local data
- Local instance type
- Docker
Introduction
Build , Train and Deploy AWS Machine Learning Models may be become expensive.
So if you don’t want to be worried about the monthly costs about your notebooks like here
https://aws.amazon.com/sagemaker/pricing/
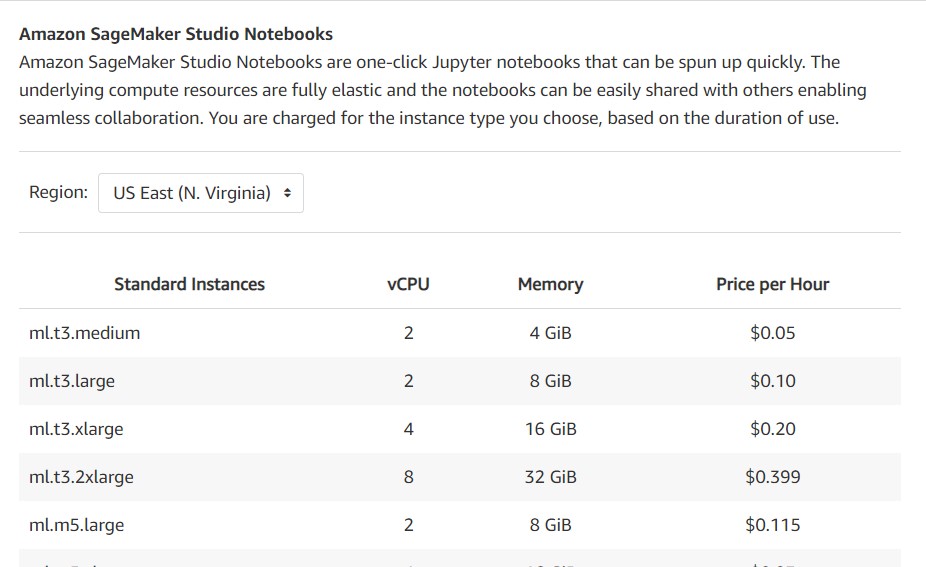
In this blog post I will show you how to install Sagemaker on your local machine and train for hours that you need without need to pay something.
Installation of Conda
First you need to install anaconda at this link

After you install , check that your terminal , recognize conda
C:\conda --version
conda 4.10.1
If says ‘conda’ is not recognized as an internal or external command,
Yu can tray this: for me, I installed anaconda3 into C:\Users\Ruslan\anaconda3. Therefore you need to add C:\Users\Ruslan\anaconda3 as well as C:\Users\Ruslan\anaconda3\Scripts\ to your path variable, e.g. set PATH=%PATH%;C:\Users\Ruslan\anaconda3;C:\Users\Ruslan\anaconda3\Scripts\.
The environments supported that I will consider is Python 3.7, Keras 2.2.0 and TensorFlow 2.2
| Framework | Description | Docker Image | Packages and Nvidia Settings |
|---|---|---|---|
| TensorFlow 2.2 | TensorFlow 2.2.0 + Keras 2.3.1 on Python 3.7. | floydhub/tensorflow | TensorFlow-2.2 |
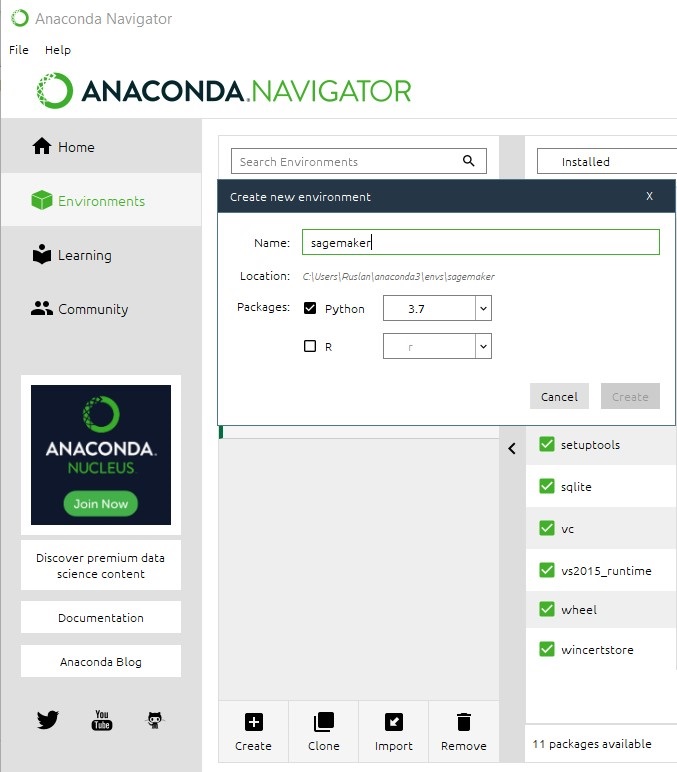
conda create -n sagemaker python==3.7
conda activate sagemaker
another way to perform the same is go to your Anaconda Navigator then go Environments and create new called sagemaker
then in your terminal type the following commands:
conda install ipykernel
python -m ipykernel install --user --name sagemaker --display-name "Python (SageMaker)"
conda install pip pandas
conda install sqlite
Then we install the correct versions of the the Tensorflow, if you will use only CPU
pip install tensorflow==2.2.0
If you will use GPU
pip install tensorflow-gpu==2.0.0
pip install keras==2.3.1
pip install sagemaker==2.35.0
pip install boto3
optional libraries that I suggest install are:
pip install awswrangler==2.7.0
pip install seaborn==0.11.0
pip install matplotlib===3.3.3
Then download the following file and local_sagemaker.ipynb
then open the Jupyter notebook with the command
jupyter notebook&
and find the file that you downloaded local_sagemaker.ipynb and open it.
Local SageMaker
import tensorflow
import boto3
import sagemaker
import keras
import os
import numpy as np
from keras.datasets import fashion_mnist
We check the versions
print(tensorflow.__version__)
2.2.0
print(keras.__version__)
2.3.1
Set region
The next step is select the region, that was defined previously by using AWS CLI
sess = sagemaker.Session() # Use the AWS region configured with the AWS CLI
if you want to change it
sess = sagemaker.Session(boto3.session.Session(region_name='eu-west-1'))
IAM role
The next step to do is take care of the role because when we work in SageMaker Studioor SageMaker Notebook Instance we do this, we call that get execution roll API which returns the I am role associated to the notebook instance or to studio obviously here we working locally so your local machine does not have an I AM role and if you try and call this API it’s gonna faill. The solution is very simple, you have to pass the ARN of your I am role the one you are using with Sage Maker. Make sure you pass the full ARN
Go to your terminal
aws iam list-roles|grep SageMaker-Execution
For example in windows you can use bash.exe

you should copy the role.
if you did not installed before the aws AWS CLI you can just type
$ sudo apt-get update.
$ sudo apt-get install awscli.
$ aws --version.
$ aws configure
and insert your credentials.
Just in case you have some buckets in S3, you can check if your AWS CLI works by typing $ aws s3 ls
Now that it works everything you can terun back to you Notebook and replace ‘YOUR _ROLE’ with your personal role for example
role = 'arn:aws:iam::101234560835:role/service-role/AmazonSageMaker-ExecutionRole-20200608T161888'
# This doesn't work on your local machine because it doesn't have an IAM role :)
# role = sagemaker.get_execution_role()
# This is the SageMaker role you're already using, it will work just fine
role = 'YOUR_ROLE'
(x_train, y_train), (x_val, y_val) = fashion_mnist.load_data()
Downloading data from http://fashion-mnist.s3-website.eu-central-1.amazonaws.com/train-labels-idx1-ubyte.gz
32768/29515 [=================================] - 0s 1us/step
Downloading data from http://fashion-mnist.s3-website.eu-central-1.amazonaws.com/train-images-idx3-ubyte.gz
26427392/26421880 [==============================] - 3s 0us/step
Downloading data from http://fashion-mnist.s3-website.eu-central-1.amazonaws.com/t10k-labels-idx1-ubyte.gz
8192/5148 [===============================================] - 0s 0us/step
Downloading data from http://fashion-mnist.s3-website.eu-central-1.amazonaws.com/t10k-images-idx3-ubyte.gz
4423680/4422102 [==============================] - 1s 0us/step
Local data
os.makedirs("./data", exist_ok = True)
np.savez('./data/training', image=x_train, label=y_train)
np.savez('./data/validation', image=x_val, label=y_val)
# Train on local data. S3 URIs would work too.
training_input_path   = 'file://data/training.npz'
validation_input_path = 'file://data/validation.npz'
# Store model locally. A S3 URI would work too.
output_path           = 'file:///tmp/model/'
Local instance type
The notebook supports three different versions of the Keras script
- mnist_keras_tf.py: Keras in symbolic mode with TensorFlow 1.15
- mnist_keras_tf20_compat.py: Keras in symbolic mode with TensorFlow 2.0
- mnist_keras_tf20_eager.py: Keras in eager mode with TensorFlow 2.0
You can create a file called mnist_keras_tf20_compat.py with the following code:
#mnist_keras_tf20_compat.py
import argparse, os
import numpy as np

import tensorflow as tf

tf.compat.v1.disable_eager_execution()

from keras import backend as K
from tensorflow.keras.models import Sequential
from tensorflow.keras.layers import Dense, Dropout, Activation, Flatten, BatchNormalization, Conv2D, MaxPooling2D
from tensorflow.keras.optimizers import SGD
from tensorflow.keras.losses import categorical_crossentropy
from tensorflow.keras.callbacks import Callback, EarlyStopping
from tensorflow.keras.preprocessing.image import ImageDataGenerator
from tensorflow.keras.utils import multi_gpu_model, to_categorical

import subprocess
import sys

# Script mode doesn't support requirements.txt
# Here's the workaround ;)
def install(package):
    subprocess.call([sys.executable, "-m", "pip", "install", package])

if __name__ == '__main__':

    # Keras-metrics brings additional metrics: precision, recall, f1
    install('keras-metrics')
    import keras_metrics

    parser = argparse.ArgumentParser()

    parser.add_argument('--epochs', type=int, default=10)
    parser.add_argument('--learning-rate', type=float, default=0.01)
    parser.add_argument('--batch-size', type=int, default=128)
    parser.add_argument('--dense-layer', type=int, default=512)
    parser.add_argument('--dropout', type=float, default=0.2)

    parser.add_argument('--gpu-count', type=int, default=os.environ['SM_NUM_GPUS'])
    parser.add_argument('--model-dir', type=str, default=os.environ['SM_MODEL_DIR'])
    parser.add_argument('--training', type=str, default=os.environ['SM_CHANNEL_TRAINING'])
    parser.add_argument('--validation', type=str, default=os.environ['SM_CHANNEL_VALIDATION'])

    args, _ = parser.parse_known_args()

    epochs     = args.epochs
    lr         = args.learning_rate
    batch_size = args.batch_size
    dense_layer = args.dense_layer
    dropout    = args.dropout

    gpu_count  = args.gpu_count
    model_dir  = args.model_dir
    training_dir   = args.training
    validation_dir = args.validation

    x_train = np.load(os.path.join(training_dir, 'training.npz'))['image']
    y_train = np.load(os.path.join(training_dir, 'training.npz'))['label']
    x_val  = np.load(os.path.join(validation_dir, 'validation.npz'))['image']
    y_val  = np.load(os.path.join(validation_dir, 'validation.npz'))['label']

    # input image dimensions
    img_rows, img_cols = 28, 28

    # Tensorflow needs image channels last, e.g. (batch size, width, height, channels)
    if K.image_data_format() == 'channels_last':
        x_train = x_train.reshape(x_train.shape[0], img_rows, img_cols, 1)
        x_val = x_val.reshape(x_val.shape[0], img_rows, img_cols, 1)
        input_shape = (img_rows, img_cols, 1)
        batch_norm_axis=-1
    else:
        # Keras is configured with channels first (Apache MXNet backend)
        print('Channels first, exiting')
        exit(-1)

    print('x_train shape:', x_train.shape)
    print(x_train.shape[0], 'train samples')
    print(x_val.shape[0], 'test samples')

    # Normalize pixel values
    x_train  = x_train.astype('float32')
    x_val    = x_val.astype('float32')
    x_train /= 255
    x_val   /= 255

    # Convert class vectors to binary class matrices
    num_classes = 10
    y_train = to_categorical(y_train, num_classes)
    y_val   = to_categorical(y_val, num_classes)

    model = Sequential()

    # 1st convolution block
    model.add(Conv2D(64, kernel_size=(3,3), padding='same', input_shape=input_shape))
    model.add(BatchNormalization(axis=batch_norm_axis))
    model.add(Activation('relu'))
    model.add(MaxPooling2D(pool_size=(2,2), strides=2))

    # 2nd convolution block
    model.add(Conv2D(128, kernel_size=(3,3), padding='valid'))
    model.add(BatchNormalization(axis=batch_norm_axis))
    model.add(Activation('relu'))
    model.add(MaxPooling2D(pool_size=(2,2), strides=2))

    # Fully connected block
    model.add(Flatten())
    model.add(Dense(dense_layer))
    model.add(Activation('relu'))
    model.add(Dropout(dropout))

    # Output layer
    model.add(Dense(num_classes, activation='softmax'))

    print(model.summary())

    if gpu_count > 1:
        model = multi_gpu_model(model, gpus=gpu_count)

    model.compile(loss=categorical_crossentropy,
                  optimizer=SGD(lr=lr, decay=1e-6, momentum=0.9, nesterov=True),
                  metrics=['accuracy',
                  keras_metrics.precision(),
                  keras_metrics.recall(),
                  keras_metrics.f1_score()])

    # Use image augmentation
    # Not useful for this data set, but this is how to set it up
    # datagen = ImageDataGenerator(
    # rotation_range=20,
    # width_shift_range=0.2,
    # height_shift_range=0.2,
    # horizontal_flip=True)

    #datagen.fit(x_train)
    #model.fit_generator(datagen.flow(x_train, y_train, batch_size=batch_size),
    #                validation_data=(x_val, y_val),
    #                epochs=epochs,
    #                steps_per_epoch=len(x_train) / batch_size,
    #                verbose=1)

    sess = tf.compat.v1.Session()
    sess.run(tf.compat.v1.local_variables_initializer())

    model.fit(x_train, y_train, batch_size=batch_size,
                    validation_data=(x_val, y_val),
                    epochs=epochs)

    score = model.evaluate(x_val, y_val, verbose=0)
    print('Validation loss    :', score[0])
    print('Validation accuracy:', score[1])

    # save Keras model in SavedModel format for Tensorflow Serving
    sess = tf.compat.v1.keras.backend.get_session()
    tf.compat.v1.saved_model.simple_save(
        sess,
        os.path.join(model_dir, 'model/1'),
        inputs={'inputs': model.input},
        outputs={t.name: t for t in model.outputs})
Then you return back to your Notebook a and set the correct TensorFlow version when configuring the TensorFlow estimator.
from sagemaker.tensorflow import TensorFlow
tf_estimator = TensorFlow(entry_point='mnist_keras_tf20_compat.py',
                          role=role,
                          instance_count=1,
                          instance_type='local',   # Train on the local CPU ('local_gpu' if it has a GPU)
                          framework_version='2.0',
                          py_version='py3',
                          hyperparameters={'epochs': 1},
                          output_path=output_path
                         )
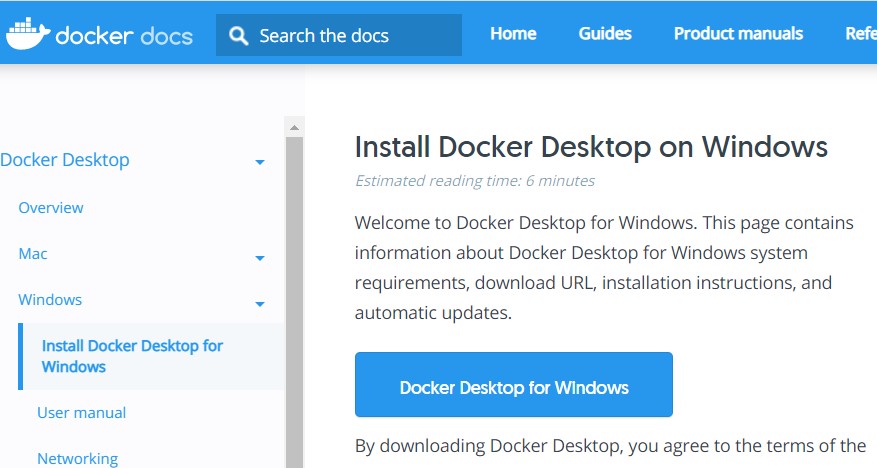
Docker
You should download and install docker and docker-compose here
Now you can return back to you Notebook and start train by using the following command:
# Train! This will pull (once) the SageMaker CPU/GPU container for TensorFlow to your local machine.
# Make sure that Docker is running and that docker-compose is installed

tf_estimator.fit({'training': training_input_path, 'validation': validation_input_path})
Creating network "sagemaker-local" with the default driver
Creating 1nm7dhp11g-algo-1-5jdu7 ...
Creating 1nm7dhp11g-algo-1-5jdu7 ... done
Docker Compose is now in the Docker CLI, try `docker compose up`
Attaching to 1nm7dhp11g-algo-1-5jdu7
[36m1nm7dhp11g-algo-1-5jdu7 |[0m 2021-06-26 09:55:54,141 sagemaker-training-toolkit INFO Imported framework sagemaker_tensorflow_container.training
.
[36m1nm7dhp11g-algo-1-5jdu7 |[0m 2021-06-26 09:57:38,772 sagemaker-training-toolkit INFO Reporting training SUCCESS
[36m1nm7dhp11g-algo-1-5jdu7 exited with code 0
[0mAborting on container exit...
===== Job Complete =====
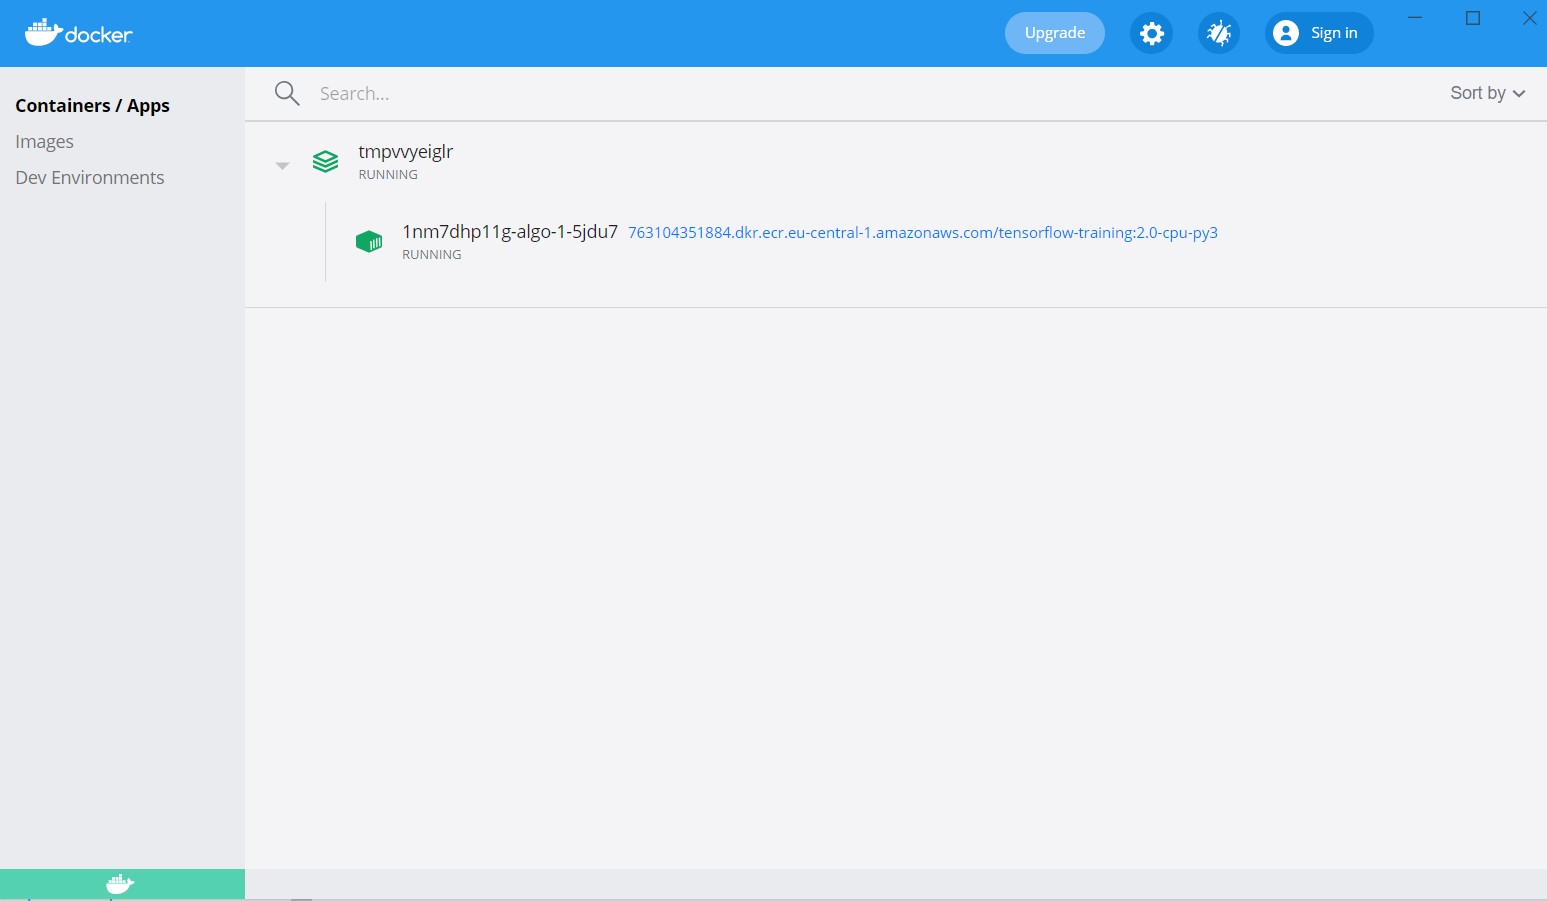
You can check how is going on your training on Docker Desktop
We can check
!docker images
REPOSITORY                                                            TAG           IMAGE ID       CREATED        SIZE
763104351884.dkr.ecr.eu-central-1.amazonaws.com/tensorflow-training   2.0-cpu-py3   a19ddacd606a   3 months ago   1.97GB
And save our models
!tar tvfz /tmp/model/model.tar.gz
drwxrwxrwx  0 0      0           0 Jun 26 11:57 model/
drwxrwxrwx  0 0      0           0 Jun 26 11:57 model/1/
-rw-rw-rw-  0 0      0      240772 Jun 26 11:57 model/1/saved_model.pb
drwxrwxrwx  0 0      0           0 Jun 26 11:57 model/1/variables/
-rw-rw-rw-  0 0      0    19520132 Jun 26 11:57 model/1/variables/variables.data-00000-of-00001
-rw-rw-rw-  0 0      0        1500 Jun 26 11:57 model/1/variables/variables.index
Congratulations we have trained our Neural Network with Sagemaker by using Docker on our local machine.
Credits: Demo for AIM410R/R1 session at AWS re:Invent 2019
Leave a comment