
Chatbot on Google Cloud with Flask and Subdomain
In this tutorial, you will learn how to get free Chatbot for lifetime that run 24 hours. This is a ubuntu server with Deploy your Chatbot with Flask Gunicorn , Nginx in GCP with custom domain .
Requirements
- Google Cloud Account
- CloudFlare account
- Domain
- Nginx
- Gunicorn
- Flask
Create Virtual Machine on Google Cloud
First sing up, google cloud platform using your Gmail account. They ask to enter card details but it is only for verification. Don’t worry, it is totally free you wouldn’t charge any fees for this. We use GCP free tier. if you want, you able to choose powerful machine but it is not free, you have to pay.
After the log in, click “menu” icon at the left upper conner. Under “compute engine”, select “VM instances” then wait for few moments. Click “create” button then a form popup then names the instance. GPC free tier offer f1 micro virtual machine for some regions. These are the regions that are cover by free tier. Select a region and zone according to that. Select N1 series and machine type should be f1 micro. After that click change button under boot disk, in here we can select a operating system (OS) and disk size.
Select OS as “Ubuntu 18.04 LTS. GCP free tier gives 30GB disk space, above that, they will charge.
and Standard Storage.

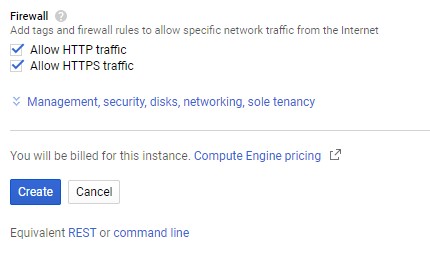
Under firewall, tick mark both “allow HTTP and HTTPS traffic” then click “create” button. It will take some time.
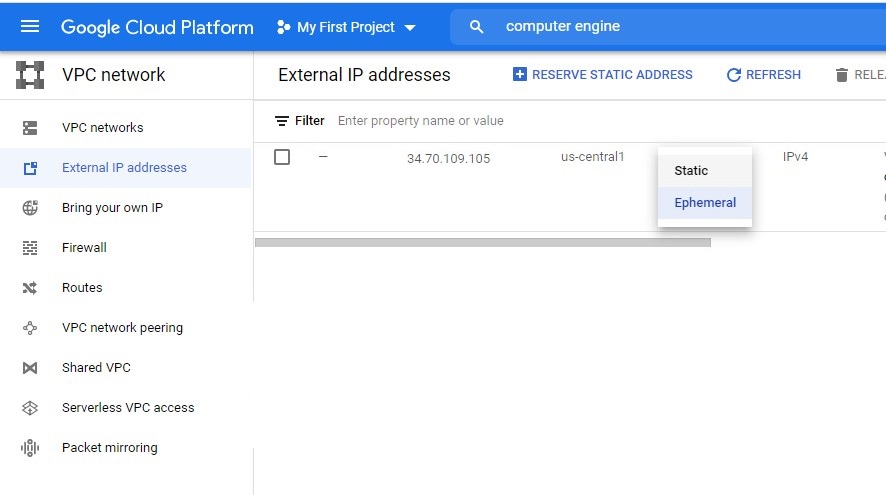
In the menu, select “external IP address” under VPC network. Change the VM IP type to “Static”. Static IP doesn’t change during refresh the VPS.
Then click “firewall” at the left menu. You have to allow turbo VNC viewer port 5000 to connect Flask remotely and 80 . Click “create firewall rule” and name it whatever you want. Under target select “all instance in the network”. then put IP range as this and under protocols and ports select “allow all”. Now, click create button. this firewall rule allows all port and all IP ranges to connect the VM instance.
Deploy your Chatbot with Flask Gunicorn , Nginx in GCP with custom domain
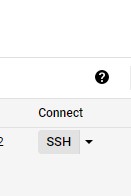
Enter to your terminal of the GCP via ssh
Update and Refresh Repository Lists
Open a terminal window, and enter the following:
sudo apt update
sudo apt install software-properties-common
add the deadsnakes PPA to your sources list:
sudo add-apt-repository ppa:deadsnakes/ppa
When prompted press Enter to continue:
nce the repository is enabled, install Python 3.7 with:
sudo apt install python3.7
At this point, Python 3.7 is installed on your Ubuntu system and ready to be used. You can verify it by typing:
python3.7 --version
Alternative update python 3 to point to python3.7 /usr/bin/python3 is just a symlink. Delete it and make a new symlink to
python3.7:
$ sudo rm /usr/bin/python3
$ sudo ln -s python3.7 /usr/bin/python3
sudo apt install python3-pip
python3 –version
sudo pip3 install pipenv
Check that pipenv installed correctly by checking the version.
$ pipenv --version
pipenv, version 2021.5.29
sudo mkdir /var/www/
cd /var/www/
sudo git clone https://github.com/ruslanmv/chatbot
The default permissions for the directory are set to root.
ls -ld /var/www/chatbot
Change the permissions for the user and group to your username and the group www-data.
sudo chown -R $USER:www-data /var/www/chatbot
cd /var/www/chatbot
Create a .env file to hold the environmental variables.
nano .env
FLASK_APP=wsgi.py
FLASK_ENV=production
Start the virtual environment. Pipenv will load the variables in the .env file automatically.
$ pipenv shell
Use pipenv to install the dependencies.
pip install -r requirements.txt --no-cache-dir
pipenv install gunicorn
python -m spacy download en
nano application.py
#import files
from flask import Flask, render_template, request
from chatterbot import ChatBot
from chatterbot.trainers import ListTrainer
from chatterbot.trainers import ChatterBotCorpusTrainer
from chatterbot.response_selection import get_first_response
app = Flask(__name__)
# Create object of ChatBot class with Storage Adapter
bot = ChatBot(
    'Annapaola',
    logic_adapters=['chatterbot.logic.MathematicalEvaluation',
                    'chatterbot.logic.BestMatch'
],
    response_selection_method = get_first_response,
)
# Inport ListTrainer
from chatterbot.trainers import ListTrainer
trainer = ListTrainer(bot)
trainer.train([
'annapaola',
'That is my name',
'ruslan',
'visit ruslanmv.com'
])
# Create a new trainer for the chatbot
# First, lets train our bot with some data
trainer = ChatterBotCorpusTrainer(bot)
# Train the chatbot based on the english corpus
trainer.train("chatterbot.corpus.english")
# Now we can export the data to a file
#trainer.export_for_training('./my_export.json')
@app.route("/")
def home():
    return render_template("home.html")
@app.route("/get")
def get_bot_response():
    userText = request.args.get('msg')
    response = bot.get_response(userText)
    return str(response)
nano wsgi.py
from application import app

if __name__ == '__main__':
    app.run(debug=False)
pip install python-dotenv
flask run --host '0.0.0.0'
Now you can access the application from another computer using a browser, navigate to the server’s IP address on port 5000. Make sure port 5000 is not blocked by a firewall so that you will be able to access the Flask application.
Press CTRL+C to stop the Flask development server.
If you want only test the deployment
use this application.py
from flask import Flask

app = Flask(__name__)


@app.route('/')
def index():
    '''Index page route'''

    return '<h1>Application Deployed!</h1>
and repeat
flask run --host '0.0.0.0'
It is time to set up Gunicorn!
If you were able to run the Flask development server successfully use this command to test run the application using Gunicorn.
$ gunicorn --workers 1 --bind 0.0.0.0:5000 wsgi:app
[2021-07-12 19:50:49 +0000] [6813] [INFO] Starting gunicorn 20.1.0
[2021-07-12 19:50:49 +0000] [6813] [INFO] Listening at: http://0.0.0.0:5000 (6813)
[2021-07-12 19:50:49 +0000] [6813] [INFO] Using worker: sync
[2021-07-12 19:50:49 +0000] [6816] [INFO] Booting worker with pid: 6816
[2021-07-12 19:50:49 +0000] [6817] [INFO] Booting worker with pid: 6817
[2021-07-12 19:50:49 +0000] [6818] [INFO] Booting worker with pid: 6818
[2021-07-12 19:50:49 +0000] [6819] [INFO] Booting worker with pid: 6819
Press CTRL+C to stop the Gunicorn server.
Install Nginx.
$ sudo apt install nginx
$ sudo systemctl enable nginx
$ sudo systemctl start nginx
Check to see if Nginx is running by running this command.
$ sudo systemctl status nginx
ow we create the systemd file that runs Gunicorn as a service. Add the following code but change all paths and user names so that they correspond to your set up.
here we have to add the address of your gunicorn bin
whereis gunicorn
we copy this address, in my case was
/home/username/.local/share/virtualenvs/chatbot-EUI373oW/bin/gunicorn
We substitute username with your username of your terminal
whoami
sudo nano /etc/systemd/system/chatbot.service
[Unit]
Description=chatbot.service - A Flask application run with Gunicorn.
After=network.target
[Service]
User=username
Group=www-data
WorkingDirectory=/var/www/chatbot/
ExecStart=/home/username/.local/share/virtualenvs/chatbot-EUI373oW/bin/gunicorn --workers 1 --bind unix:/var/www/chatbot/chatbot.sock wsgi:app
[Install]
WantedBy=multi-user.target
Next we need to create the server block/virtual host in Nginx.
sudo nano /etc/nginx/sites-available/chatbot.ruslanmv.com
Add the following content. .
server {
        listen 80;
        server_name chatbot.ruslanmv www.chatbot.ruslanmv;
        access_log /var/log/nginx/chatbot.access.log;
        error_log /var/log/nginx/chatbot.error.log;
        location / {
                include proxy_params;
                proxy_pass http://unix:/var/www/chatbot/chatbot.sock;
        }
}
Enable the website by creating a link to the sites-enabled directory.
sudo ln -s /etc/nginx/sites-available/chatbot.ruslanmv.com /etc/nginx/sites-enabled/
Make sure the link has been created in sites-enabled directory.
ls -l /etc/nginx/sites-enabled/ | grep chatbot.ruslanmv.com

lrwxrwxrwx 1 root root 39 Jul 12 20:09 chatbot.conf -> /etc/nginx/sites-available/chatbot.conf
Subdomain Setup in Cloudflare

insert your address
Then return back to your terminal and check the nginx configuration for errors then restart the service.
$ sudo nginx -t
in your inter to your webrowser as example my case
Disable the default virtual host, that is pre-configured when Nginx is istalled via Ubuntu’s packet manager apt:
cd /etc/nginx/sites-enabled/
unlink /etc/nginx/sites-enabled/default
we verify that /etc/nginx/sites-available there i a reverse proxy configuration file.
chatbot.ruslanmv.com
then
sudo systemctl restart nginx
sudo systemctl status nginx
Now w start the chatbot service
sudo systemctl start chatbot.service
and then we check
sudo systemctl status chatbot.service
● chatbot.service - chatbot.service - A Flask application run with Gunicorn.
     Loaded: loaded (/etc/systemd/system/chatbot.service; disabled; vendor preset: enabled)
     Active: active (running) since Wed 2021-07-14 10:25:49 UTC; 15s ago
   Main PID: 9338 (gunicorn)
      Tasks: 2 (limit: 682)
     Memory: 155.6M
     CGroup: /system.slice/chatbot.service
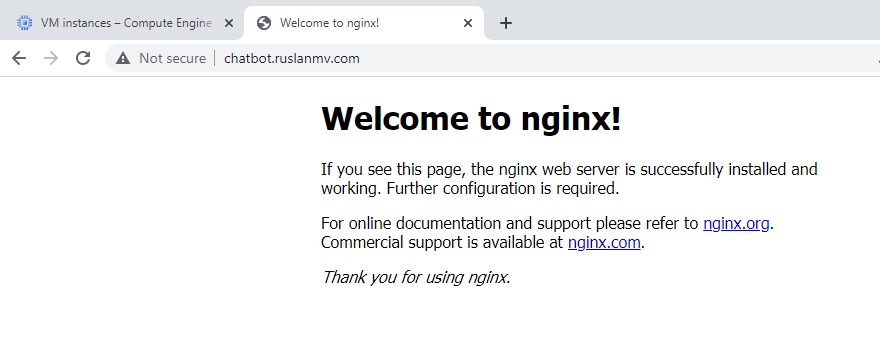
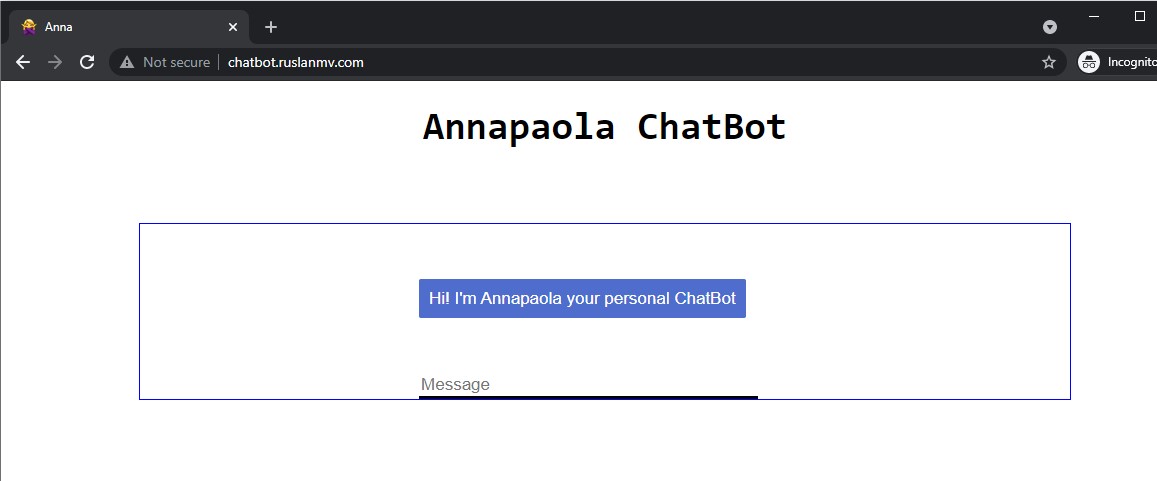
Now I can access the Flask application with a browser via the name.
http://chatbot.ruslanmv.com
Troubleshooting
curl -I http://chatbot.ruslanmv.com
sudo systemctl status chatbot.service
sudo journalctl -xe
sudo systemctl restart nginx
sudo systemctl stop chatbot.service
sudo systemctl restart chatbot.service
sudo systemctl daemon-reload
Congratulations we have created our Chatbot with Flask on Google cloud with our subdomain.
Leave a comment