
How to install a MySQL server in a virtual machine ready to work remotelly
In this blog post we will install MySQL Server 8 in virtual machine in windows and connect it via terminal.
Section 1. Ubuntu as a virtual machine on Windows
To install Ubuntu as a virtual machine on Windows 10:
-
Download VirtualBox for Windows and install it on your computer.
-
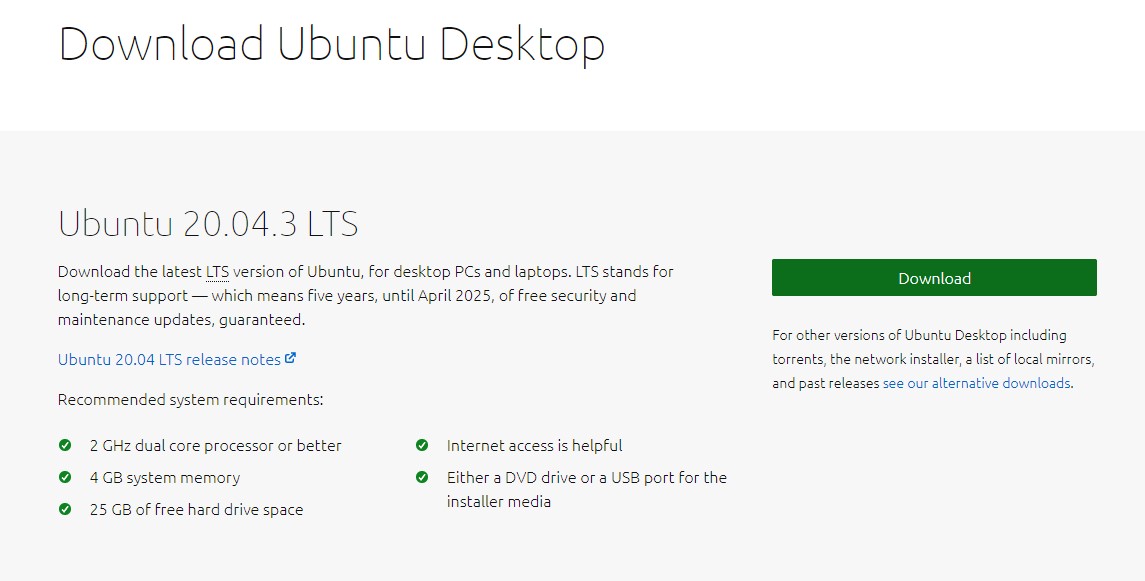
Download the Ubuntu ISO file you want to install from the Ubuntu download page.
-
Open VirtualBox and select New in the top taskbar.
-
Give your VM a name, choose Linux as the Type, then choose Ubuntu as the Version and select Next.
-
Choose how much RAM you want to assign to the virtual machine and select Next. The recommended minimum is 1024 MB . I will use 4096 MB
The amount of memory you set aside is only used while the virtual machine is running.
-
Choose Create a virtual hard disk now and select Create.
You must create a virtual hard drive to save the changes you make in Ubuntu.
-
Choose VDI (VirtualBox Disk Image) and select Next.
-
Choose Dynamically allocated or Fixed size for the storage type and select Next.
A fixed size disk performs better because the virtual machine doesn’t have to increase the file size as you install software.
Choose at least 20GB of size. I suggest 40 GB to avoid issues in the future.
-
The name of your virtual machine will now appear on the left side of the VirtualBox manager. Select Start in the toolbar to launch your VM.
-
This is the point where you need to choose the Ubuntu ISO file you downloaded earlier.
-
Select Add in the window that pops up.
-
Choose your Ubuntu disk image and select Open.
-
Select Choose.
-
Select Start.
-
Your VM will now boot into a live version of Ubuntu. Choose your language and select Install Ubuntu.
If you select Try Ubuntu, you can run the installer later by double-clicking Install Ubuntu on the desktop.
-
Choose your keyboard layout and select Continue.
-
Choose Normal installation or Minimal installation, then select Continue.
Check the boxes under Other Options to download updates.
-
Choose Erase disk and install Ubuntu and select Install Now, then select Continue to ignore the warning.
This step will not erase your computer’s physical hard drive; it only applies to the virtual machine.
-
Choose your time zone on the map, then select Continue.
-
Set up your user account, your computer we select
awsand select Continue. -
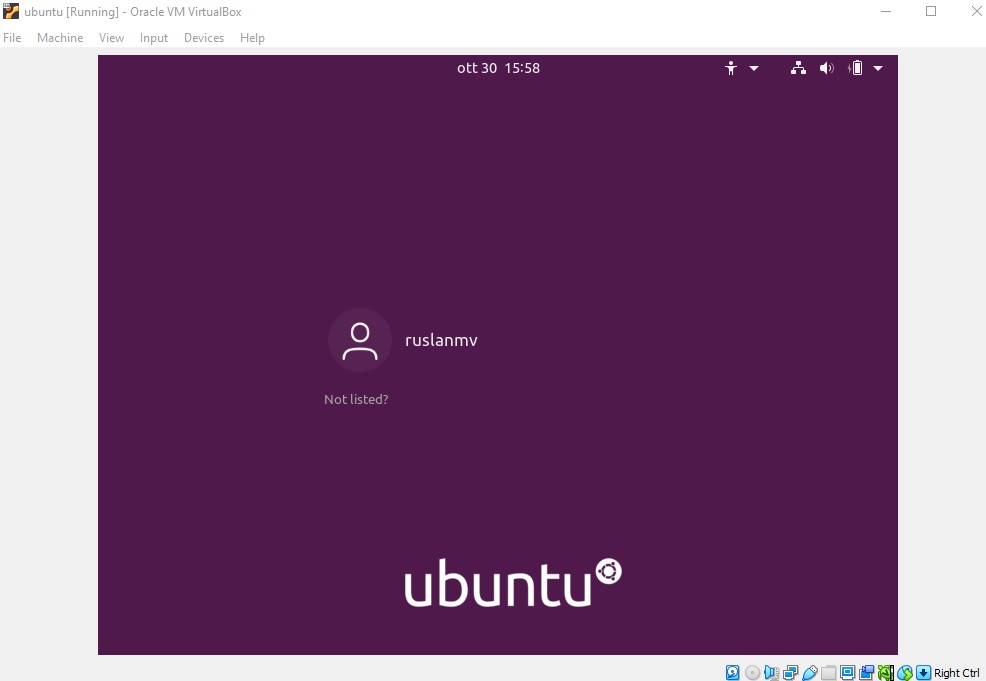
Select Restart Now and press enter. After restart you will have something like
-
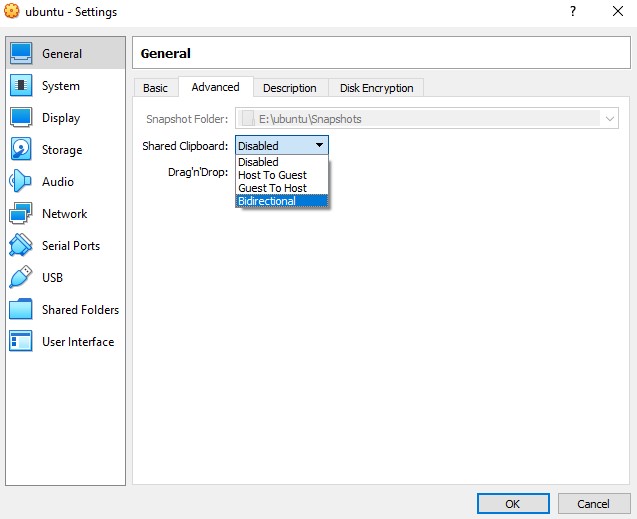
To enable the shared clipboard in VirtualBox , go to Oracle VM Virtual Box Manager and our image called ubuntu click settings then General>Advanced>Shared Clipboard we change to Bidirectional and then click OK
-
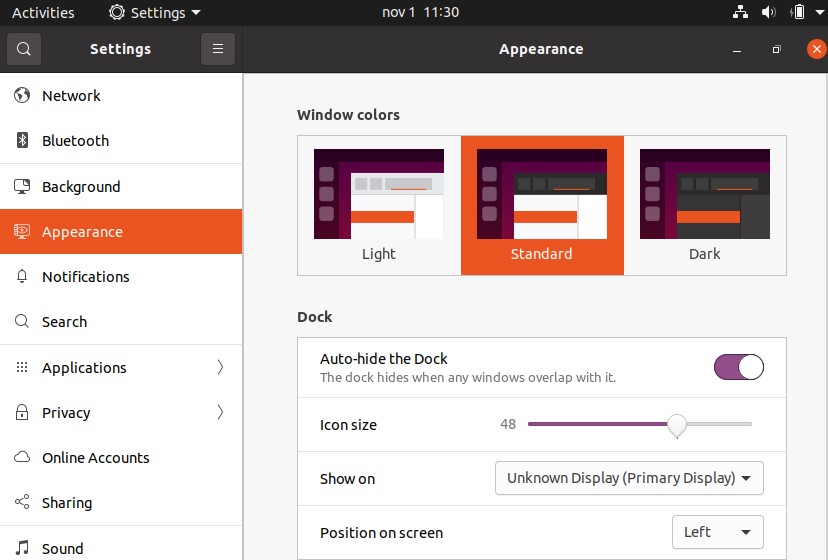
Hide the Dock (optional)
Due to we will going to code, we need work with a clean screen. so Let us to clear the screen in ubuntu by removing the left panel of ubuntu while we are coding.
Press the Win key on your keyboard and type “dock” to filter the app list down to the sub-page you need in “Appearance Settings.” Select the Settings entry that appears to open that page.
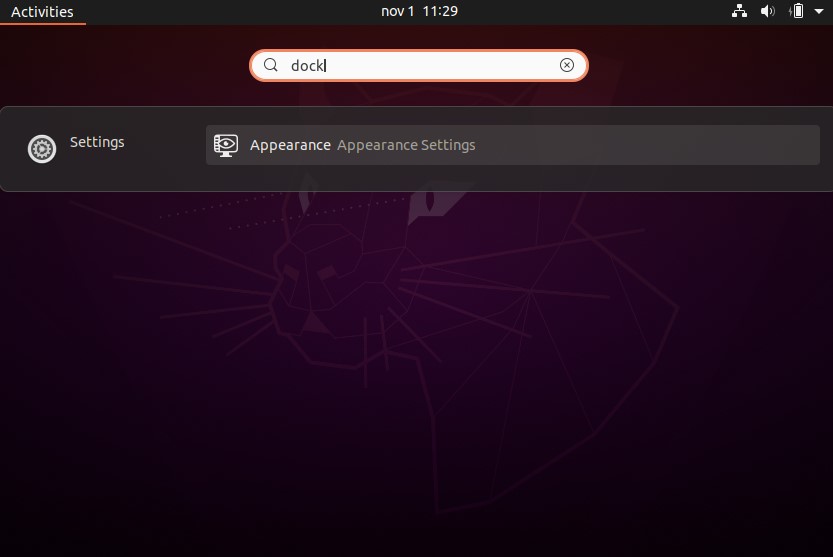
Enable the toggle next to “Auto-hide the Dock.”
-
Then return back to your terminal in Ubuntu , open a new terminal,
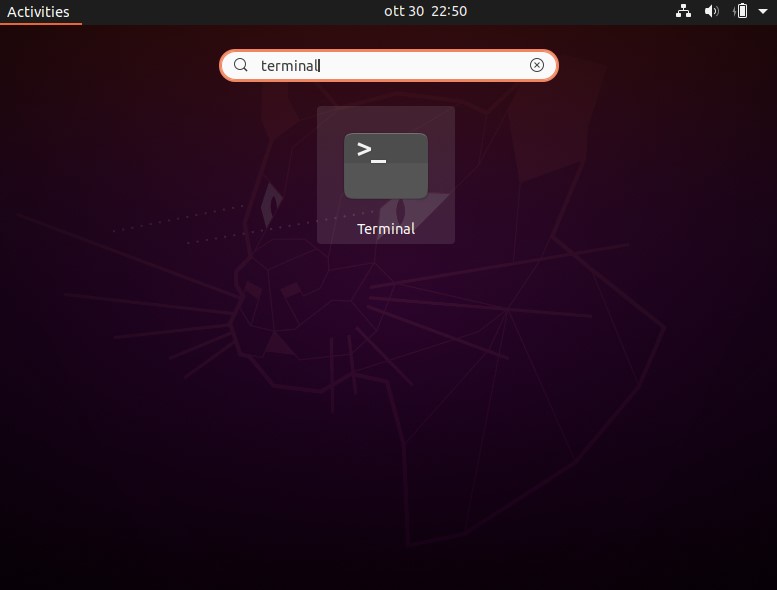
-
and type the following
sudo apt-get updatesudo apt upgradesudo apt install virtualbox-guest-x11sudo VBoxClient --clipboardthen Shared Clipboard should be work. Copy the following text
echo 'Your VM is Ready!'and paste it with
ctrl+shift+vand then press enter.
Section 2 Install MySQL on Ubuntu 20.04
MySQL team provides official MySQL PPA for Ubuntu operating systems. Run below command to enable PPA.
wget https://dev.mysql.com/get/mysql-apt-config_0.8.20-1_all.deb
sudo dpkg -i mysql-apt-config_0.8.20-1_all.deb
The installer will prompt you to set default repository for the MySQL version. Select MySQL 8 server when you are prompted which MySQL product you want to install. Click OK to confirm.
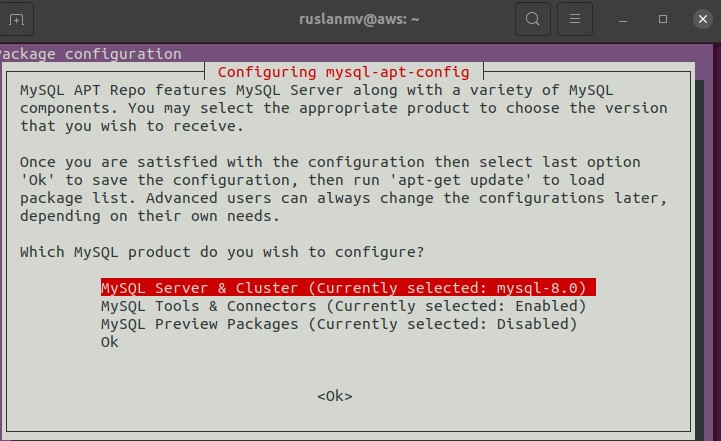
Select MySQL 8 server when you are prompted which MySQL product you want to install. Click OK to confirm.
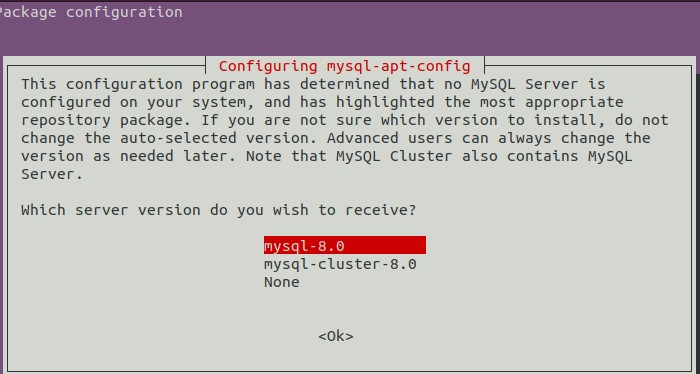
In case you select wrong version. Execute dpkg-reconfigure mysql-apt-config command after package installation to get this window again.
We can check if our setup was done correctly
cat /etc/apt/sources.list.d/mysql.list
### THIS FILE IS AUTOMATICALLY CONFIGURED #### You may comment out entries below, but any other modifications may be lost.# Use command 'dpkg-reconfigure mysql-apt-config' as root for modifications.deb http://repo.mysql.com/apt/ubuntu/ focal mysql-apt-configdeb http://repo.mysql.com/apt/ubuntu/ focal mysql-8.0deb http://repo.mysql.com/apt/ubuntu/ focal mysql-tools#deb http://repo.mysql.com/apt/ubuntu/ focal mysql-tools-previewdeb-src http://repo.mysql.com/apt/ubuntu/ focal mysql-8.0
Execute below command to update apt cache on your system.
sudo apt update
After successfully updating the package repository, install MySQL Server by running the following command:
sudo apt install mysql-server
When asked if you want to continue with the installation, answer Y and hit ENTER.
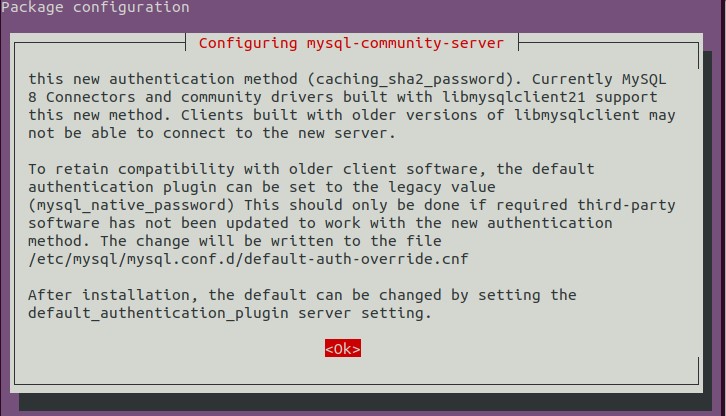
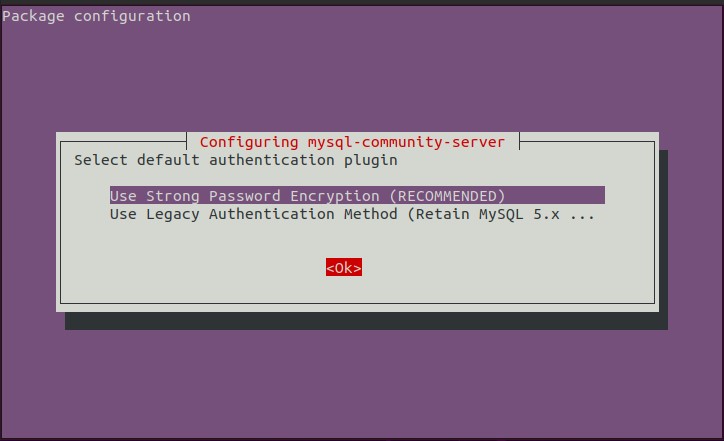
You will be prompted the following questions during the configuration:
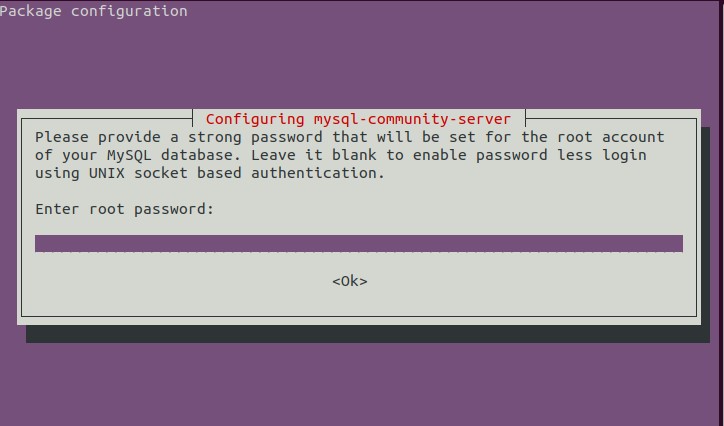
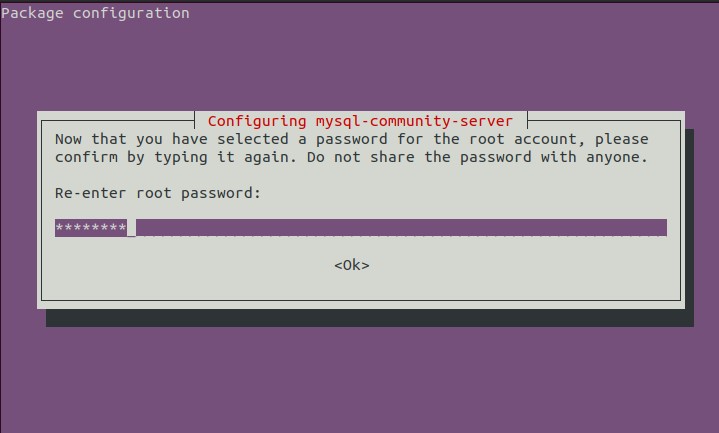
select tab and enter ok
mysql --version
you will get
mysql Ver 8.0.27 for Linux on x86_64 (MySQL Community Server - GPL)
Good! Now is time add a little more of security. The MySQL instance on your machine is insecure immediately after installation.
Securing MySQL
Secure your MySQL user account with password authentication by running the included security script:
sudo mysql_secure_installation
Enter your password and answer Y and you will get the following questions:
When it ask Disallow root login remotely? use N
Securing the MySQL server deployment.

Connecting to MySQL using a blank password.

VALIDATE PASSWORD COMPONENT can be used to test passwords
and improve security. It checks the strength of password
and allows the users to set only those passwords which are
secure enough. Would you like to setup VALIDATE PASSWORD component?

Press y|Y for Yes, any other key for No: Y <-- Type y or Y and press Enter to confirm

There are three levels of password validation policy:

LOW    Length >= 8
MEDIUM Length >= 8, numeric, mixed case, and special characters
STRONG Length >= 8, numeric, mixed case, special characters and dictionary file

Please enter 0 = LOW, 1 = MEDIUM and 2 = STRONG: 2 <-- Enter 2 to force strong passwords with a password length >= 8, numeric, mixed case, special characters and validation against a dictionary file

Please set the password for root here.

New password: <-- Enter your strong password
Re-enter new password: <-- Repeat your password

Estimated strength of the password: 50
Do you wish to continue with the password provided?(Press y|Y for Yes, any other key for No) : Y <-- MySQL has evaluated the strengh of your password in the line above. If you wish to continue with the password provided, type y or Y and confirm by pressing Enter.

By default, a MySQL installation has an anonymous user,
allowing anyone to log into MySQL without having to have
a user account created for them. This is intended only for
testing, and to make the installation go a bit smoother.
You should remove them before moving into a production
environment.

Remove anonymous users? (Press y|Y for Yes, any other key for No) : Y <-- Type y or Y to remove anonymous users from the MySQL server
Success.

Normally, root should only be allowed to connect from
'localhost'. This ensures that someone cannot guess at
the root password from the network.

Disallow root login remotely? (Press y|Y for Yes, any other key for No) : N <-- Type y our Y and press Enter to restrict connections to the database server from localhost. If you have need to access your database from a remote machine, enter any other key before confirming by pressing Enter.

Success.

By default, MySQL comes with a database named 'test' that
anyone can access. This is also intended only for testing,
and should be removed before moving into a production
environment.

Remove test database and access to it? (Press y|Y for Yes, any other key for No) : Y <-- Type y or Y to remove the MySQL test database then confirm by pressing Enter.
- Dropping test database...
Success.

- Removing privileges on test database...
Success.

Reloading the privilege tables will ensure that all changes
made so far will take effect immediately.

Reload privilege tables now? (Press y|Y for Yes, any other key for No) : Y <-- Type y or Y to reload the MySQL privilege table to ensure all changes made so far will take effect. Confirm by pressing Enter.

All done!
Allowing Remote Access to MySQL 8
MySQL instance is only configured to listen for local connections. This is MySQL’s default setting, but it won’t work for a remote database setup since MySQL must be able to listen for an external IP address where the server can be reached.
1) Allow access from any host
Locate the line that contain [mysqlid].
sudo nano /etc/mysql/mysql.conf.d/mysqld.cnf
Just add the following line to the file.*
bind-address = 0.0.0.0
If you bind MySQL to 0.0.0.0, then any machine that reaches the MySQL server can also connect with it.
[mysqld]
pid-file        = /var/run/mysqld/mysqld.pid
socket          = /var/run/mysqld/mysqld.sock
datadir         = /var/lib/mysql
log-error       = /var/log/mysql/error.log
bind-address    = 0.0.0.0
2) Allow the user to access from anywhere:
Log in Locally to MySQL Server
Finally, to log in to the MySQL interface, run the following command:
sudo mysql -u root -p
3) Create the root user
(yes, a new user because what exists is ‘root@localhost’ which is local access only):
Let us just add e new user to weak password for this project
SET GLOBAL validate_password.policy = 0;
SHOW VARIABLES LIKE 'validate_password%';
CREATE USER 'root'@'%' IDENTIFIED BY 'password';
3) Give the privileges:
GRANT ALL PRIVILEGES ON *.* TO 'root'@'%';
UPDATE mysql.user SET host='%' WHERE user='root';
4) Change authentication to password
ALTER USER 'root'@'%' IDENTIFIED WITH mysql_native_password BY 'password';
Or add new online user
create user 'ruslanmv'@'localhost' identified by 'password';
GRANT ALL PRIVILEGES ON *.* TO 'ruslanmv'@'%';
Well that’s it. But for the config changes to take action, restart your MySQL server by running
sudo systemctl restart mysql
for further issues go here.
Check if MySQL Service Is Running
Upon successfully installing MySQL, the MySQL service starts automatically.
Verify that the MySQL server is running by running:
sudo systemctl status mysql
The output should show that the service is operational and running.
Open MySQL port (default 3306) in the firewall for external connections. For that follow the below steps.
sudo iptables -A INPUT -i enp1s0 -p tcp --destination-port 3306 -j ACCEPT
Alternatively you can grant access to specific ip address.
iptables -A INPUT -i enp1s0 -s xxx.xxx.xxx.xxx -p tcp --destination-port 3306 -j ACCEPT
replace xxx.xxx.xxx.xxx with ip of the system from which you need to establish the connection.
For our test we dont need.
sudo iptables -S
we will get
-P INPUT ACCEPT
-P FORWARD ACCEPT
-P OUTPUT ACCEPT
-A INPUT -i enp1s0 -p tcp -m tcp --dport 3306 -j ACCEPT
Alternatively you can use sudo iptables -S INPUT or iptables -S OUTPUT
Good now is time to setup the server to enter remotely from windows.
Section 3. Install ssh server.
Install openssh-server
sudo apt-get updatesudo apt-get install openssh-server
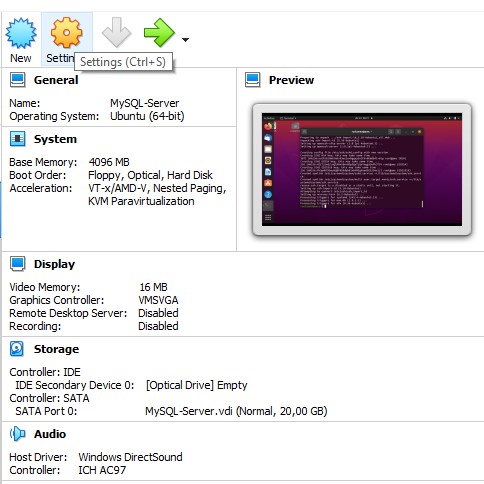
stop your virtualmachine.
Set the net of your virtualmachine:
click on settings & net:
Select NAT as connection and click on advanced, and set as in the picture below.
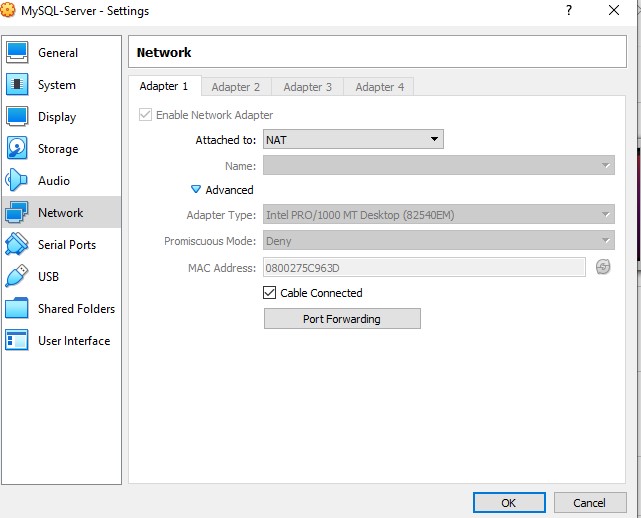
Click on port forwarding:
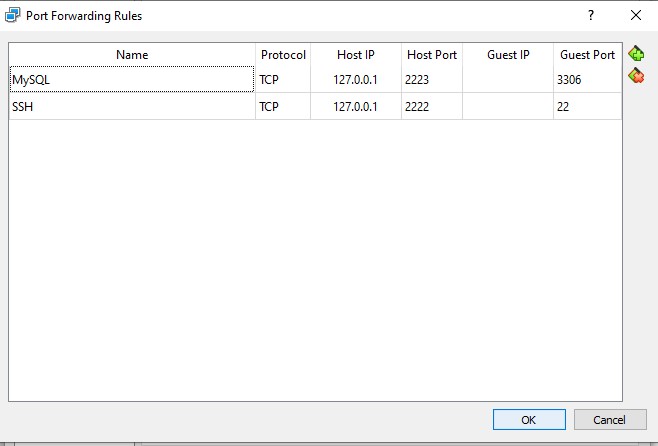
and set the MySQL parameters:
Name: MySQL
Protocol: TCP
Host IP: 127.0.0.1
Host Port: 2223
IP Guest: Empty
Port Guest: 3306
and set the SSH parameters:
Name: SSH
Protocol: TCP
Host IP: 127.0.0.1
Host Port: 2222
IP Guest: Empty
Port Guest: 22
and click OK. and start again your virtual machine. When your VM is started, open your terminal and try to connect.
Section 4 Log in Remotely to MySQL Server
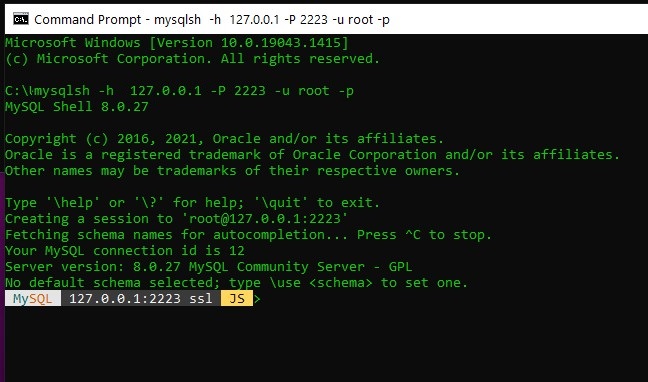
First you install MySQL Shell on Microsoft Windows using the MSI Installer, do the following:
Download package from http://dev.mysql.com/downloads/shell/.
When prompted, click Run and follow the steps in the Setup Wizard.
mysqlsh -h 127.0.0.1 -P 2223 -u root -p
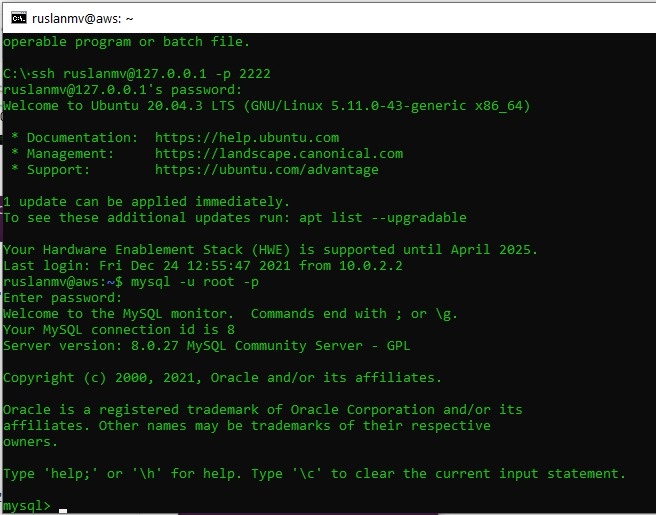
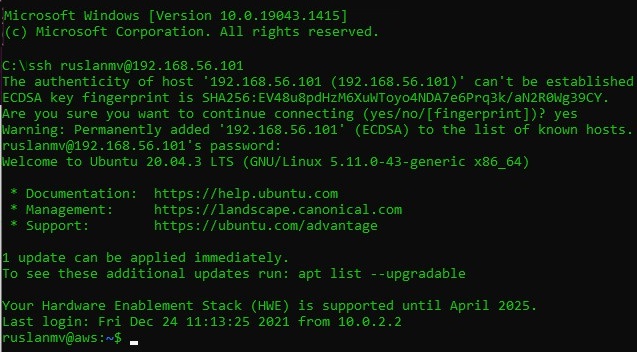
Login via ssh to MySQL Server
ssh [email protected] -p 2222
now you shoud be inside your virtualmachine. and then enter to you root local
mysql -u root -p
Troobleshooting
If you can’t connect try to disable or change settings to ubuntu firewall:
sudo ufw disable
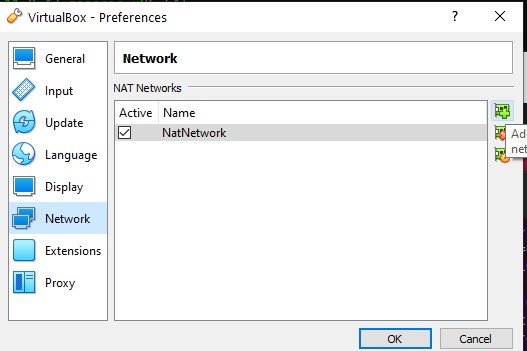
or try to connect to the ip of VM, we go to virtual box preferences and we add a Nat network if you dont have
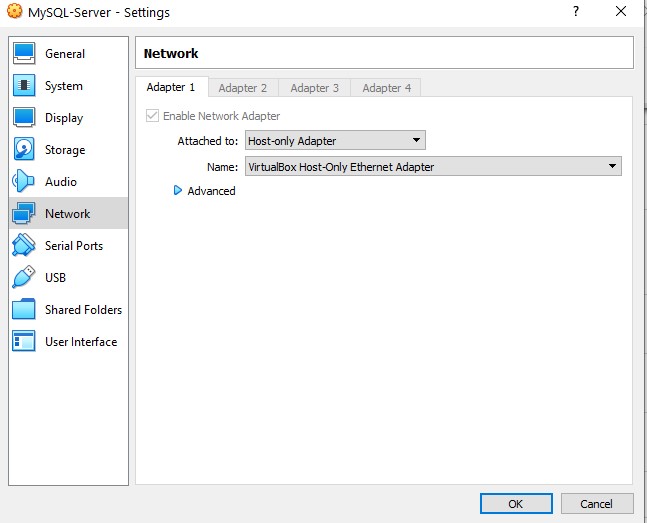
Back to Settings > Network and select adapter 1
Select Adapter only Host.
go inside the VM
sudo apt install net-tools
and get the ip number with ifconfig and get ip address:
ifconfig
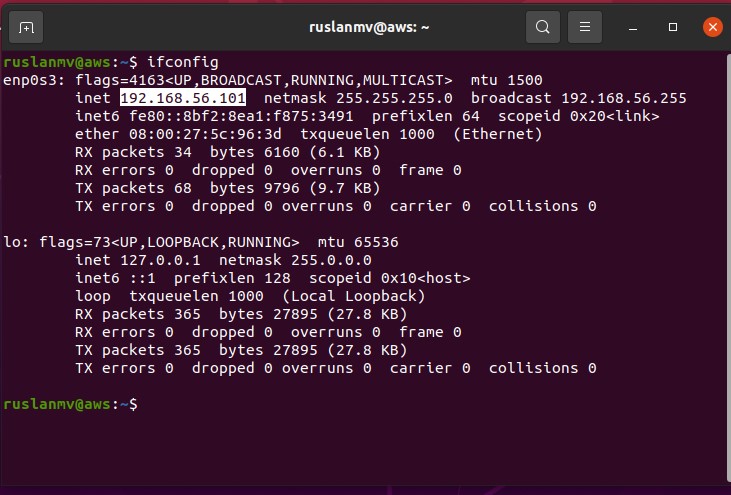
In my case the ip is 192.168.56.101, now from terminal I try to connect in ssh to the ip 192.168.56.101, you should put your username instead ruslanmv
Download the sample database from to this project
mkdir test
cd test
wget https://raw.githubusercontent.com/ruslanmv/How-to-create-a-dataframe-in-S3-from-SQL-queries/master/mysqlsampledatabase.sql
mysql -u root -p
source /home/ruslanmv/test/mysqlsampledatabase.sql
USE classicmodels;
SELECT * FROM customers;
Basically, those statements switch the current database to classicmodels and query data from the customers table.
If you see the customer data returned, you have successfully imported the sample database into the MySQL database server.
Congratulations ! You have installed a MySQL Server on a virtual machine in windows.
Leave a comment