
How to install Hadoop on Windows
Hello everyone, today we are going to to install Hadoop 3.3.0 on Windows 11.
Apache Hadoop is a collection of open-source software utilities that facilitates using a network of many computers to solve problems involving massive amounts of data and computation. It provides a software framework for distributed storage and processing of big data using the MapReduce programming model.
![]()
Prerequisites
- Java 8 runtime environment (JRE)
- Apache Hadoop 3.3.0
Step 1 - Download Hadoop binary package
The first step is to download Hadoop binaries from the official website. The binary package size is about 478M MB.
https://archive.apache.org/dist/hadoop/common/hadoop-3.3.0/hadoop-3.3.0.tar.gz
Step 2 - Unpack the package
After finishing the file download, we should unpack the package using 7zip or command line.
cd Downloads
Because I am installing Hadoop in folder Haddop of my C drive (C:\Hadoop)
we create the the directory
mkdir C:\Hadoop
then run the following command to unzip:
tar -xvzf hadoop-3.3.0.tar.gz -C C:\Hadoop\
The command will take quite a few minutes as there are numerous files included.
After the unzip command is completed we have to install the Java.
Step 3 - Java installation
Java is required to run Hadoop. If you have not installed Java , please install it.
You can install Java 8 from the following link here, different versions may be downloaded here.
I am choosing the Java SE Runtime Environment and I choose the Windows X64 version.
After finishing the file download we open a new command prompt, we should unpack the package
cd Downloads
Because I am installing Java in folder Java of my C drive (C:\Java)
we create the the directory
mkdir C:\Java
then run the following command to unzip:
tar -xvzf jre-8u361-windows-x64.tar.gz -C C:\Java\
Step 4 - Install Hadoop native IO binary
Hadoop on Linux includes optional Native IO support. However Native IO is mandatory on Windows and without it you will not be able to get your installation working. The Windows native IO libraries are not included as part of Apache Hadoop release. Thus we need to build and install it.
infoThe following repository already pre-built Hadoop Windows native libraries:
warning These libraries are not signed and there is no guarantee that it is 100% safe. We use it purely for test&learn purpose.
Download all the files in the following location and save them to the bin folder under Hadoop folder.
You can use Git by typing in your terminal
git clone https://github.com/ruslanmv/How-to-install-Hadoop-on-Windows.git
and then copy
cd How-to-install-Hadoop-on-Windows\winutils\hadoop-3.3.0-YARN-8246\bin
copy *.*  C:\Hadoop\hadoop-3.3.0\bin
Step 5 - Configure environment variables
Now we’ve downloaded and unpacked all the artefacts we need to configure two important environment variables.
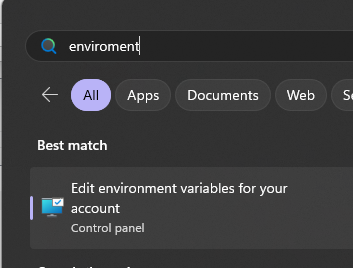
First you click the windows button and type environment
Configure Environment variables
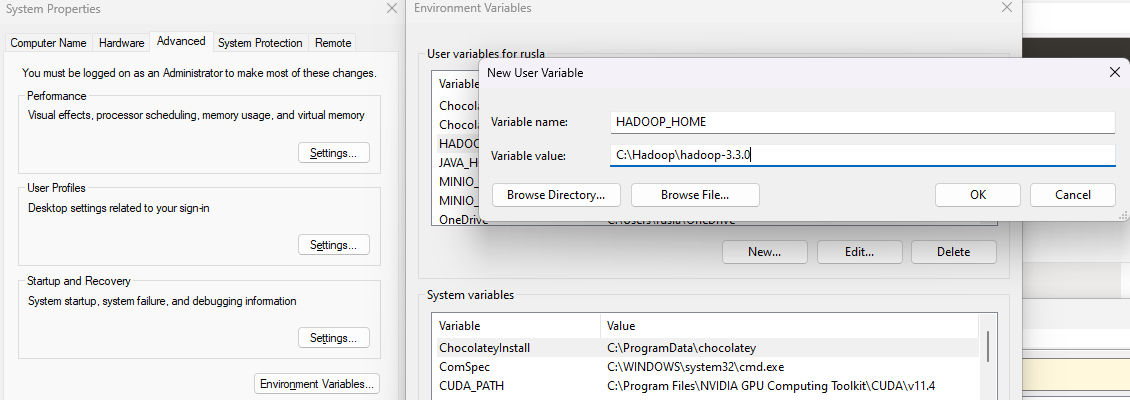
We configure JAVA_HOME environment variable
by adding new environment variable:
Variable name : JAVA_HOME
Variable value: C:\Java\jre1.8.0_361

the same with HADOOP_HOME environment variable:
Variable name : HADOOP_HOME
Variable value: C:\Hadoop\hadoop-3.3.0
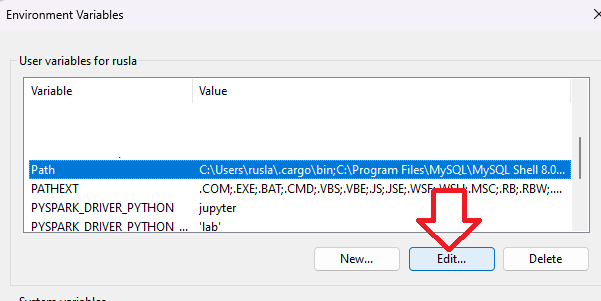
b) Configure PATH environment variable
Once we finish setting up the above two environment variables, we need to add the bin folders to the PATH environment variable. We click on Edit
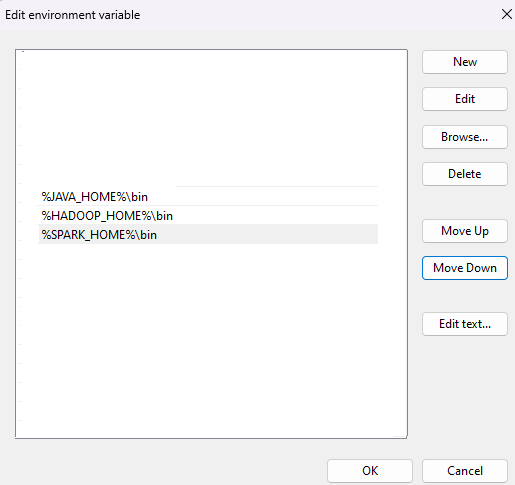
If PATH environment exists in your system, you can also manually add the following two paths to it:
%JAVA_HOME%/bin
%HADOOP_HOME%/bin
Verification of Installation
Once you complete the installation, Close your terminal window and open a new one and please run the following command to verify:
java -version
you will have
java version "1.8.0_361"
Java(TM) SE Runtime Environment (build 1.8.0_361-b09)
Java HotSpot(TM) 64-Bit Server VM (build 25.361-b09, mixed mode)
You should also be able to run the following command:
hadoop -version
java version "1.8.0_361"
Java(TM) SE Runtime Environment (build 1.8.0_361-b09)
Java HotSpot(TM) 64-Bit Server VM (build 25.361-b09, mixed mode)
Please verify that both versions of hadoop java and java coincide.
Finally directly to verify that our above steps are completed successfully:
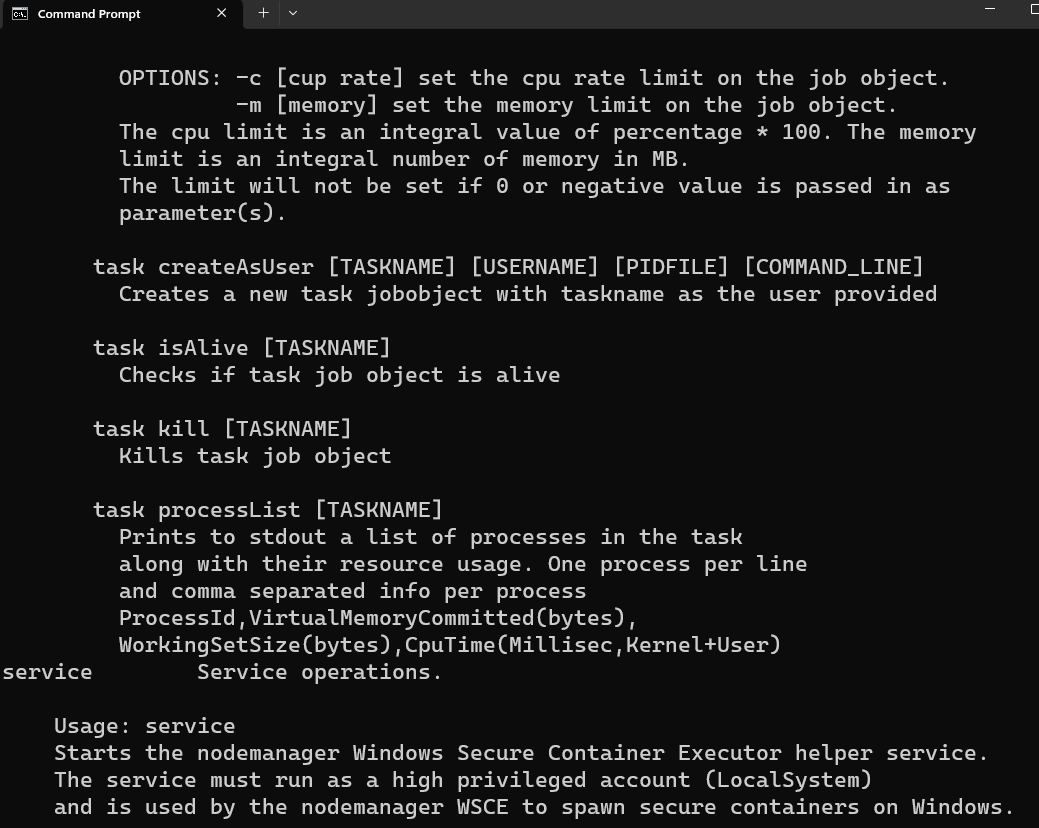
winutils.exe
Step 6 - Configure Hadoop
Now we are ready to configure the most important part - Hadoop configurations which involves Core, YARN, MapReduce, HDFS configurations.
Configure core site
Edit file core-site.xml in %HADOOP_HOME%\etc\hadoop folder.
For my environment, the actual path is C:\Hadoop\hadoop-3.3.0\etc\hadoop
Replace configuration element with the following:
<configuration>
   <property>
     <name>fs.default.name</name>
     <value>hdfs://0.0.0.0:19000</value>
   </property>
</configuration>
Configure HDFS
Edit file hdfs-site.xml in %HADOOP_HOME%\etc\hadoop folder.
Before editing, please correct two folders in your system: one for namenode directory and another for data directory. For my system, I created the following two sub folders:
mkdir C:\hadoop\hadoop-3.3.0\data\datanode
mkdir C:\hadoop\hadoop-3.3.0\data\namenode
Replace configuration element with the following (remember to replace the highlighted paths accordingly):
<configuration>
   <property>
     <name>dfs.replication</name>
     <value>1</value>
   </property>
   <property>
     <name>dfs.namenode.name.dir</name>
     <value>/hadoop/hadoop-3.3.0/data/namenode</value>
   </property>
   <property>
     <name>dfs.datanode.data.dir</name>
     <value>/hadoop/hadoop-3.3.0/data/datanode</value>
   </property>
</configuration>
Configure MapReduce and YARN site
Edit file mapred-site.xml in %HADOOP_HOME%\etc\hadoop folder.
Replace configuration element with the following:
<configuration>
    <property>
        <name>mapreduce.framework.name</name>
        <value>yarn</value>
    </property>
    <property>
        <name>mapreduce.application.classpath</name>
        <value>%HADOOP_HOME%/share/hadoop/mapreduce/*,%HADOOP_HOME%/share/hadoop/mapreduce/lib/*,%HADOOP_HOME%/share/hadoop/common/*,%HADOOP_HOME%/share/hadoop/common/lib/*,%HADOOP_HOME%/share/hadoop/yarn/*,%HADOOP_HOME%/share/hadoop/yarn/lib/*,%HADOOP_HOME%/share/hadoop/hdfs/*,%HADOOP_HOME%/share/hadoop/hdfs/lib/*</value>
    </property>
</configuration>
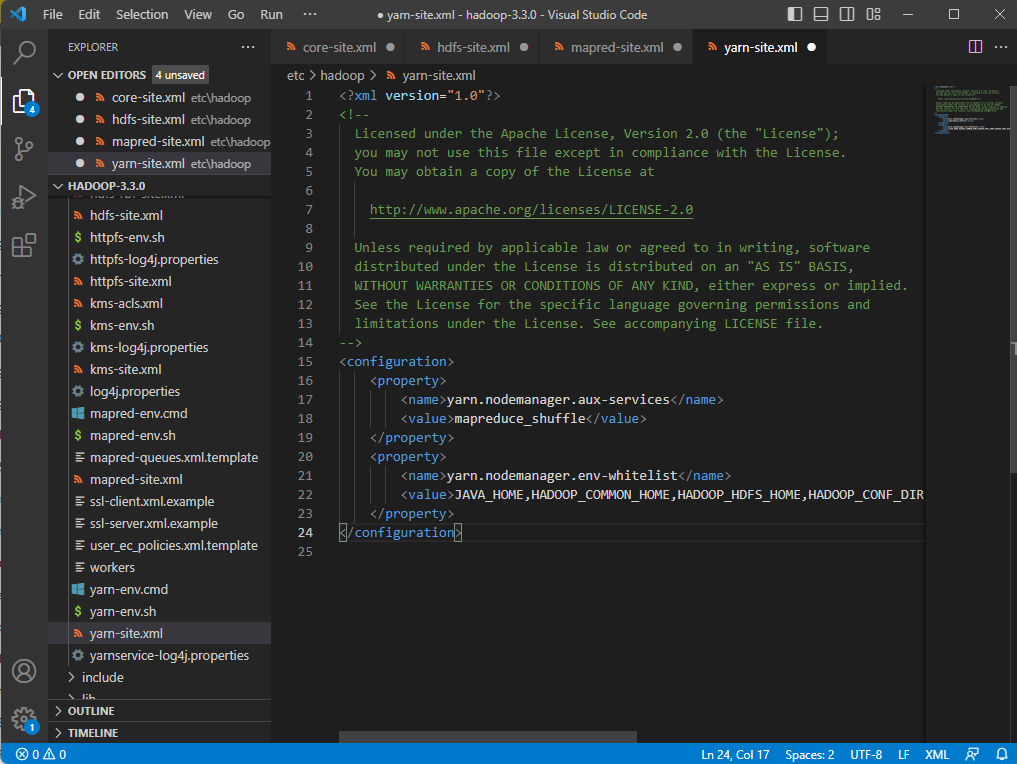
Edit file yarn-site.xml in %HADOOP_HOME%\etc\hadoop folder.
<configuration>
    <property>
        <name>yarn.nodemanager.aux-services</name>
        <value>mapreduce_shuffle</value>
    </property>
    <property>
        <name>yarn.nodemanager.env-whitelist</name>
        <value>JAVA_HOME,HADOOP_COMMON_HOME,HADOOP_HDFS_HOME,HADOOP_CONF_DIR,CLASSPATH_PREPEND_DISTCACHE,HADOOP_YARN_HOME,HADOOP_MAPRED_HOME</value>
    </property>
</configuration>
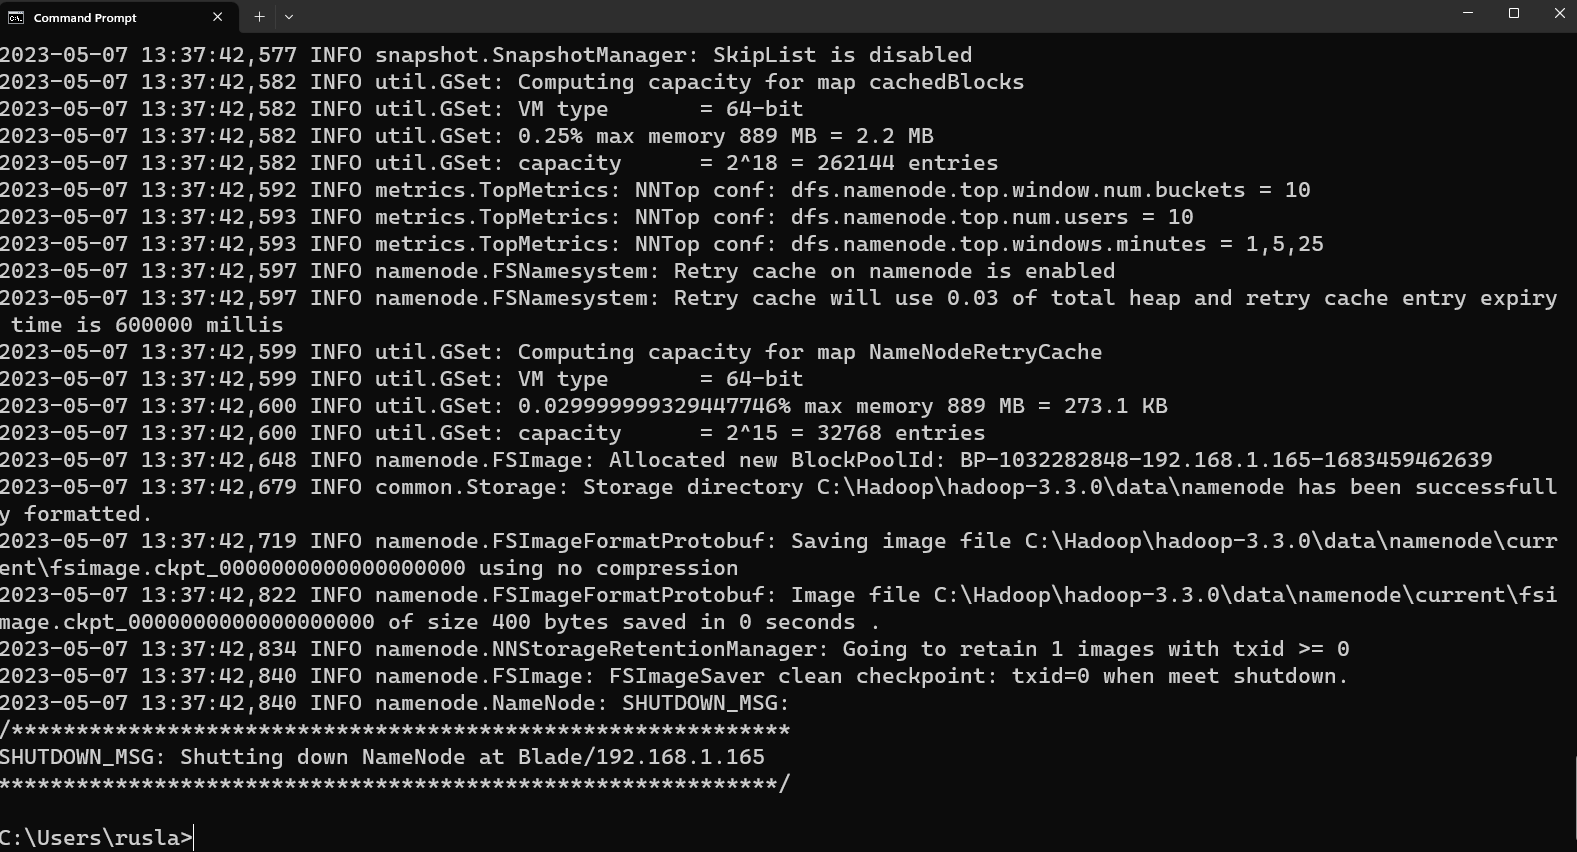
Step 7 - Initialise HDFS
Run the following command in Command Prompt
hdfs namenode -format
The following is an example when it is formatted successfully:
Step 8 - Start HDFS daemons
Run the following command to start HDFS daemons in Command Prompt:
%HADOOP_HOME%\sbin\start-dfs.cmd
Please click Allow access to the java.
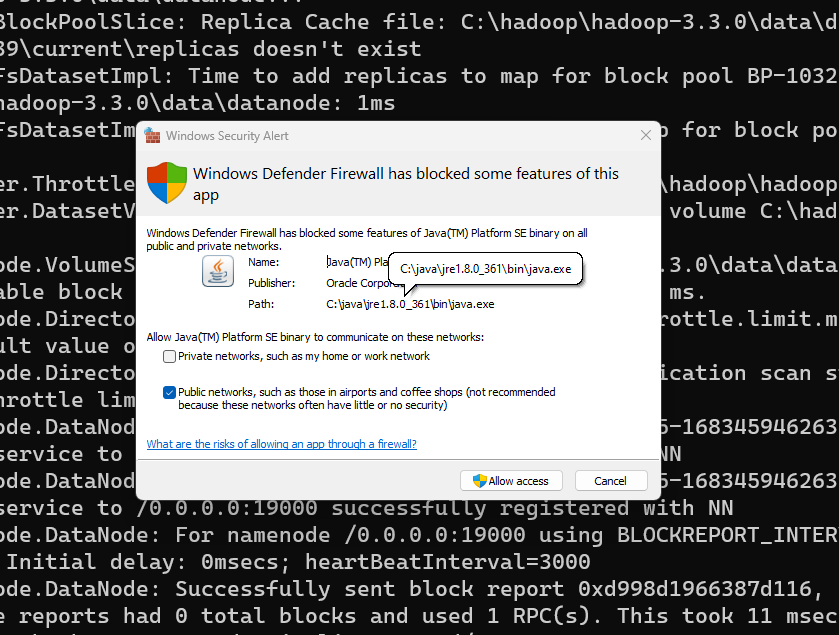
Two Command Prompt windows will open: one for datanode and another for namenode as the following screenshot shows:

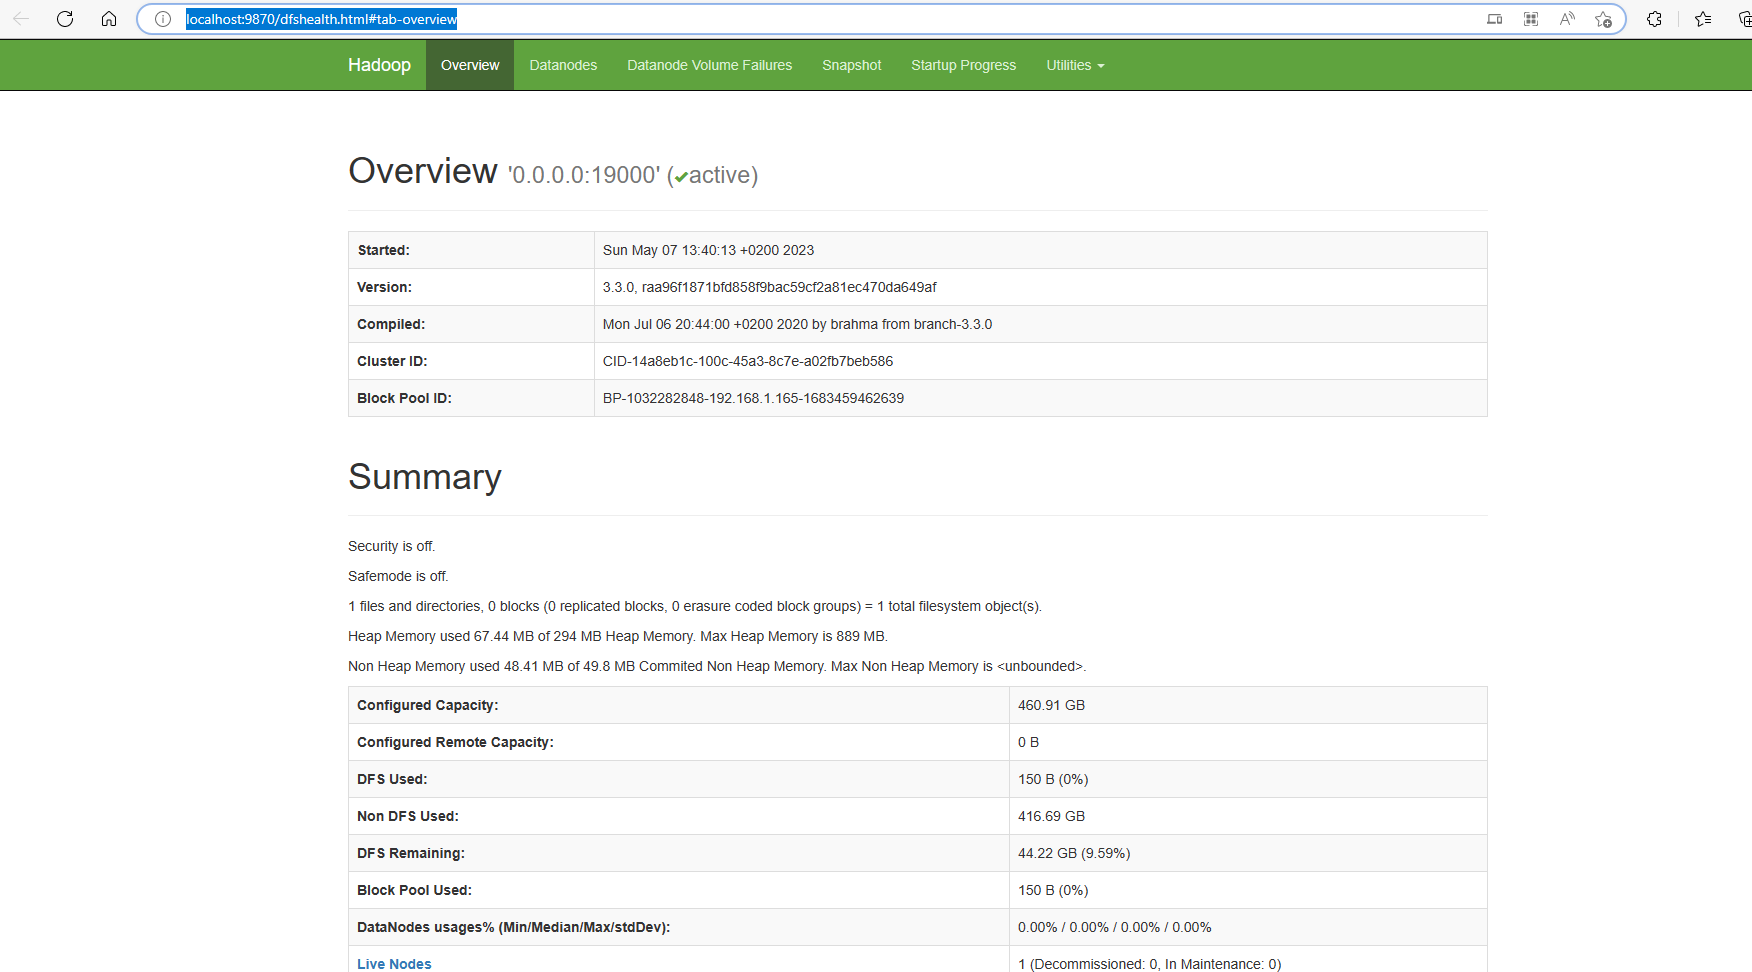
Verify HDFS web portal UI through this link:
http://localhost:9870/dfshealth.html#tab-overview.
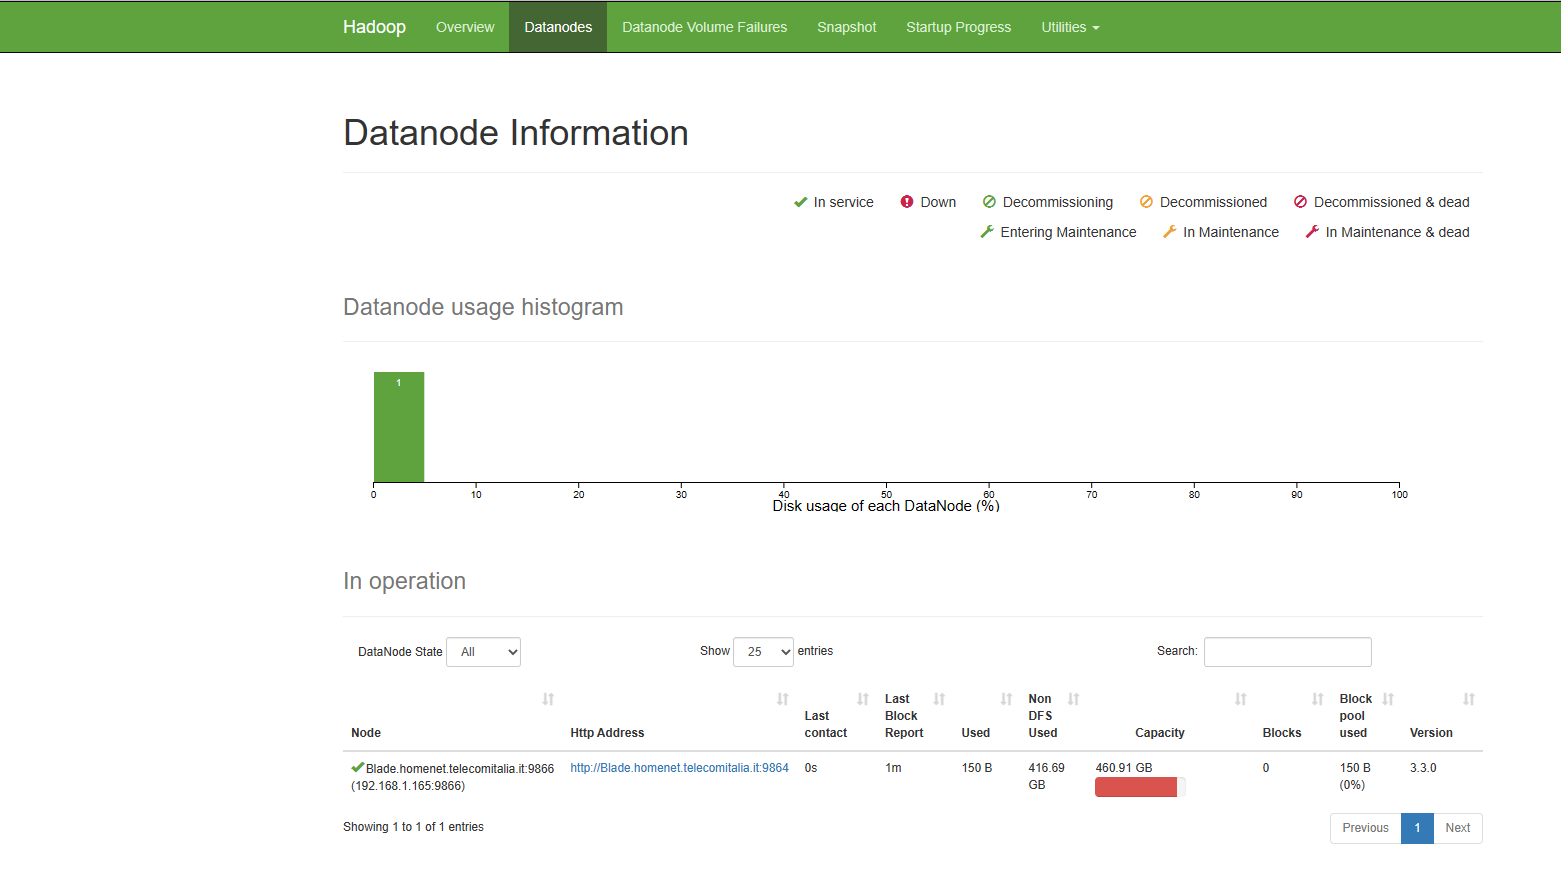
You can also navigate to a data node UI:
Step 9 - Start YARN daemons
warning You may encounter permission issues if you start YARN daemons using normal user. To ensure you don’t encounter any issues. Please open a Command Prompt window using Run as administrator.
Run the following command in an elevated Command Prompt window (Run as administrator) to start YARN daemons:
%HADOOP_HOME%\sbin\start-yarn.cmd
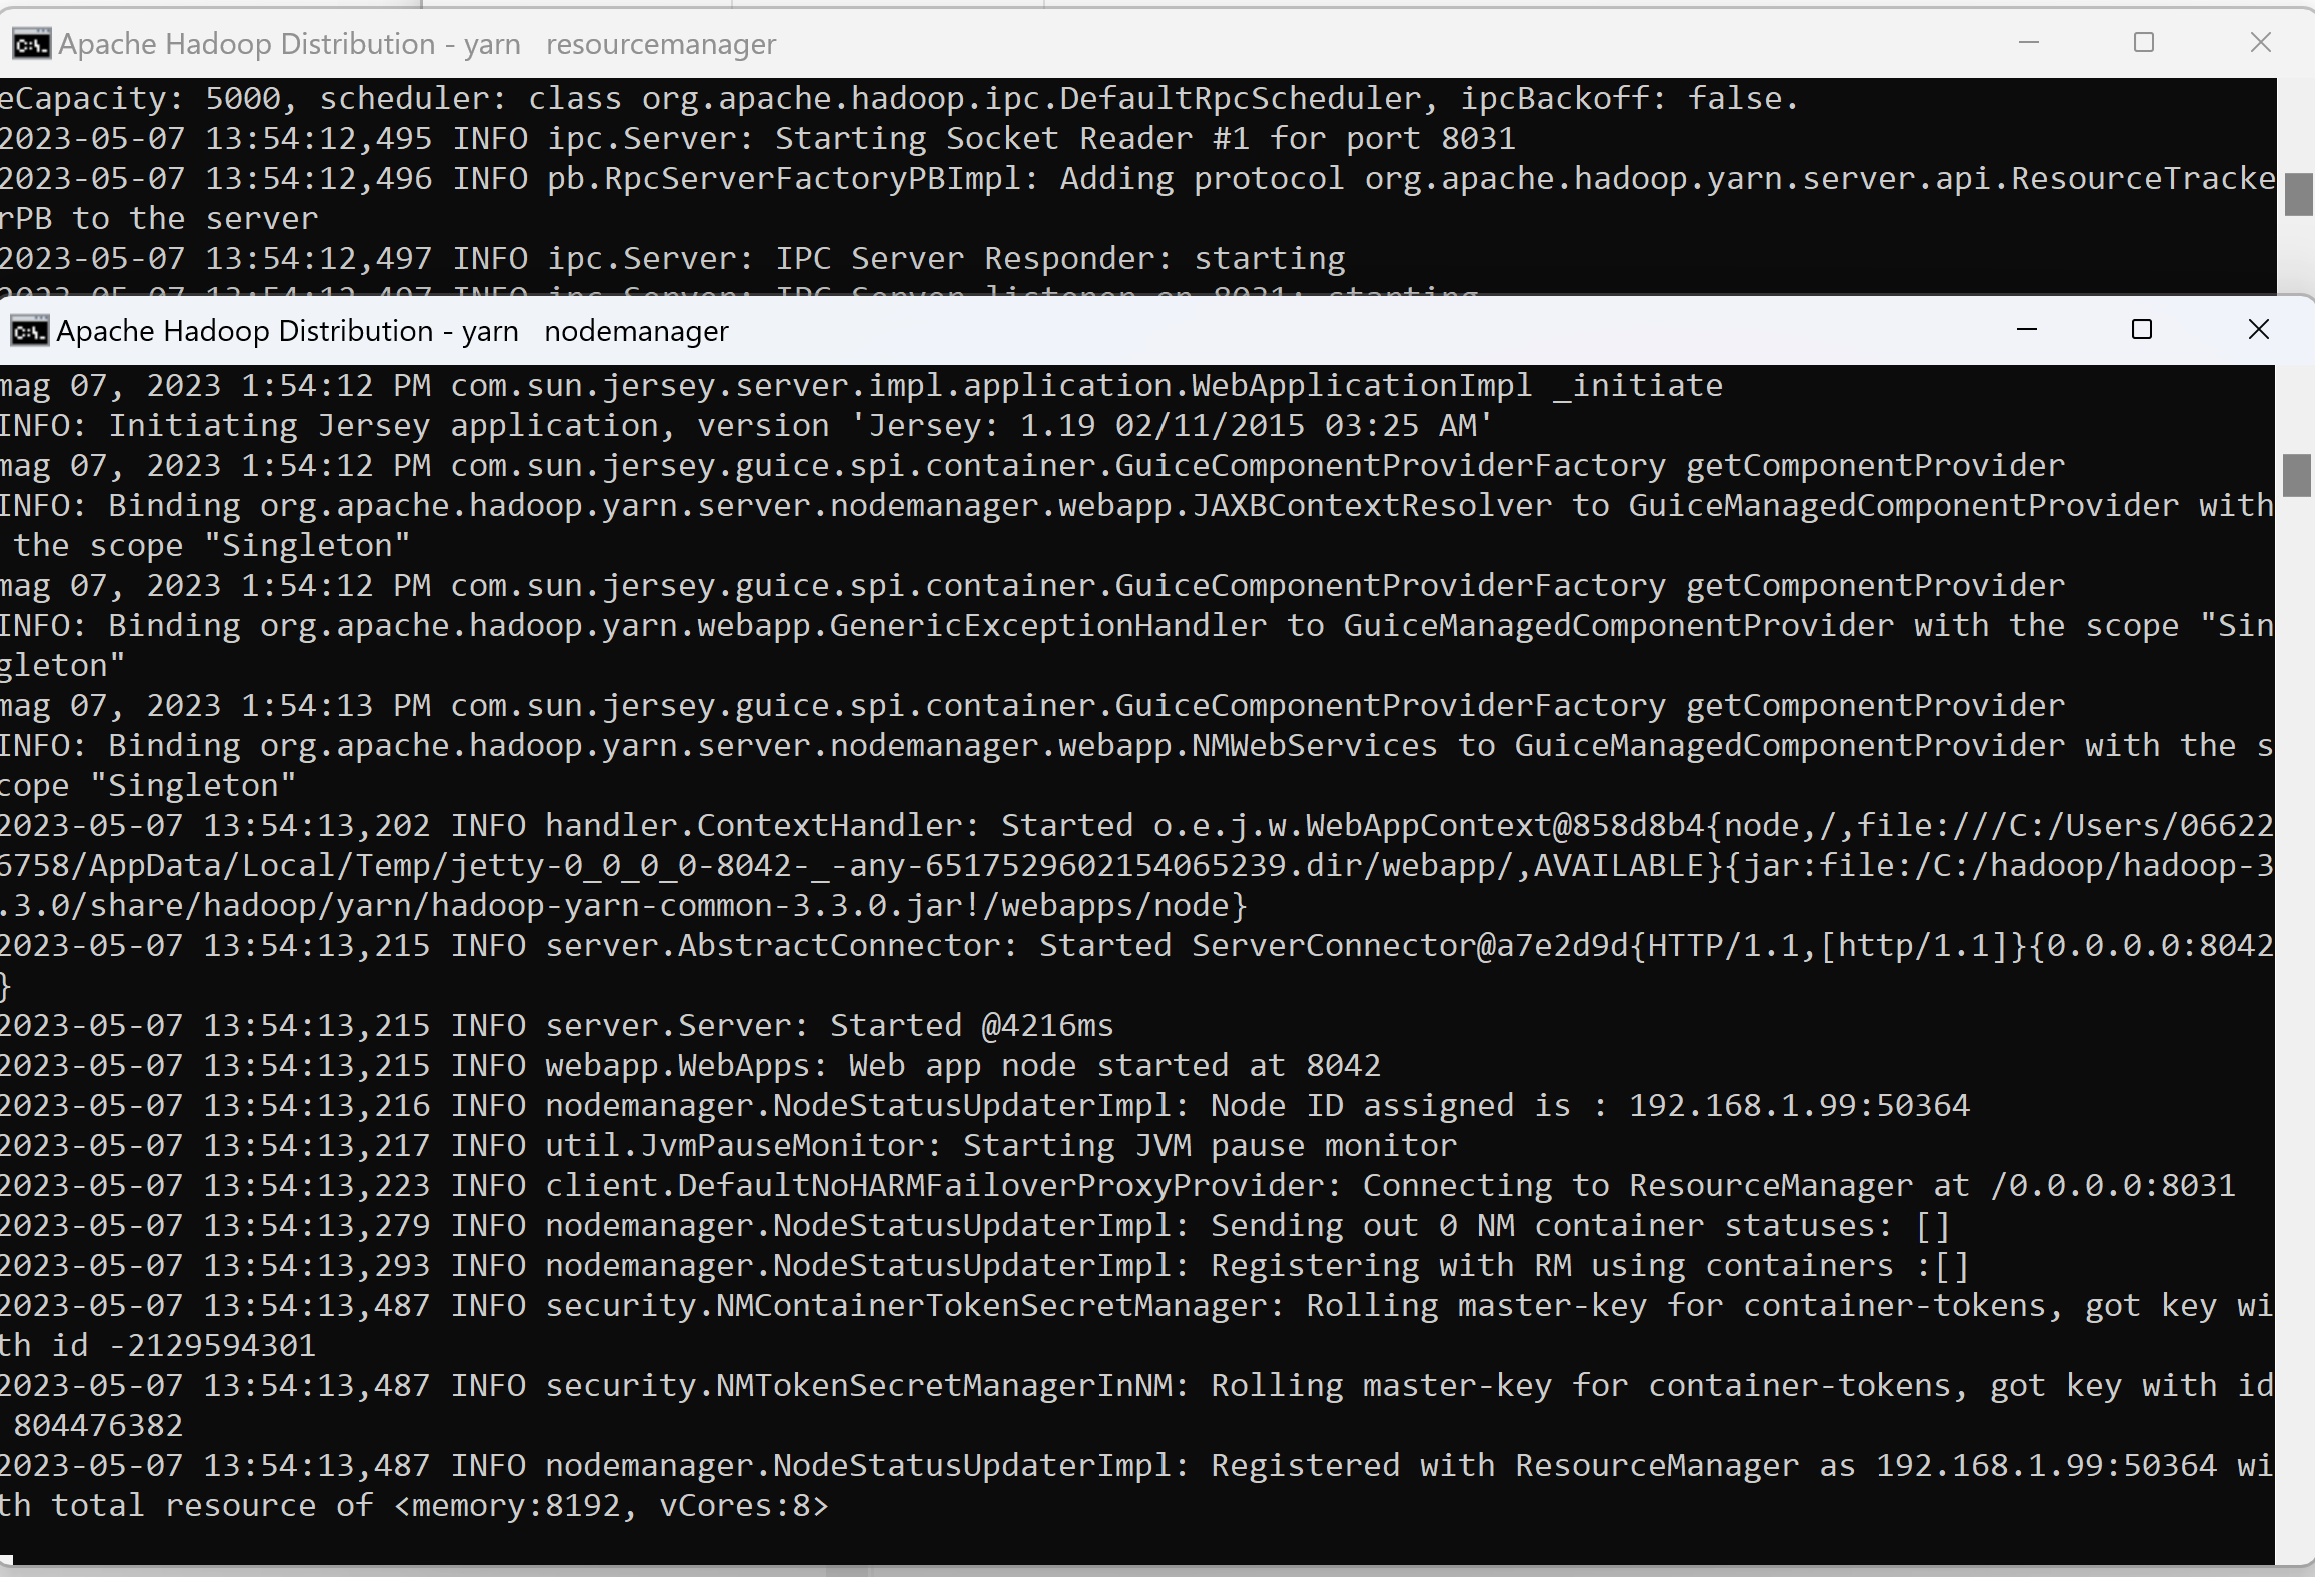
Similarly two Command Prompt windows will open: one for resource manager and another for node manager as the following screenshot shows:
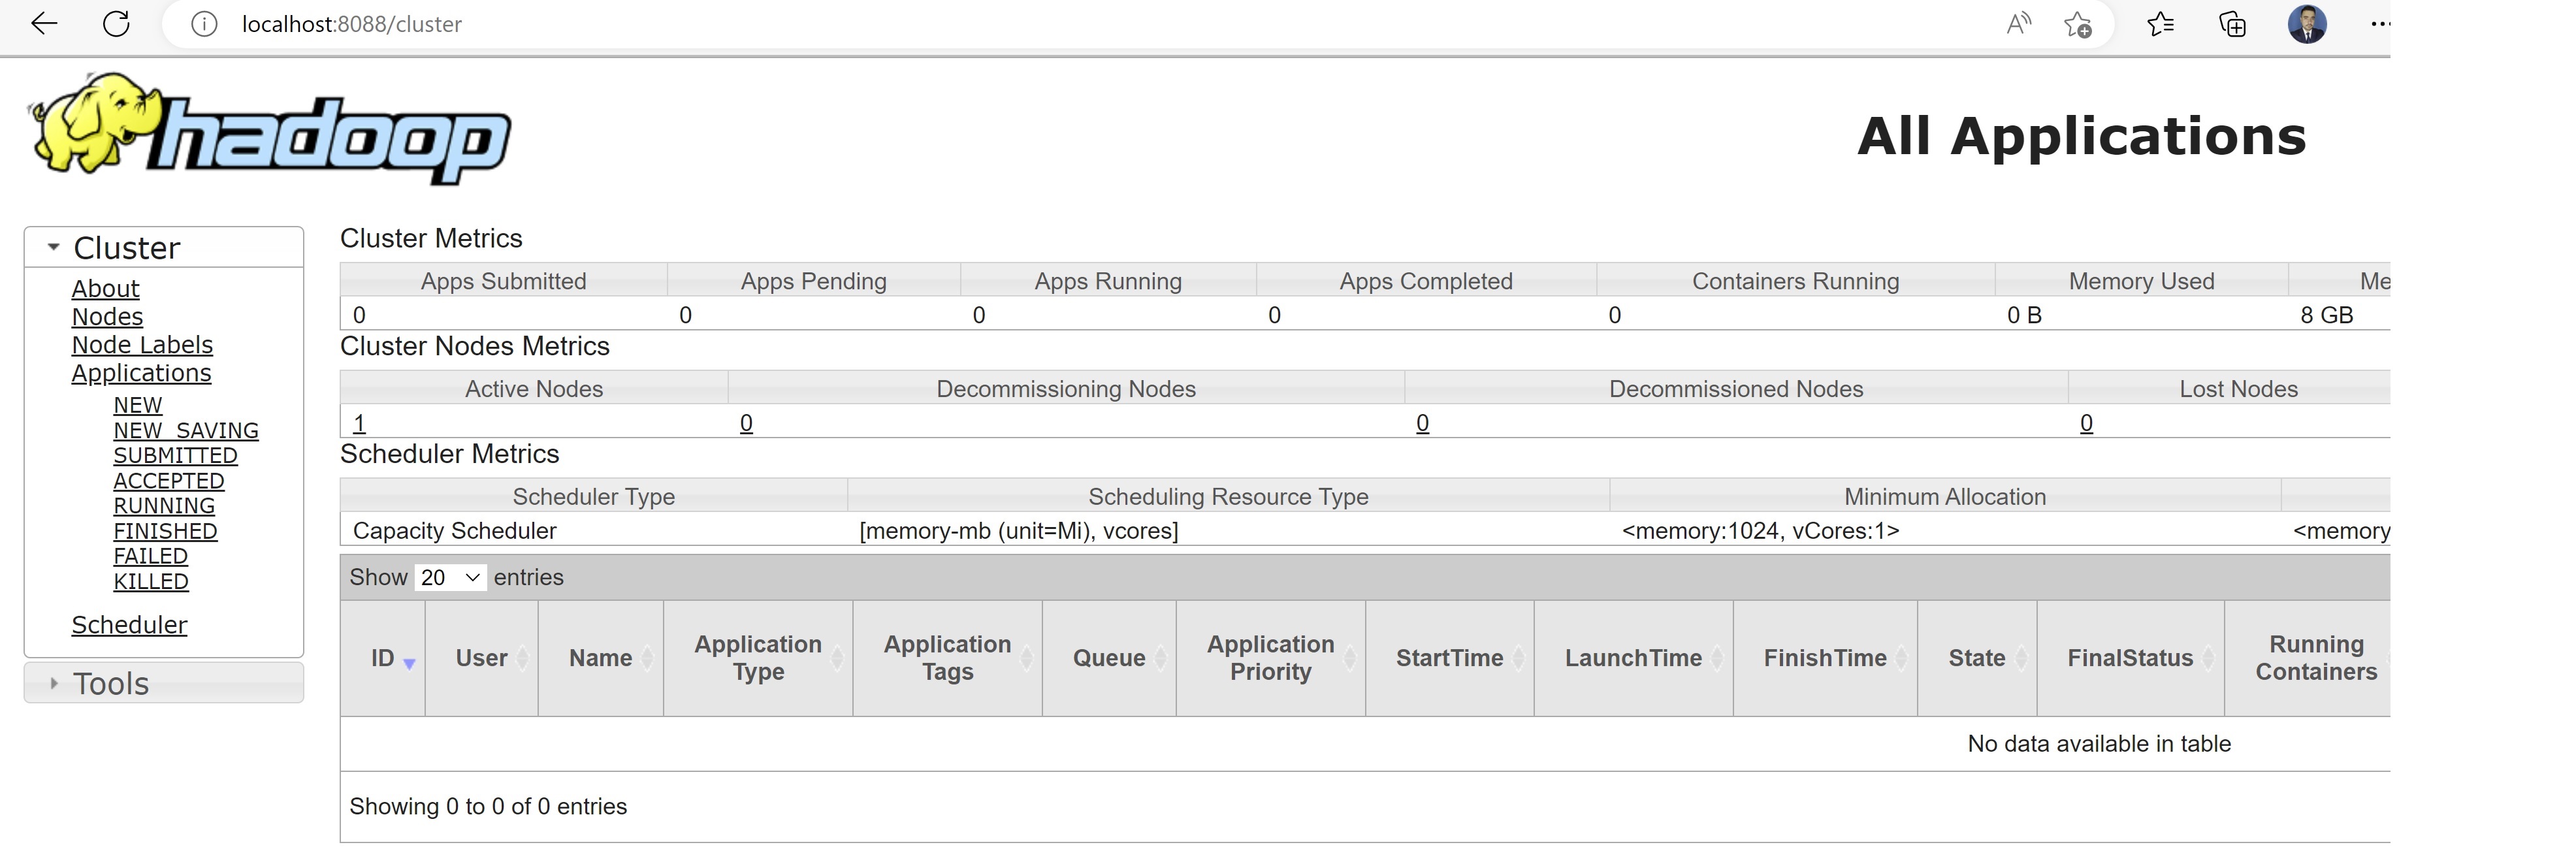
You can verify YARN resource manager UI when all services are started successfully.
Congratulations! You have installed Apache Hadoop on Windows 11.
Leave a comment