
ArXiv Research with Artificial Intelligence using IBM WatsonX.ai
Today, we are going to build an interesting application that allows you to search files in ArXiv using WatsonX and chat with Scientific papers. We are going to make questions and the program will search the papers from ArXiv that fit better to your question, and will answer from those papers.

Introduction
In the world of scientific research, finding relevant information from a vast pool of academic papers can be a daunting task. Traditional search engines often fall short in effectively retrieving the most pertinent articles, for example hindering progress in finding potential cures and treatments for critical health issues. However, with the advent of AI-powered technologies like WatsonX.ai and Streamlit, researchers now have a powerful tool at their disposal to navigate the wealth of knowledge stored in ArXiv.
In this blog, we will explore how to build an application that utilizes these cutting-edge technologies to answer scientific questions.
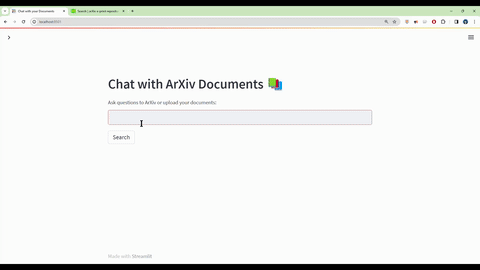
Demo: WatsonX with arXiv.org e-Print archive
The high-level structure of the program is as follows:
- Question Analysis: Analyze your question using the Artificial Intelligence of WatsonX
- Searching on ArXiv: Search for relevant papers on ArXiv
- Download multiple papers and extract their text content.
- Text Chunking: Divide the extracted text into smaller chunks that can be processed effectively.
- Language Model: The application utilizes a language model to generate vector representations (embeddings) of the text chunks.
- Similarity Matching: When you ask a question, the app compares it with the text chunks and identifies the most semantically similar ones.
- Response Generation: The selected chunks are passed to the language model, which generates a response based on the relevant contents.
Step 1: Environment Creation
There are several ways to create an environment in Python. In this tutorial, we will show two options.
- Conda method:
First, you need to install Anaconda from this link. Install it in the location C:\Anaconda3 and then check if your terminal recognizes conda by typing the following command:
C:\\conda --version
conda 23.1.0
The environment we will use is Python 3.10.11. You can create an environment called watsonx (or any other name you prefer) by running the following command:
conda create -n watsonx python==3.10.11
After creating the environment, activate it:
conda activate watsonx
Next, install the necessary packages by running the following command:
conda install ipykernel notebook
- Python native method:
First, install Python 3.10.11 from here. Then, create a virtual environment by running the following command:
python -m venv .venv
You will notice a new directory in your current working directory with the same name as your virtual environment. Activate the virtual environment:
.venv\Scripts\activate.bat
Upgrade pip:
python -m pip install --upgrade pip
Install the notebook package:
pip install ipykernel notebook
Step 2: Setup Libraries
Once we have our running environment, we need to install additional libraries. Install the necessary libraries by running the following command:
pip install streamlit python-dotenv PyPDF2 arxiv langchain htmlTemplates ibm_watson_machine_learning requests pandas
Step 3: Getting API from IBM Cloud
To obtain an API key from IBM Cloud, follow these steps:
- Sign in to your IBM Cloud account at https://cloud.ibm.com.
- In the IBM Cloud dashboard, click on your account name in the top right corner.
- From the dropdown menu, select “Manage” to go to the Account settings.
- In the left-hand menu, click on “IBM Cloud API keys” under the “Access (IAM)” section.
- On the “API keys” page, click on the “Create an IBM Cloud API key” button.
- Provide a name for your API key and an optional description.
- Select the appropriate access policies for your API key if needed.
- Click on the “Create” button to generate the API key.
- Once the API key is created, you will see a dialog box displaying the API key value. Make sure to copy and save this key as it will not be shown again.
Please note that the steps above are based on the current IBM Cloud interface, and the steps may vary slightly depending on any updates or changes made to the IBM Cloud dashboard. If you encounter any difficulties or if the steps do not match your IBM Cloud interface, I recommend referring to the IBM Cloud documentation or contacting IBM support for further assistance.
To obtain the Project ID for IBM Watsonx, you will need to have access to the IBM Watson Machine Learning (WML) service. Here are the steps to retrieve the Project ID:
- Log in to the IBM Cloud Console (https://cloud.ibm.com) using your IBM Cloud credentials.
- Navigate to the Watson Machine Learning service.
- Click on the service instance associated with your Watsonx project.
- In the left-hand menu, click on “Service credentials”.
- Under the “Credentials” tab, you will find a list of service credentials associated with your Watsonx project. Click on the name of the service credential that you want to use.
- In the JSON object, you will find the “project_id” field. The value of this field is your Project ID.
Add the API key to the .env file in the project directory.
API_KEY=your_api_key
PROJECT_ID=your_projec_id
If you have a high-end NVIDIA GPU card, you can install the pytorch capability with CUDA:
pip install torch torchvision torchaudio --index-url https://download.pytorch.org/whl/cu117
Step 4: Creation of app.py
Create a file app.py with the following code:
and we add the following CSS file htmlTemplates.py
Step 5: Running your program
To use the ArXiv Chatter App, follow these steps:
- Ensure that you have installed the required dependencies and added the API key to the
.envfile. - Run the
main.pyfile using the Streamlit CLI. Execute the following command:
streamlit run app.py
-
The application will launch in your default web browser, displaying the user interface.
-
Load multiple PDF documents into the app by following the provided instructions.
-
Ask questions in natural language about the loaded PDFs using the chat interface.
Conclusion:
By harnessing the power of AI, specifically WatsonX.ai and Streamlit, we have created an innovative application that revolutionizes the way researchers search in ArXiv. This technology empowers scientists to find solutions to critical health problems efficiently, potentially leading to groundbreaking discoveries and advancements in medical research. With AI as our ally, we can pave the way for a healthier future.
Troubleshooting
You can get a list of existing Conda environments using the command below:
Delete an Environment in Conda
conda env list
Before you delete an environment in Conda, you should first deactivate it. You can do that using this command:
conda deactivate
Once you’ve deactivated the environment, you will be switched back to the base environment. To delete an environment, run the command below:
conda remove --name ENV_NAME --all
Faiss issues:
If you encounter the following error:
INFO:faiss.loader:Loading faiss with AVX2 support.
INFO:faiss.loader:Could not load library with AVX2 support due to:
ModuleNotFoundError("No module named 'faiss.swigfaiss_avx2'")
INFO:faiss.loader:Loading faiss.
INFO:faiss.loader:Successfully loaded faiss.
Using Command Prompt (cmd):
-
Open Command Prompt as an administrator.
-
Navigate to the directory where you want to create the symbolic link using the
cdcommand. For example, if you want to create the link in your user folder, you can use:cd your_python_path/site-packages/faissYou can retrieve your Python path by typing
conda info. -
Create the symbolic link using the
mklinkcommand as follows:mklink swigfaiss_avx2.py swigfaiss.pyThis command creates a symbolic link named
swigfaiss_avx2.pythat points toswigfaiss.py.
Using Linux:
cd your_python_path/site-packages/faiss
ln -s swigfaiss.py swigfaiss_avx2.py
Contributing
You can find this repository here is intended for educational purposes.
Congratulations! You can Search and Chat with your Scientific Papers by using WatsonX AI
Leave a comment