Machine Learning with Google Cloud Platform with AutoML and VertexAI
Hello everyone today I want to discuss something interesting about how to create an automatic Machine Learning model by using the AutoML feature that provides Google Cloud Platform.
Let us assume that you have one dataset which you should create a machine learning model, you don’t have too much time to think which model to use and you need to create a machine learning model asap. Fortunately your company give you the possibility to use the cloud resources of Google.
Then for this special case, you can can use the AutoML with Vertex AI.
To illustrate how to create a machine learning model with few clicks , I will take an example of public dataset of Fraud Detection, and we will create a binary classification by using the AutoML. In similar way you can use to another types of ML models that I will discuss during this blog post.
Step 1 - Activate Cloud Shell
First we login into our console of Google Cloud Platform (GCP) account

Then after you login to your Cloud Console in the top right toolbar, to launch Notebooks with Vertex AI.
Step 2 Enable the Vertex AI API
Click on the Navigation Menu and navigate to Vertex AI, then click Vertex AI > Dashboard, and then click Enable Vertex AI API.

Step 2 Create a Notebooks instance
-
Still on the Vertex AI page, in the left menu click on Workbench.
-
On the Notebook instances page, click New Notebook > Python 3.

-
In the New notebook instance dialog, use the default settings, then click Create. The new VM will take 2-3 minutes to start.

-
Click Open JupyterLab. A JupyterLab window will open in a new tab.

With this notebook you can open Python 3 and load the endpoint of your machine learning model that you will create in the next section.
Step 3 - Creation of the Machine Learning model
In Vertex AI, you can create managed datasets for a variety of data types. You can then generate statistics on these datasets and use them to train models with AutoML or use your own custom model code.
-
In the Vertex AI navigation menu, click Datasets.

-
Click Create dataset. For Dataset name, type a name like
fraud_detection.
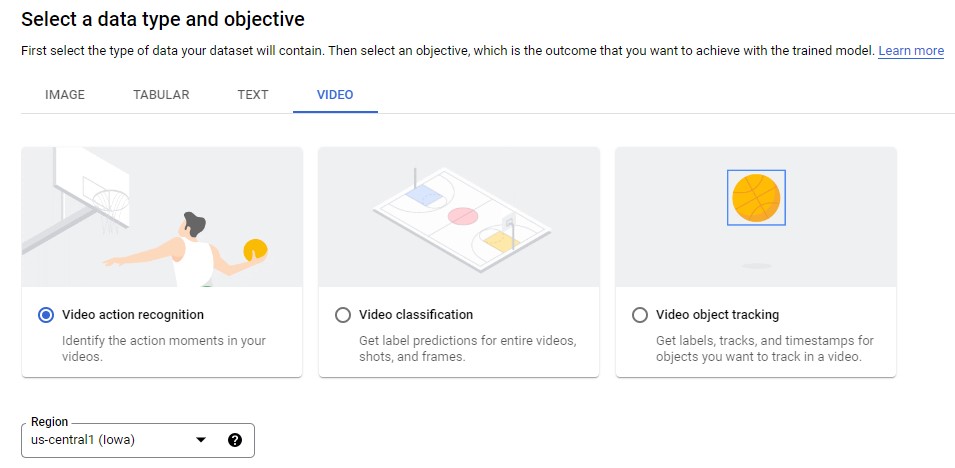
Types of Machine Learning Models for VertexAI
There are different machine learning models that can be handled by Google Cloud Platform,
For Images
- Image Classification ( Single-Label)
- Image Classification ( Multi-Label)
- Image Object detection
- Image Segmentation

For tabular data
- Regression/Classification
- Forecasting

For text data
- Text Classification ( Single-Label)
- Text Classification ( Multi-Label)
- Text entity extraction
- Text sentiment analysis

For video
- Video action recognition
- Video classification
- Video object tracking

Depending the type of data of your dataset will contain. Then we need to select an objective, which is the outcome that you want to achieve with the trained mode
Step 4. Selection of the Machine Learning case
For this blog post project we choose the the Tabular data type, and then select Regression/classification.

and we click Create.
Step 5. Import data from BigQuery
In the created dataset, there are a few options for importing data to managed datasets in Vertex.

You can:
- Upload CSV files from your computer.
- Select CSV files from Cloud Storage.
- Select a table or view from BigQuery.
For this project you will upload data from a public BigQuery table.
-
On the Add data to your dataset page, for Select a data source, choose Select a table or view from BigQuery.

For the BigQuery path, add the following:
bigquery-public-data.ml_datasets.ulb_fraud_detection
then Click Continue.
Your result should look similar to this image:

To see additional information about this dataset, click Generate statistics. This dataset contains real credit card transactions. Most of the column names have been obscured, which is why they are called V1, V2, etc.
Step 6. Train a model with AutoML
With a managed dataset uploaded, you are ready to train a model with this data. You will train a classification model to predict whether a specific transaction is fraudulent. Vertex AI gives you two options for training models:
-
AutoML: Train high-quality models with minimal effort and ML expertise.
-
Custom training: Run your custom training applications in the cloud by using one of Google Cloud’s pre-built containers or your own.
In this blog we use AutoML for training.
Start the training job
-
On the dataset detail page, on the right side, click Train new model.

-
For Objective, select Classification, and then select AutoML.
-
Click Continue.

Under Advanced options you can specify a train/test split if you don’t want Vertex to handle this automatically. For this project you use random assignment, but you can also specify this manually when you upload a CSV of your data, or you can have the data split chronologically if it has a Time column.
-
Under Model details, for Target column, select Class (INTEGER). The integer indicates whether a particular transaction was fraudulent (0 for non-fraud, 1 for fraud).
-
Click Continue.

-
Scroll down the page and click Advanced options.
-
For Optimization objective, select AUC PRC. Because this dataset is heavily imbalanced (less than 1% of the data contains fraudulent transactions), this option maximizes precision-recall for the less common class.
-
Click Continue.

-
For Budget, type 1, and leave early stopping enabled. Training your AutoML model for 1 compute hour is typically a good start for understanding whether there is a relationship between the features and label you’ve selected. From there, you can modify your features and train for more time to improve model performance.
Training will take slightly longer than two hours to account for time to spin up and tear down resources.
If you want to spend money you can click Click Start training.

Step 7. Vertex AI Models
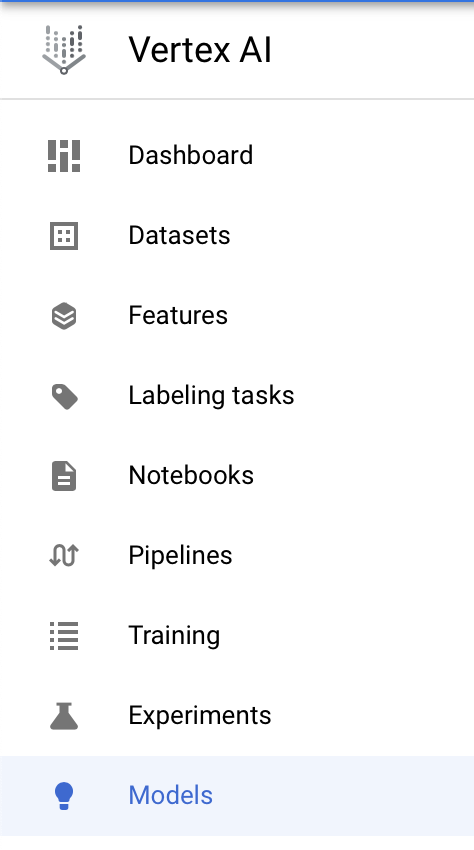
Once the model has been successfully trained, you can see a custom trained model if you head to Vertex AI ➞ Models


Step 7 Deploy the model
Before you use your model to make predictions, you need to deploy it to an Endpoint. You can do this by calling the deploy function on the Model resource. This will do two things:
- Create an
Endpointresource for deploying theModelresource to. - Deploy the
Modelresource to theEndpointresource.
Endpoint
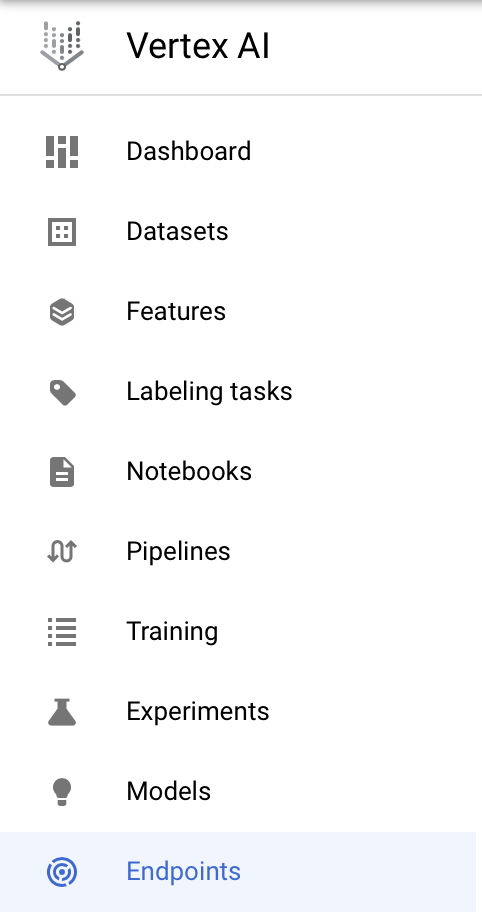
In order to view your deployed endpoint, you can head over to Vertex AI ➞ Endpoints

You can check if your endpoint is in the list of the currently deployed/deploying endpoints.
To view the details of the endpoint that is currently deploying, you can simply click on the endpoint name.
Once deployment is successfull, you should be able to see a green tick next to the endpoint name
Step 8 Make a prediction request
Send an online prediction request to your deployed model.
AUTH_TOKEN = 'REPLACE_WITH_YOUR_TOKEN'

data = '{"endpointId": "2416330733665648640","instance": "[{Time: 80422,Amount: 17.99,V1: -0.24,V2: -0.027,V3: 0.064,V4: -0.16,V5: -0.152,V6: -0.3,V7: -0.03,V8: -0.01,V9: -0.13,V10: -0.18,V11: -0.16,V12: 0.06,V13: -0.11,V14: 2.1,V15: -0.07,V16: -0.033,V17: -0.14,V18: -0.08,V19: -0.062,V20: -0.08,V21: -0.06,V22: -0.088,V23: -0.03,V24: 0.01,V25: -0.04,V26: -0.99,V27: -0.13,V28: 0.003}]"}'

import requests
headers = {
    'Content-type': 'application/json',
    'Authorization': 'Bearer ' + AUTH_TOKEN
}
response = requests.post('https://sml-api-vertex-kjyo252taq-uc.a.run.app/vertex/predict/tabular_classification', headers=headers, data=data
Add a cell in your notebook to print the prediction results:
print(response.json())
Step 9 Cleaning up
To clean up all Google Cloud resources used in this project, you can delete the Google Cloud project you used for the tutorial.
Otherwise, you can delete the individual resources you created in this tutorial:
- Training Job
- Model
- Endpoint
To delete the notebook entirely, click Delete.
To delete the endpoint you deployed, in the Endpoints section of your Vertex AI console, click Delete. Then, click Undeploy.
To remove the endpoint, click the overflow menu. Then click Remove endpoint.
Congratulations! You have used Vertex AI to train and serve a model with tabular data. You have build a fraud detection model to determine whether a particular credit card transaction should be classified as fraudulent.


Leave a comment