Cloudera HDP Sandbox on AWS EC2

In this tutorial, we will install the Hortonworks Data Platform (HDP) HDP 3.0.1/ HDP2.6.5 Sandbox Through Docker on AWS on an single node EC2 Instance.
Apache Hadoop is a layered structure to process and store massive amounts of data. In our case, Apache Hadoop will be recognized as an enterprise solution in the form of HDP. At the base of HDP exists our data storage environment known as the Hadoop Distributed File System. When data files are accessed by Hive, Pig or another coding language, YARN is the Data Operating System that enables them to analyze, manipulate or process that data. HDP includes various components that open new opportunities and efficiencies in healthcare, finance, insurance and other industries that impact people.
![]()
Steps
1.Login in to the AWS Console and search the EC2 (Virtual Server in the Cloud) services and we launch a service.
https://aws.amazon.com/it/console/
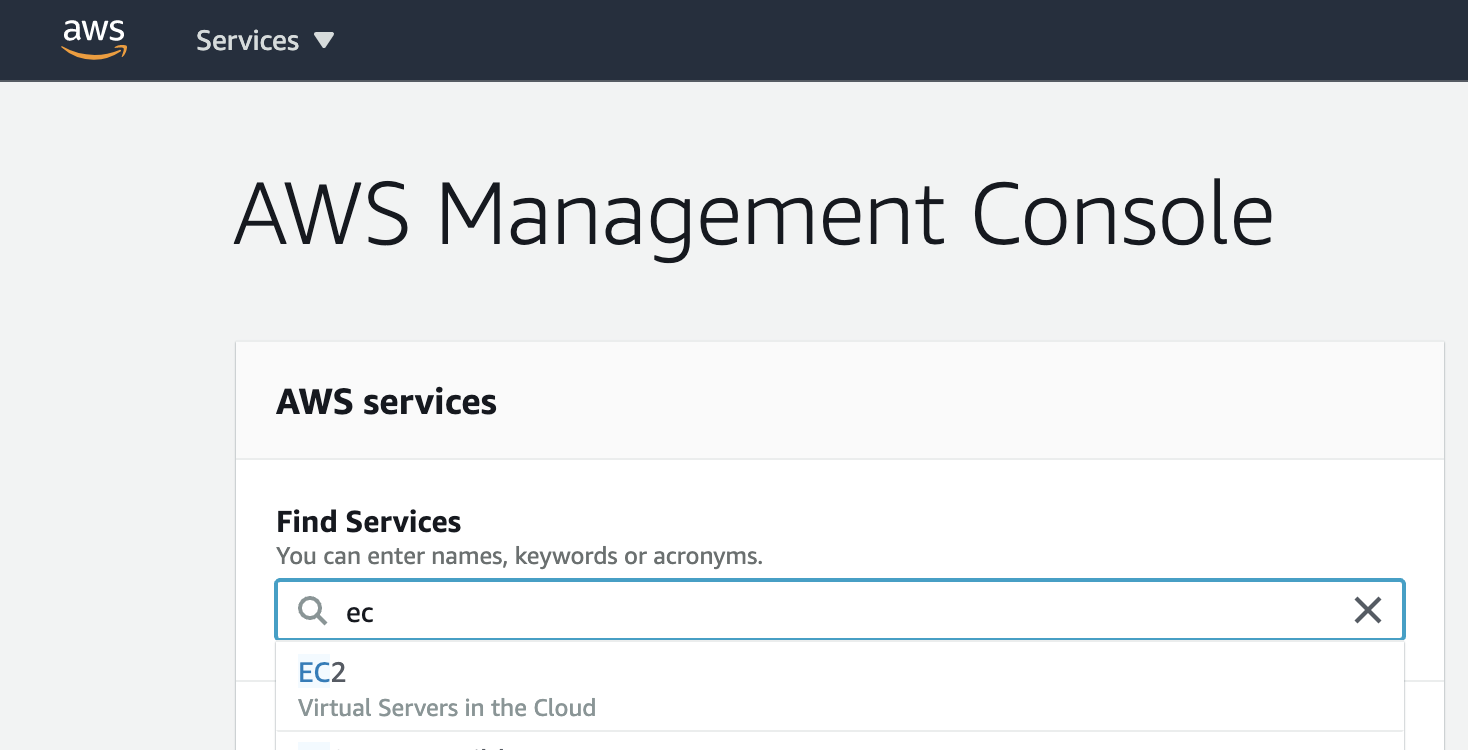

2.Boot an EC2 instance with Amazon Linux 2 AMI:
-
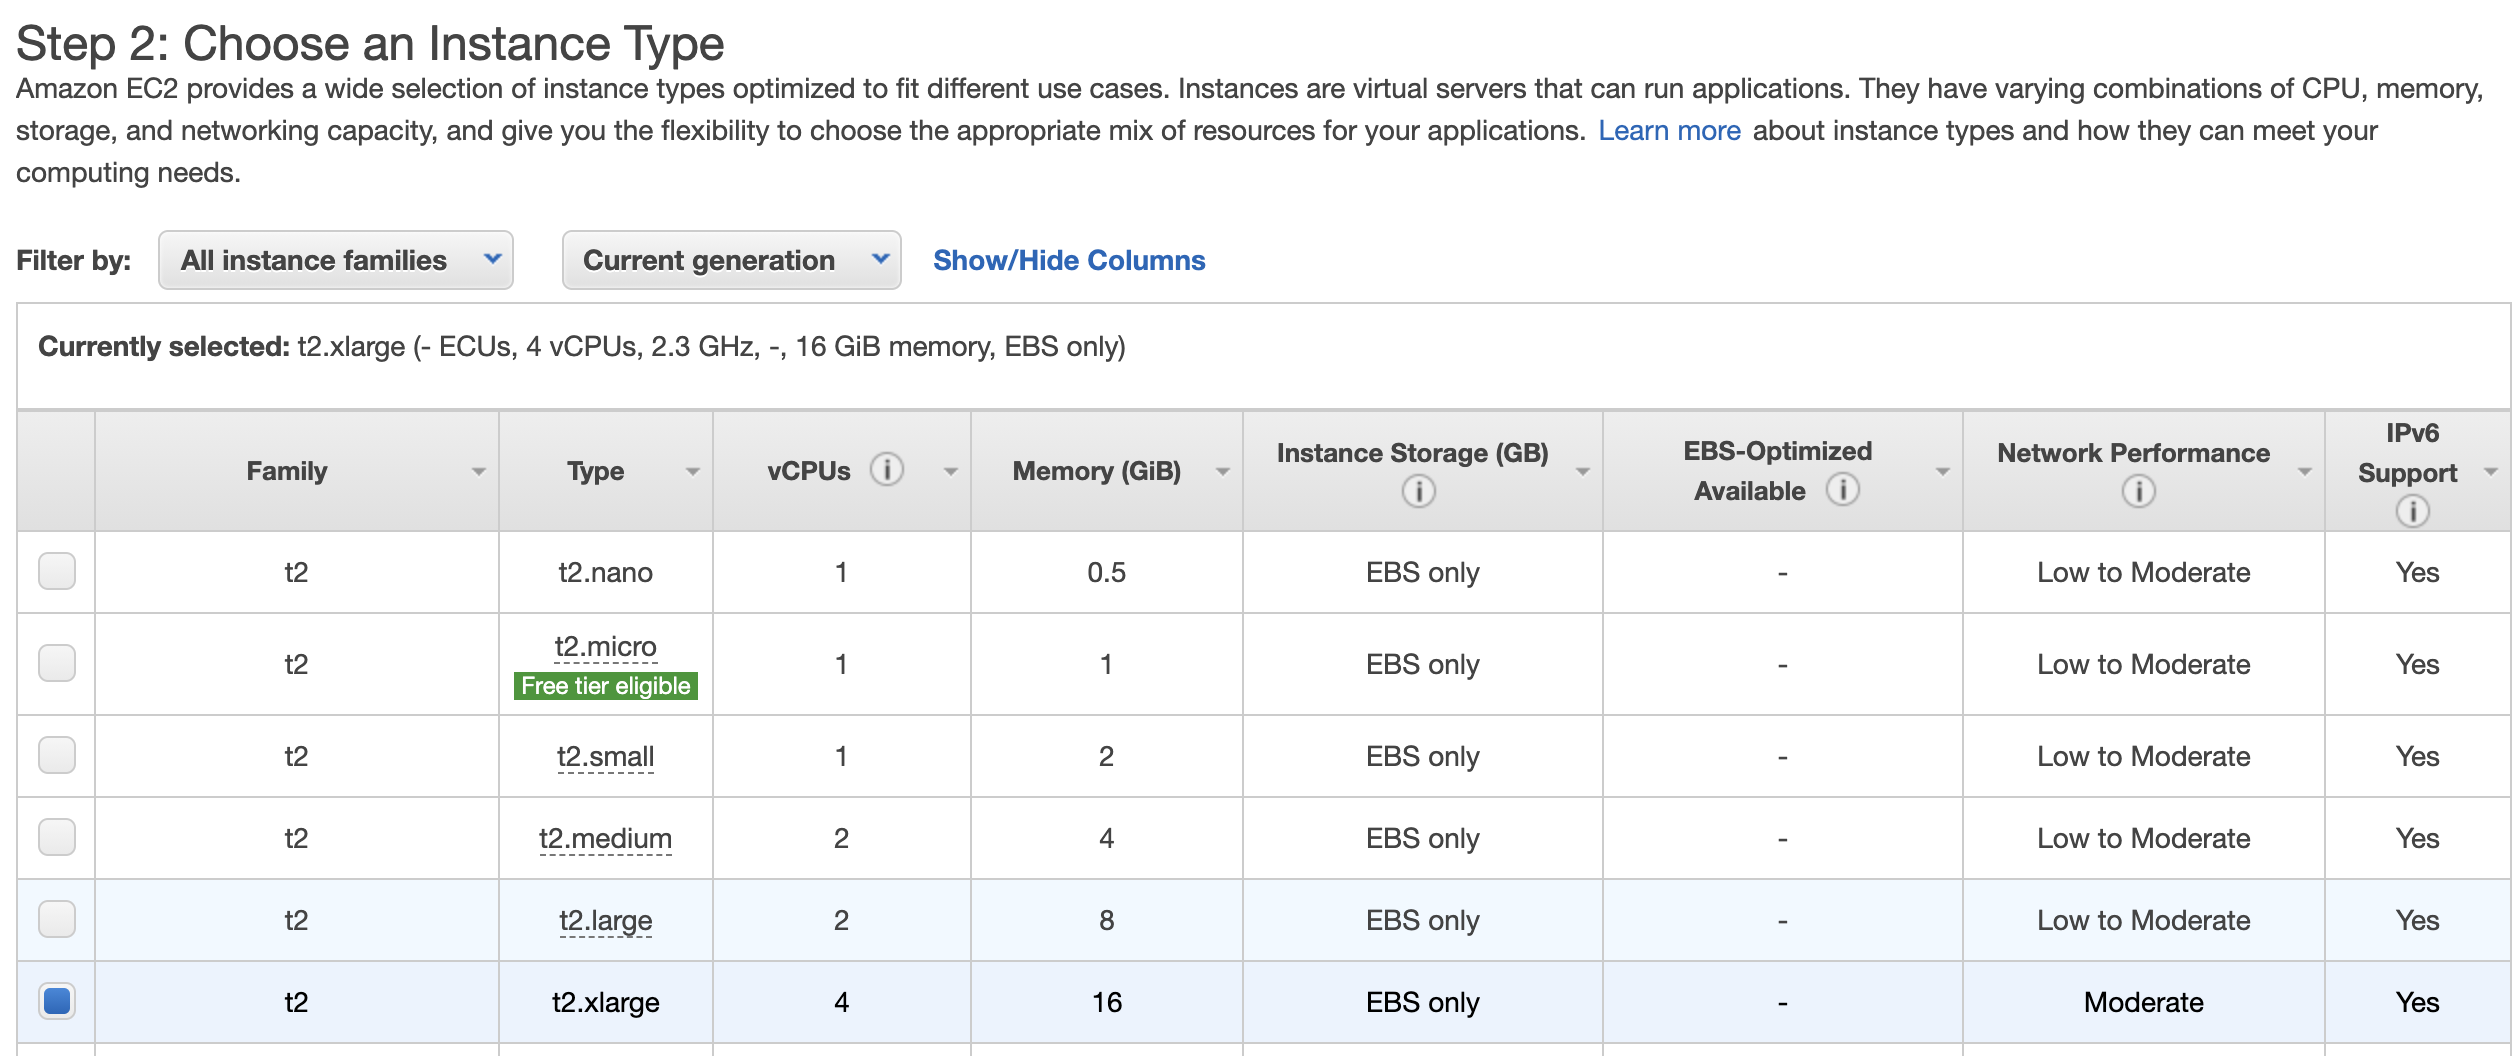
Use >= 16GB of RAM (t2.xlarge or above).
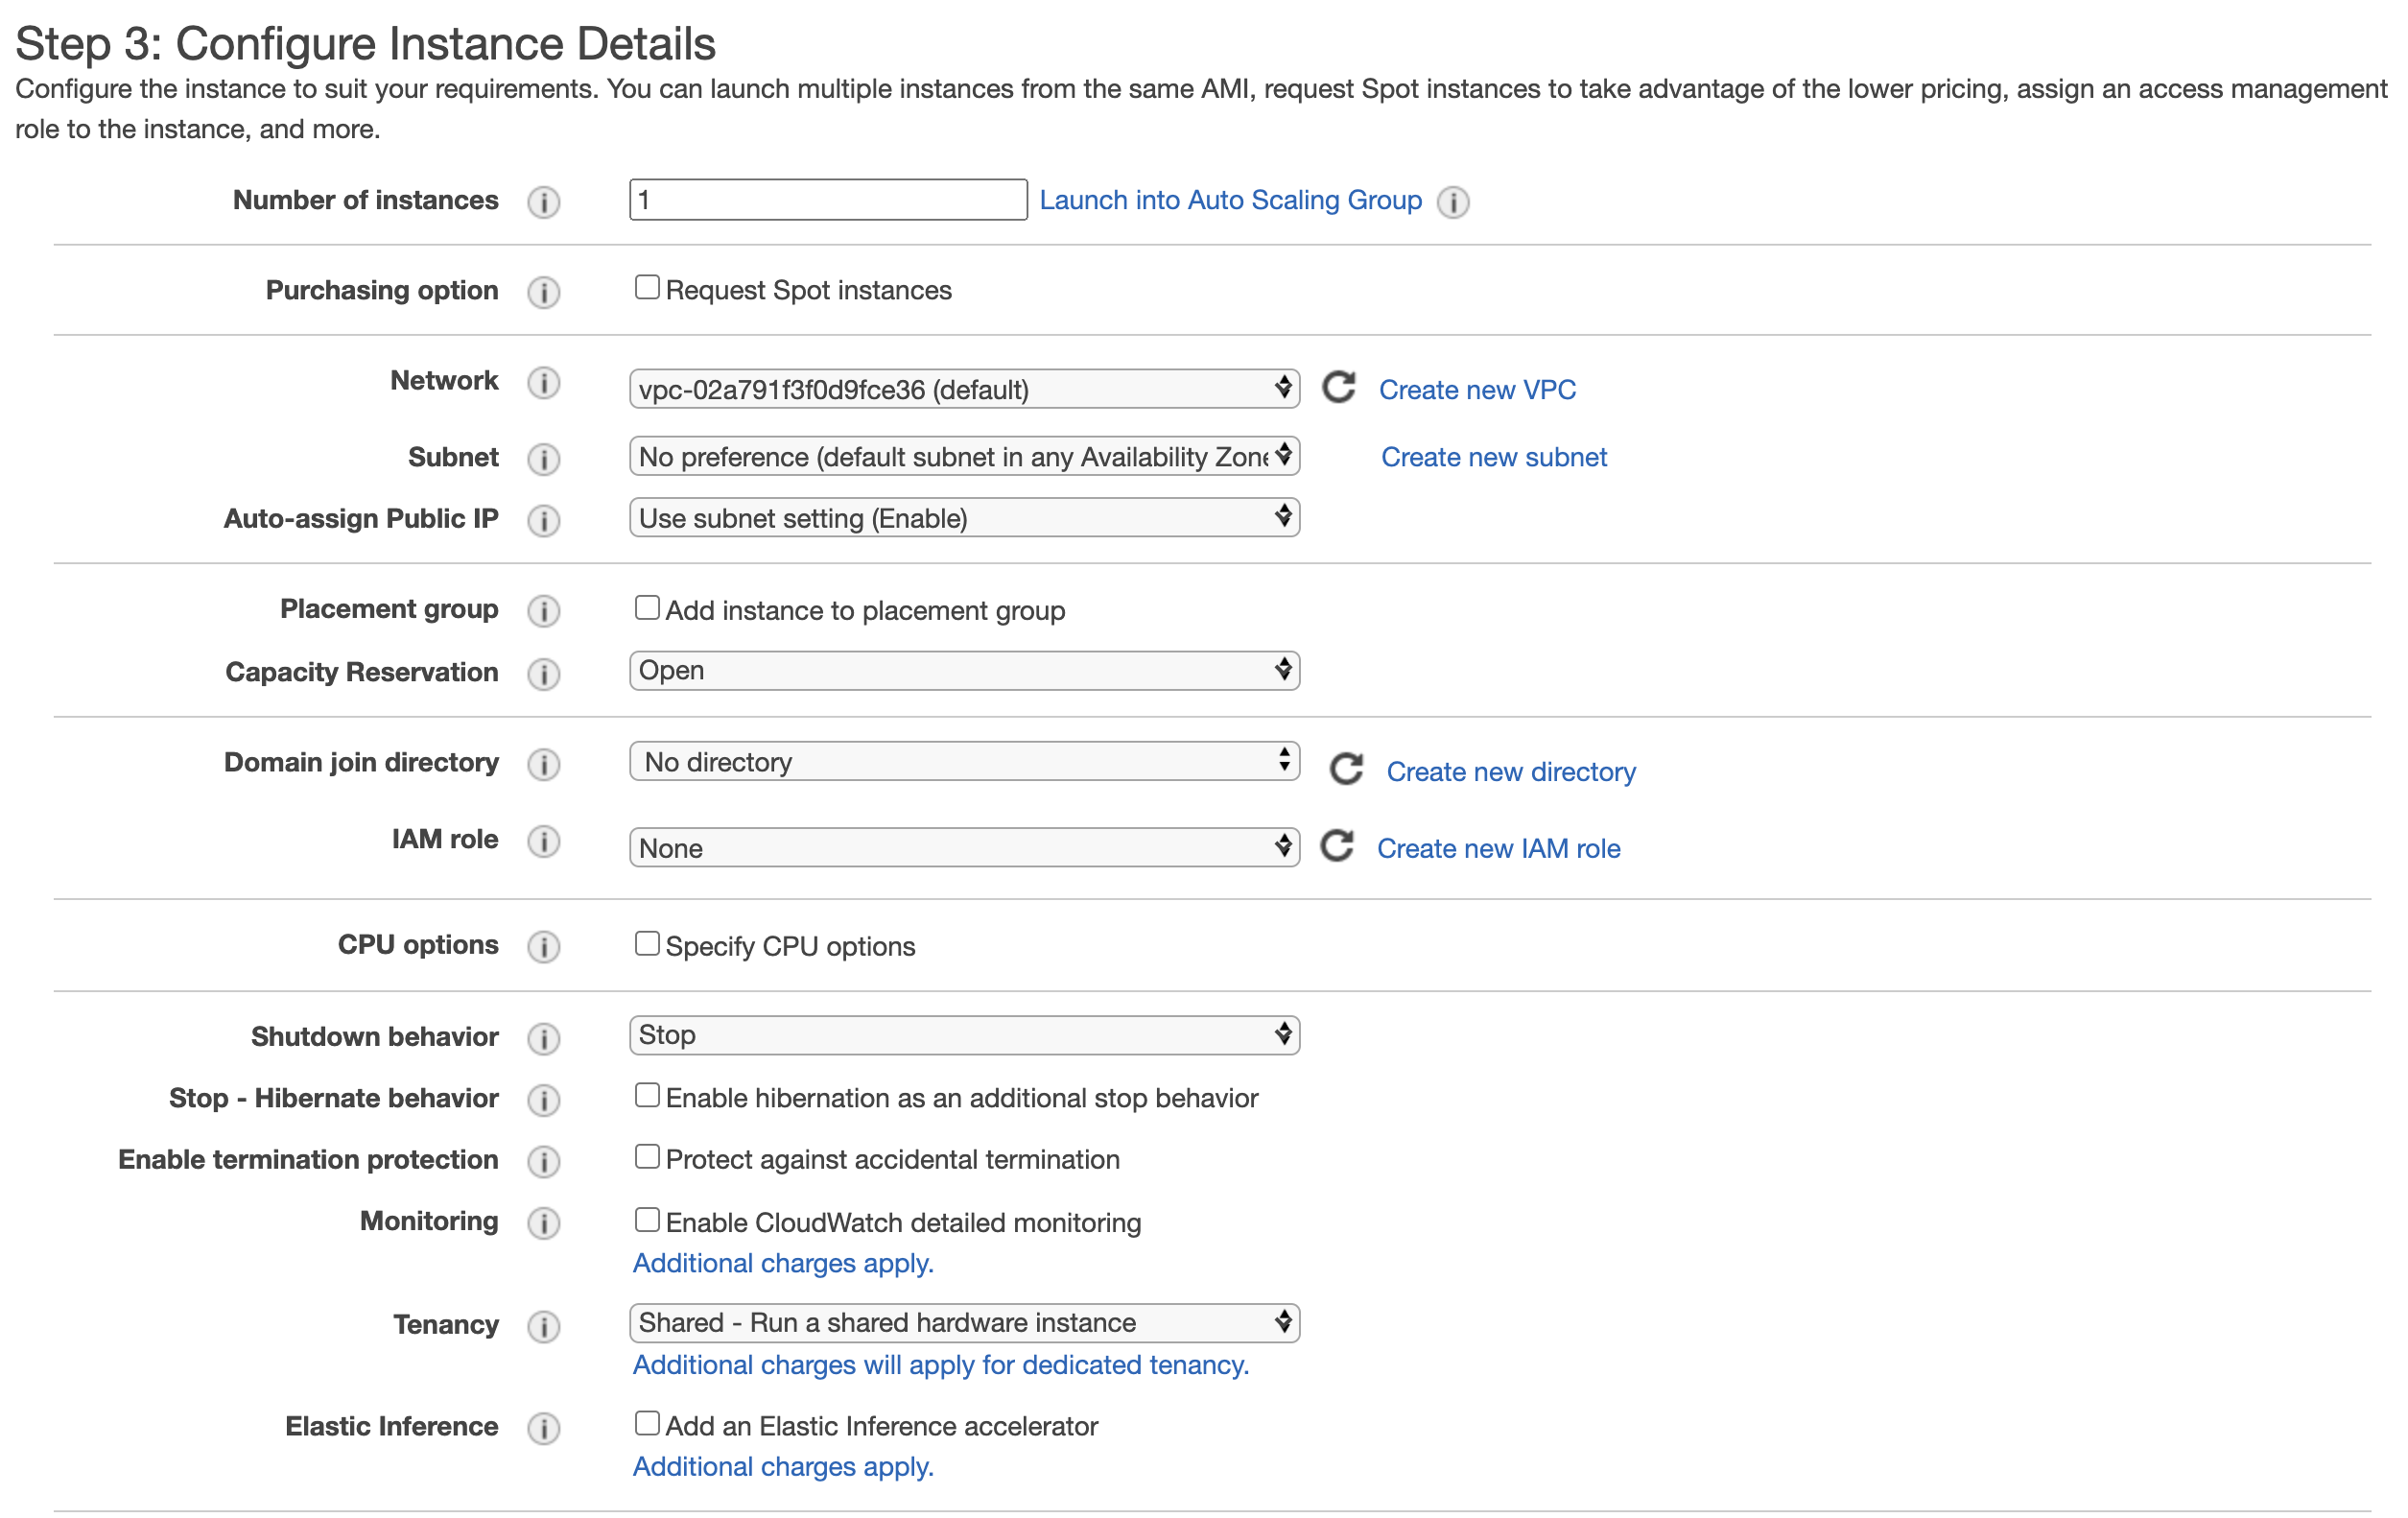
3.We keep the default settings
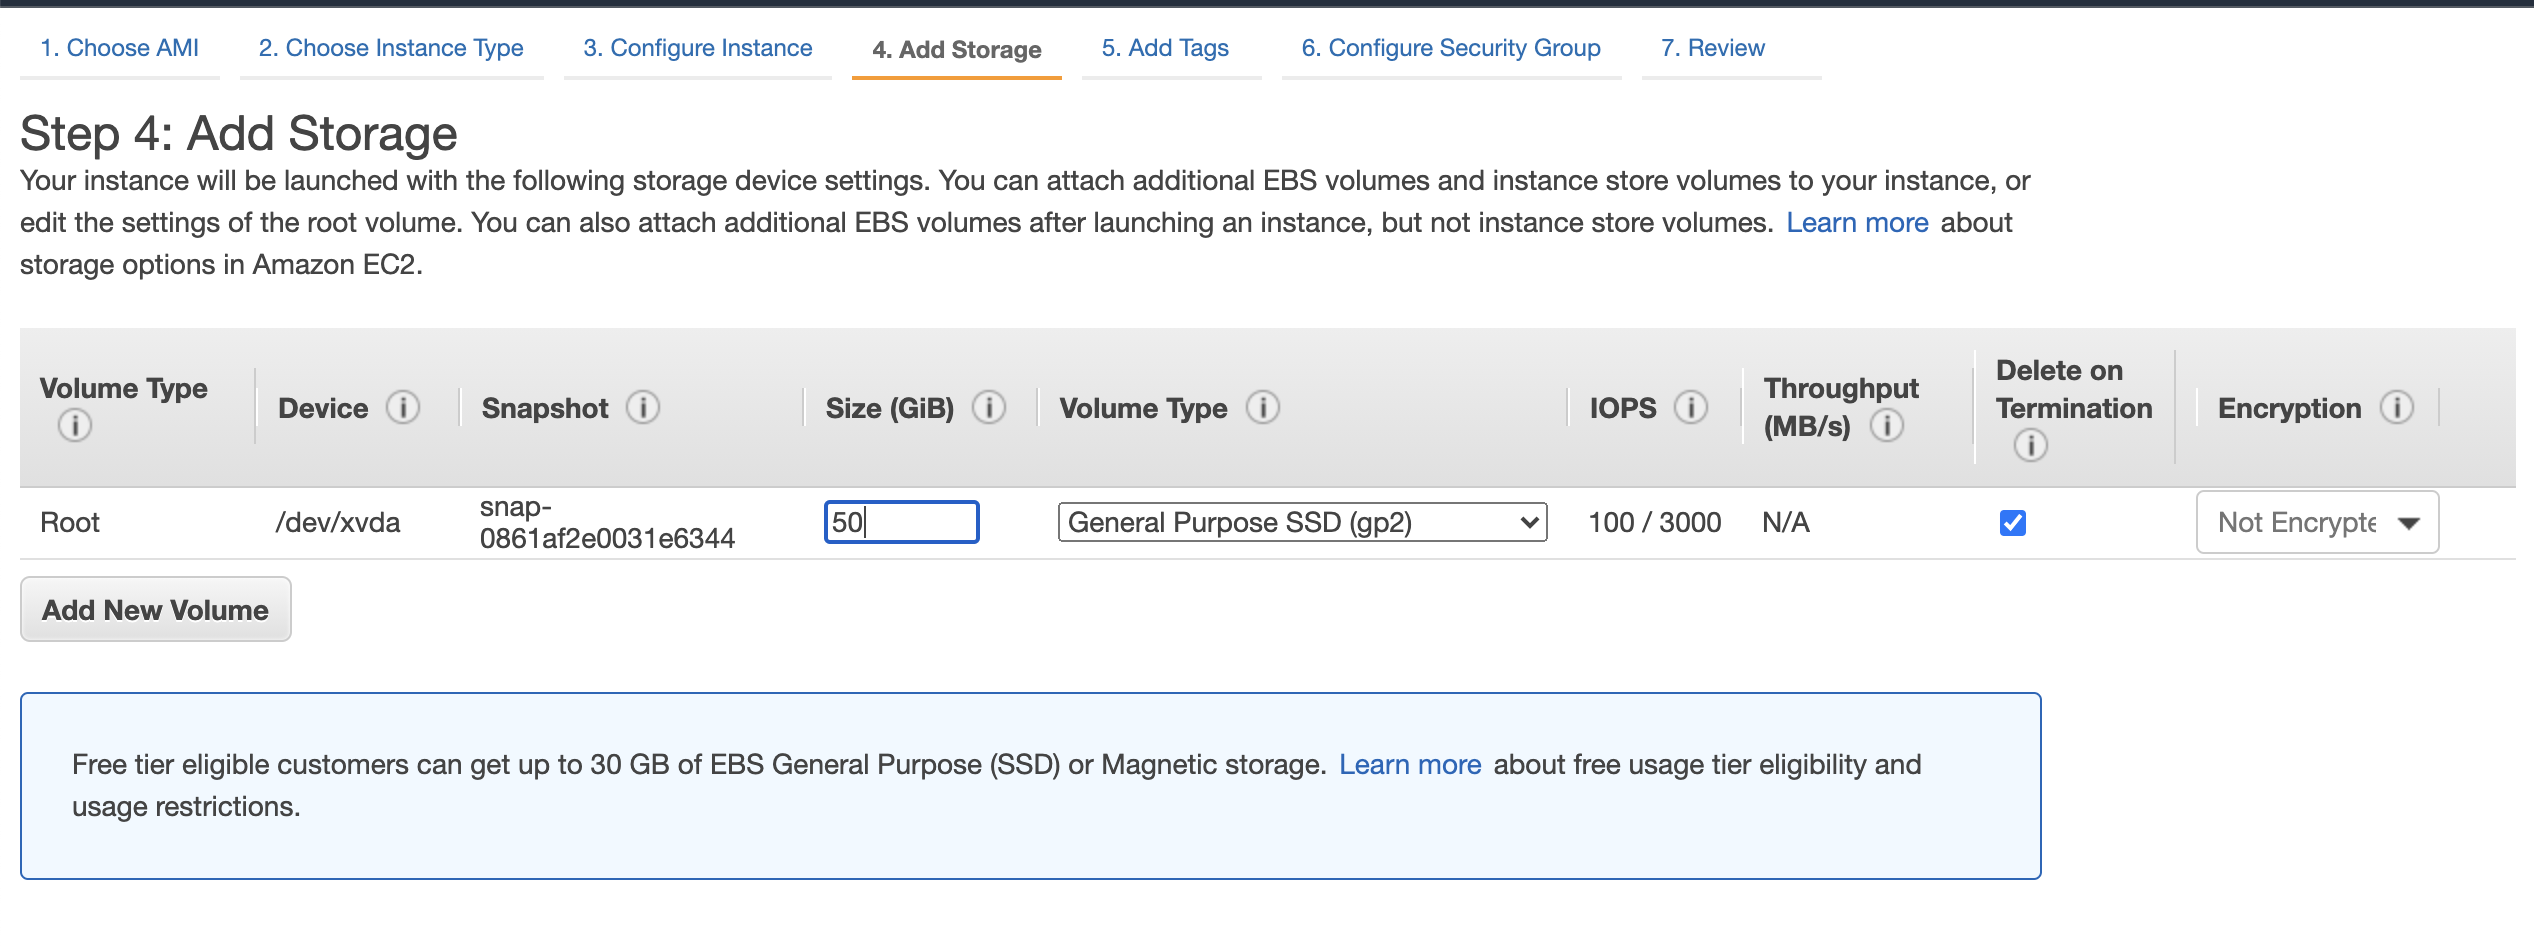
- Add >=20GB storage.
4 For the HDP 3.0.1 we require more than 30 GB storage
5 We addd key tags key Name an value Hadoop

- Configure security Group: Add rule for [Type=All TCP, Source=My IP]. It is important to restrict access only to your IP.

6 We choose our key pair or create new one.
- Keep note the key pair you are using for the EC2 instance.
- Note down the public ip of this instance. This is the IP address you are going to use to access HDP services and web UIs.

7 After the EC2 instance is up and running, select the instance, click Connect, select
Specify the path to your key-pair file and connect. I used to connect via ssh on the terminal.
8 Enter to the EC2 instance via ssh and install git with sudo yum install -y git.
9 Check out the scripts with git clone https://github.com/ruslanmv/HDP-Sandbox-AWS.git,
and then cd HDP-Sandbox-AWS.

Enter to the HDP-Sanbox-AWS folder

10 Install docker on the EC2 instance with bash install_docker.sh. Logout the SSH client and login again
11 Run docker info to confirm docker is working without sudo.
HDP Installation
12 In the GitHub repository of the installation, that I have here
https://github.com/ruslanmv/HDP-Sandbox-AWS
There are two HDP versions 3.0.1, and 2.6.5 that we can install on AWS Cloud.
You should choose one, in this tutorial I selected the 2.6.5 because Hive View is not present in HDP 3.0.1 or Ambari 2.7.
a) HDP 3.0.1
cd HDP-Sandbox-AWS/HDP_3.0.1
Install HDP through docker with bash docker-deploy-hdp30.sh.
b) HDP 2.6.5
cd HDP-Sandbox-AWS/HDP_2.6.5
Install HDP through docker with bash docker-deploy-hdp265.sh.
It will take a while to install.
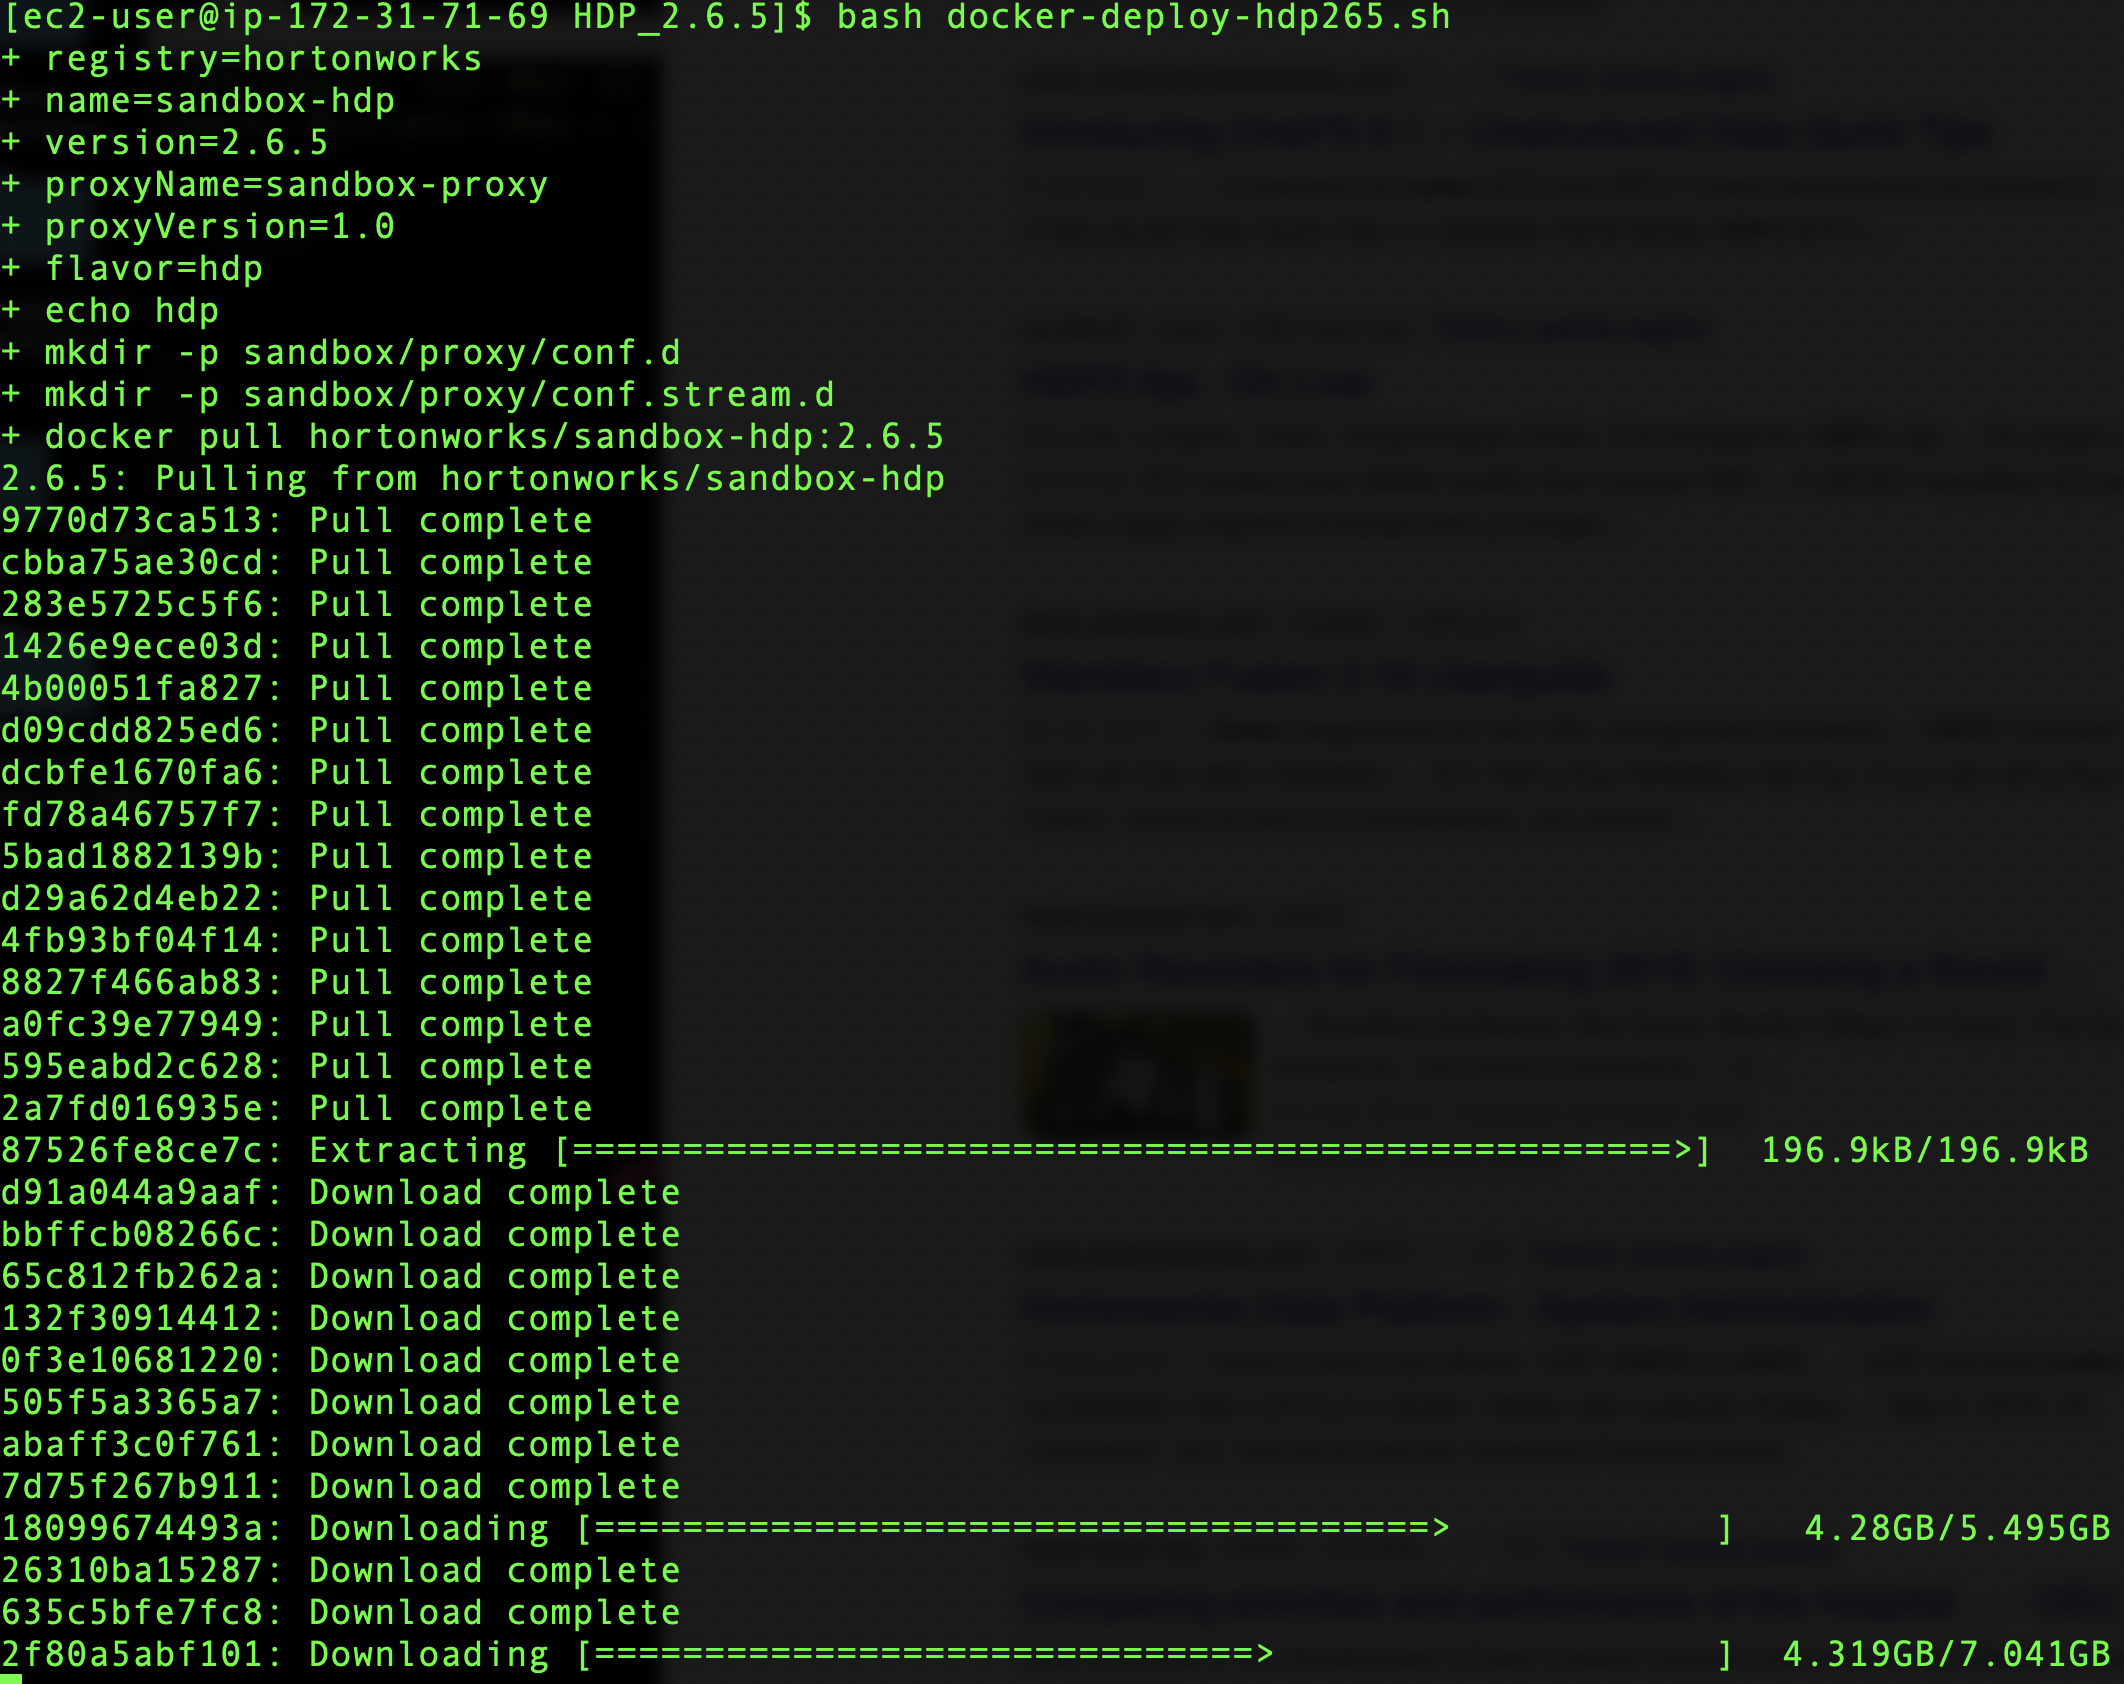
The advantage of the HDP 2.6.5 is that you have Hive View
When it is finished you will have the following screen

You can check with the command docker ps to see if is running
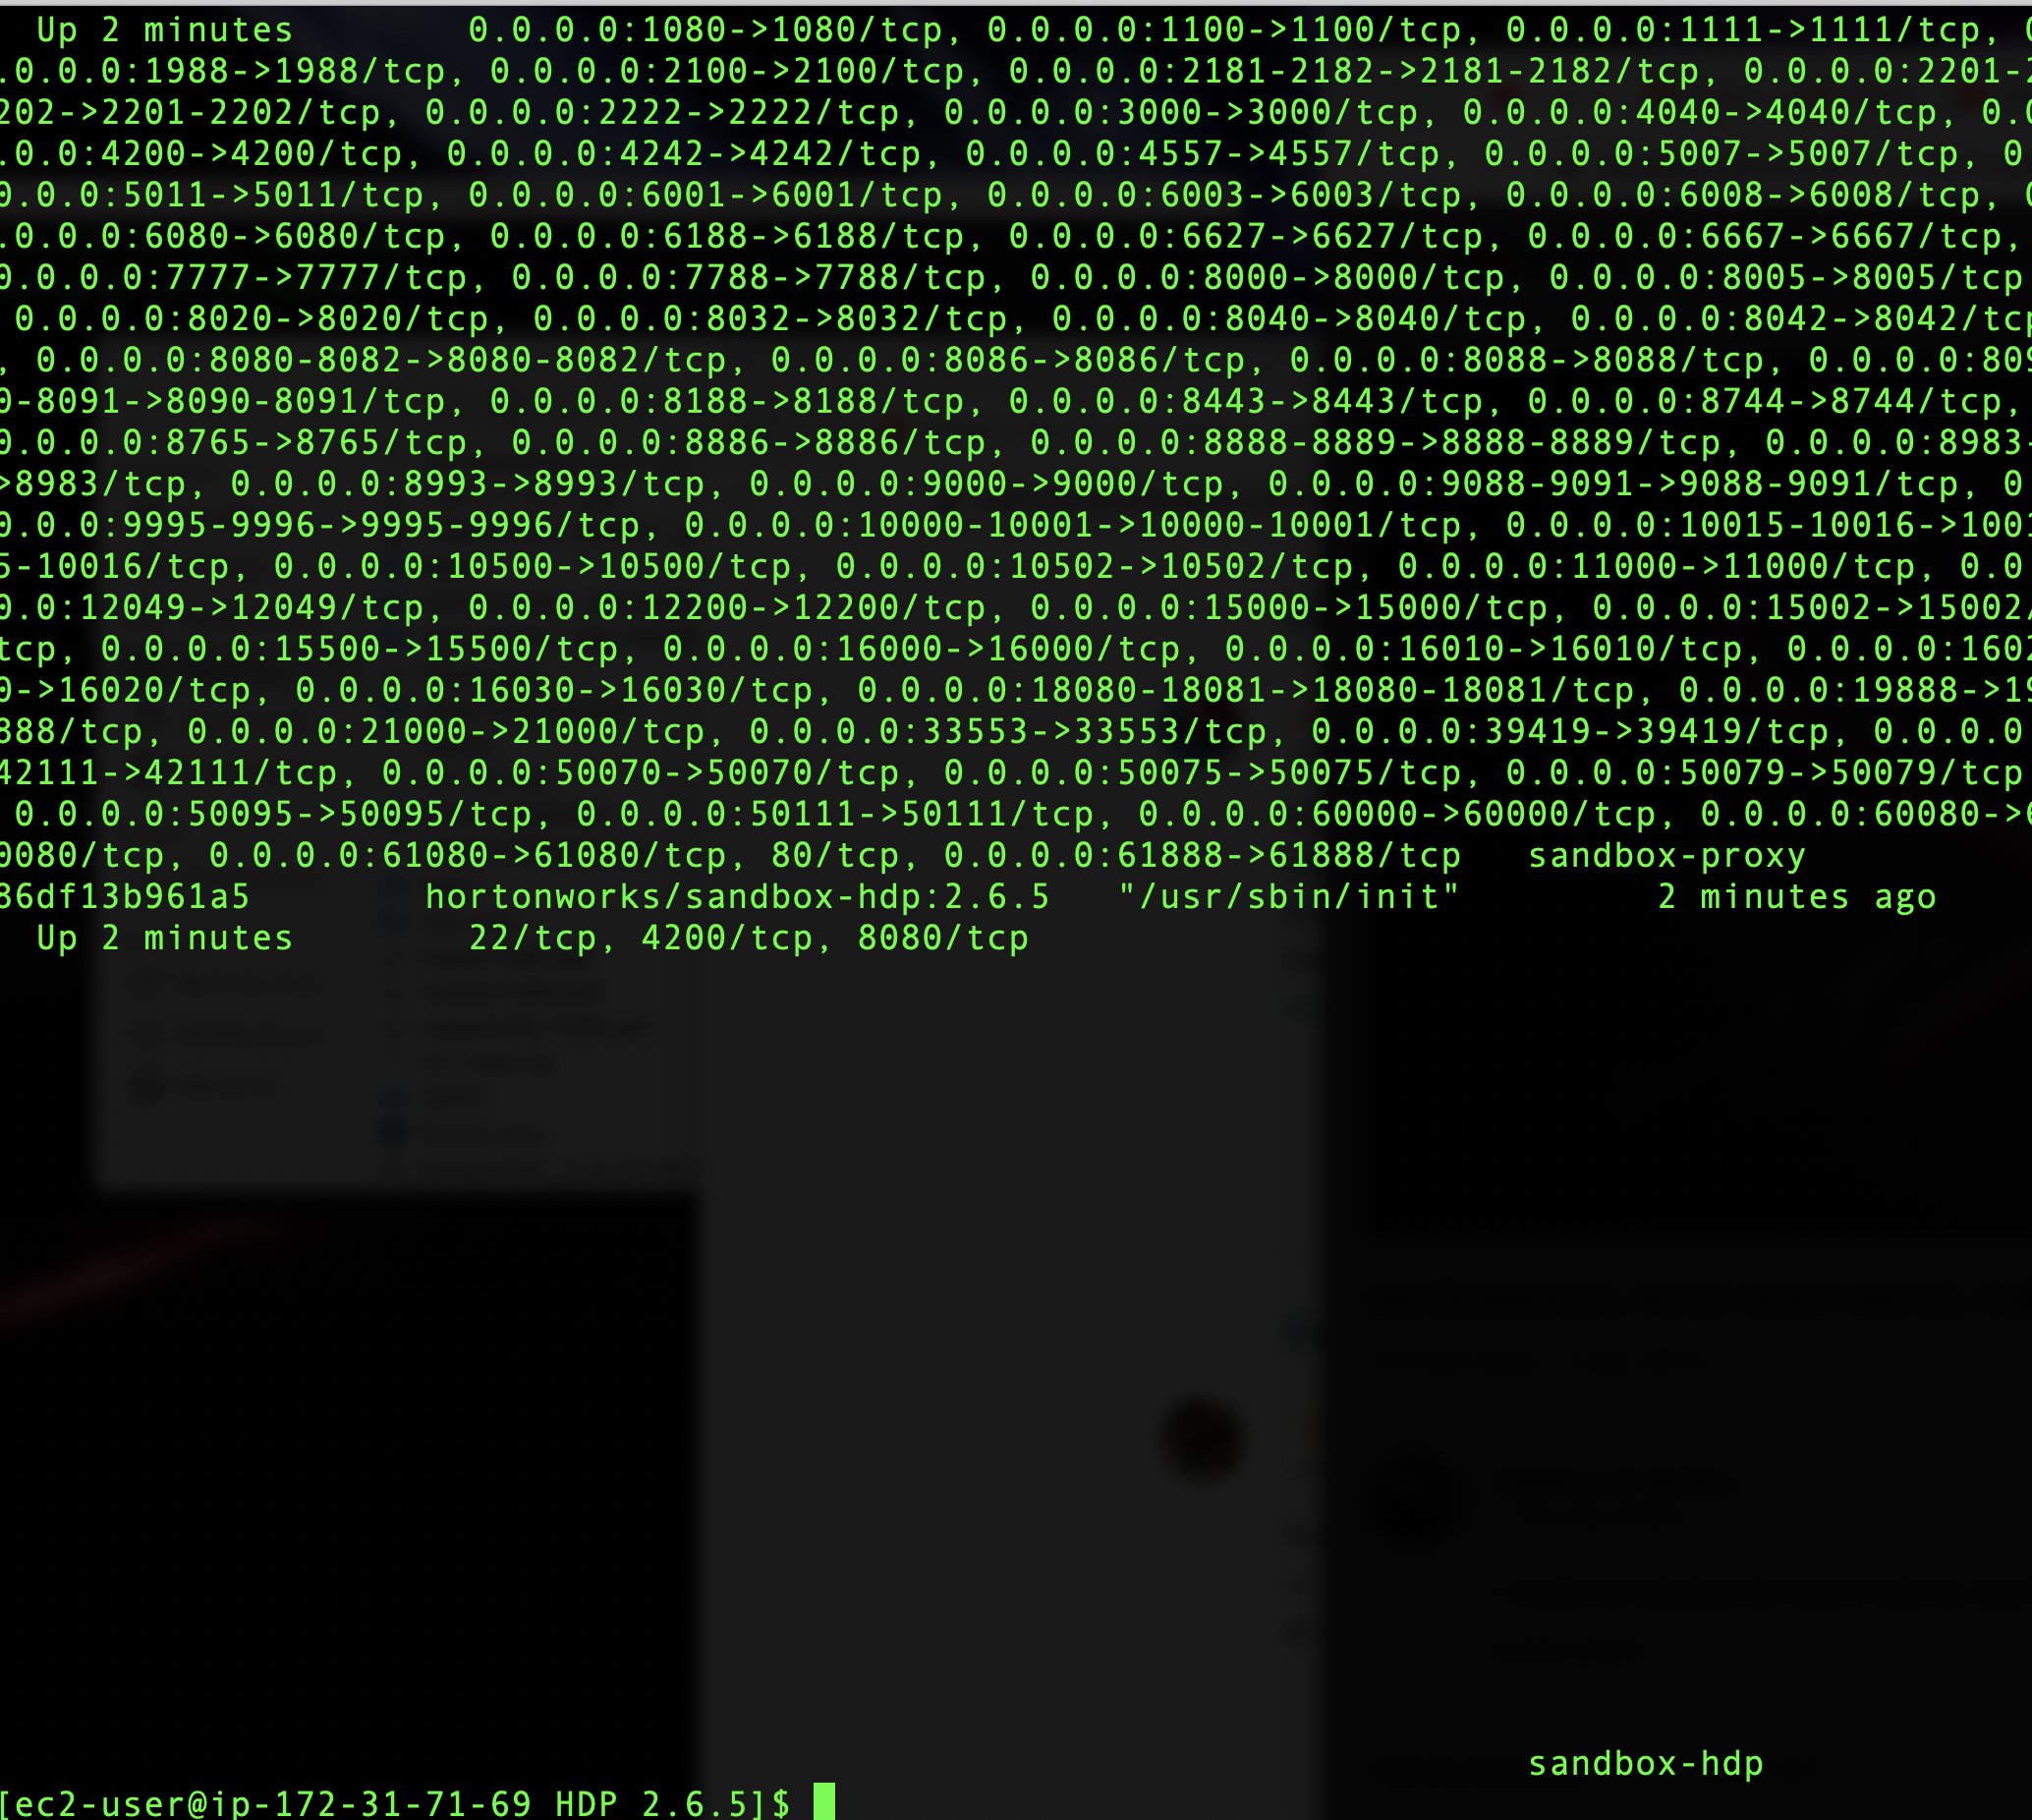
14 After it finishes, access Ambari through http://your-ec2-public-ip:8080/ to confirm it is working.
You can see the ip4 public ip and paste it on the web browser
by default the credentials are:
Username : maria_dev
Password: maria_dev
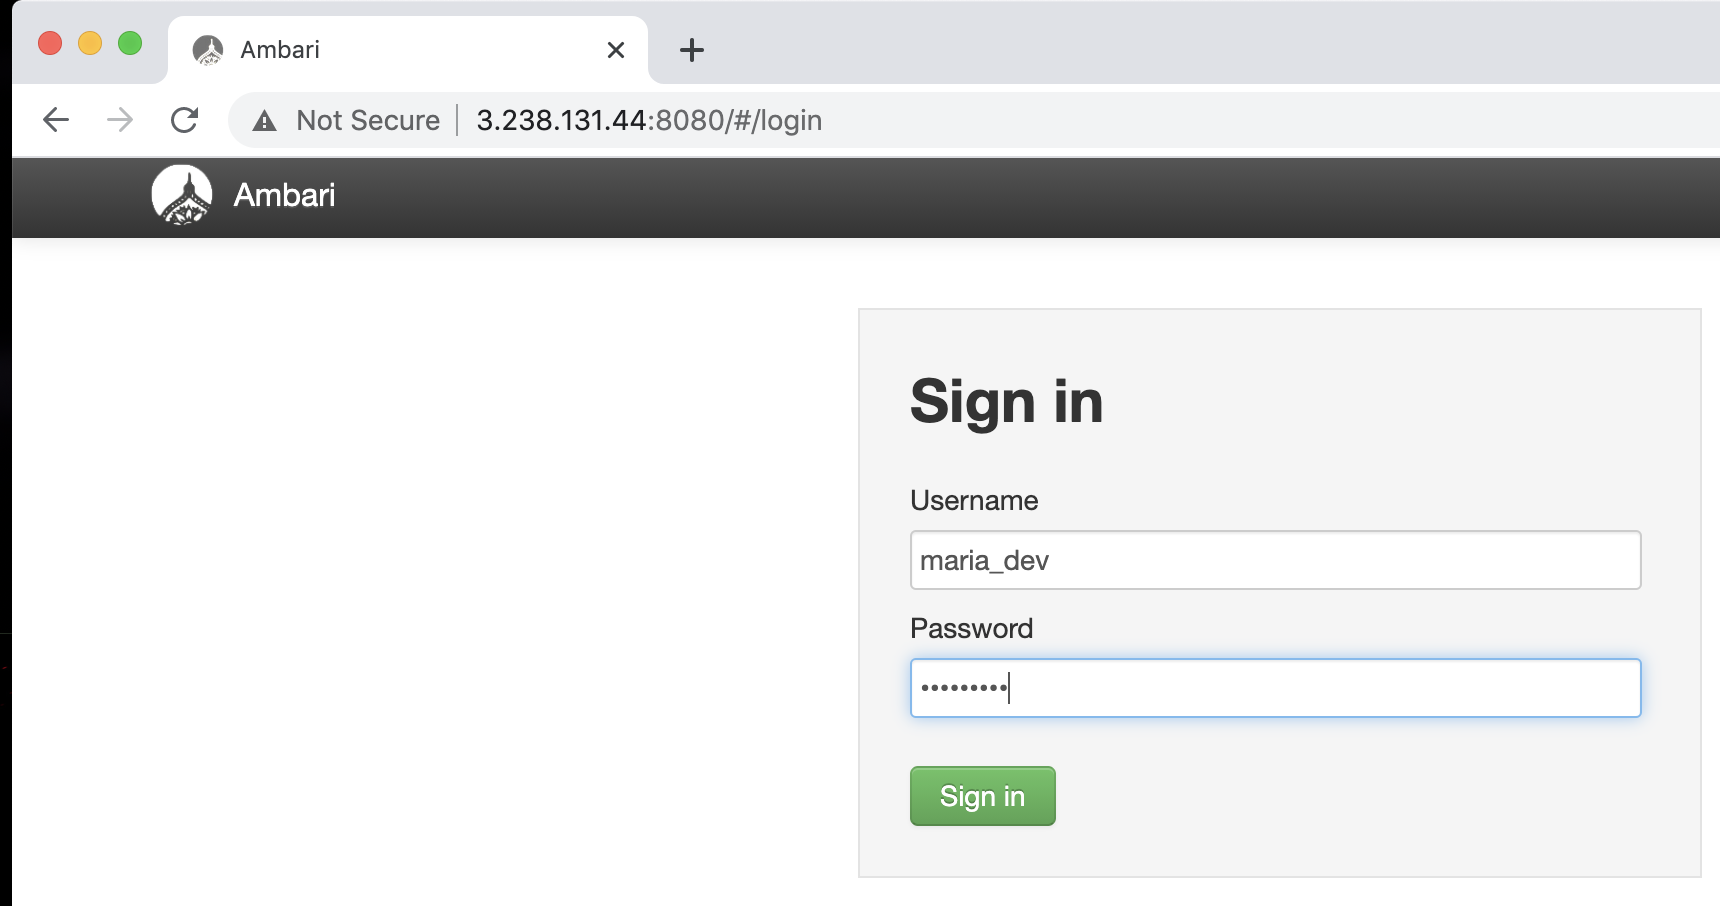
Just after deployed the server the services are starting
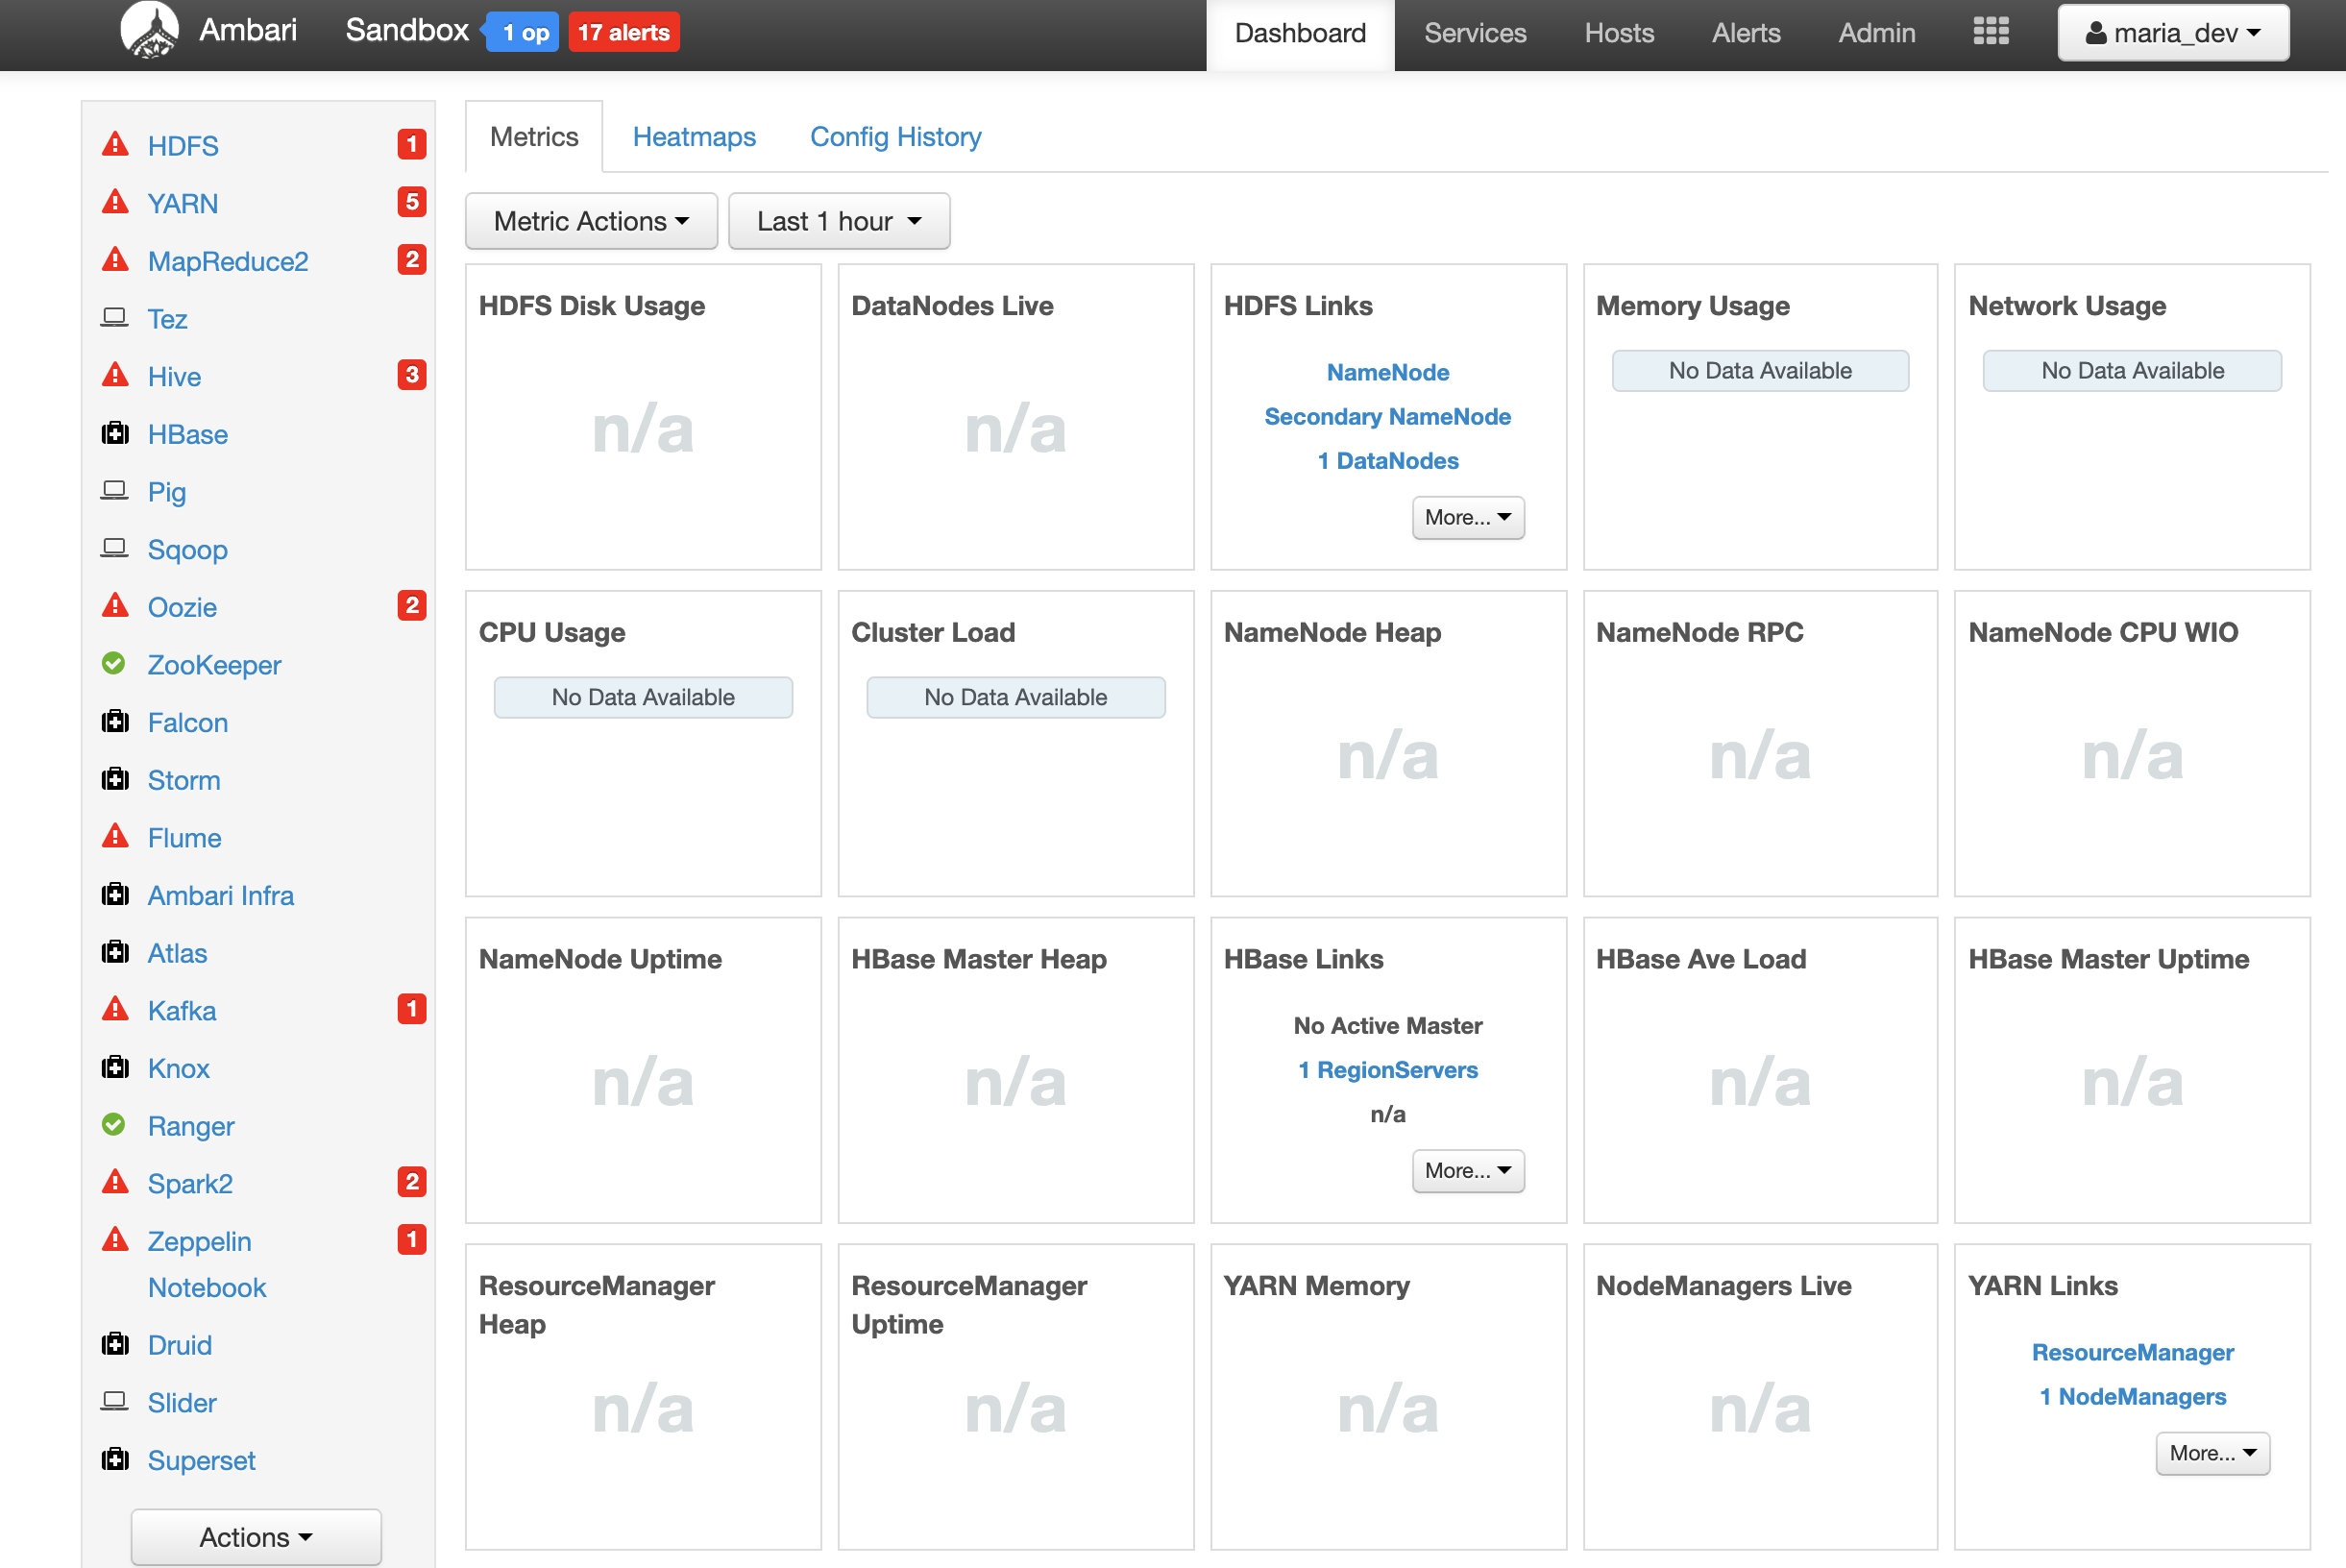
and after few minutes the services should be ready ( something like 7 minutes)
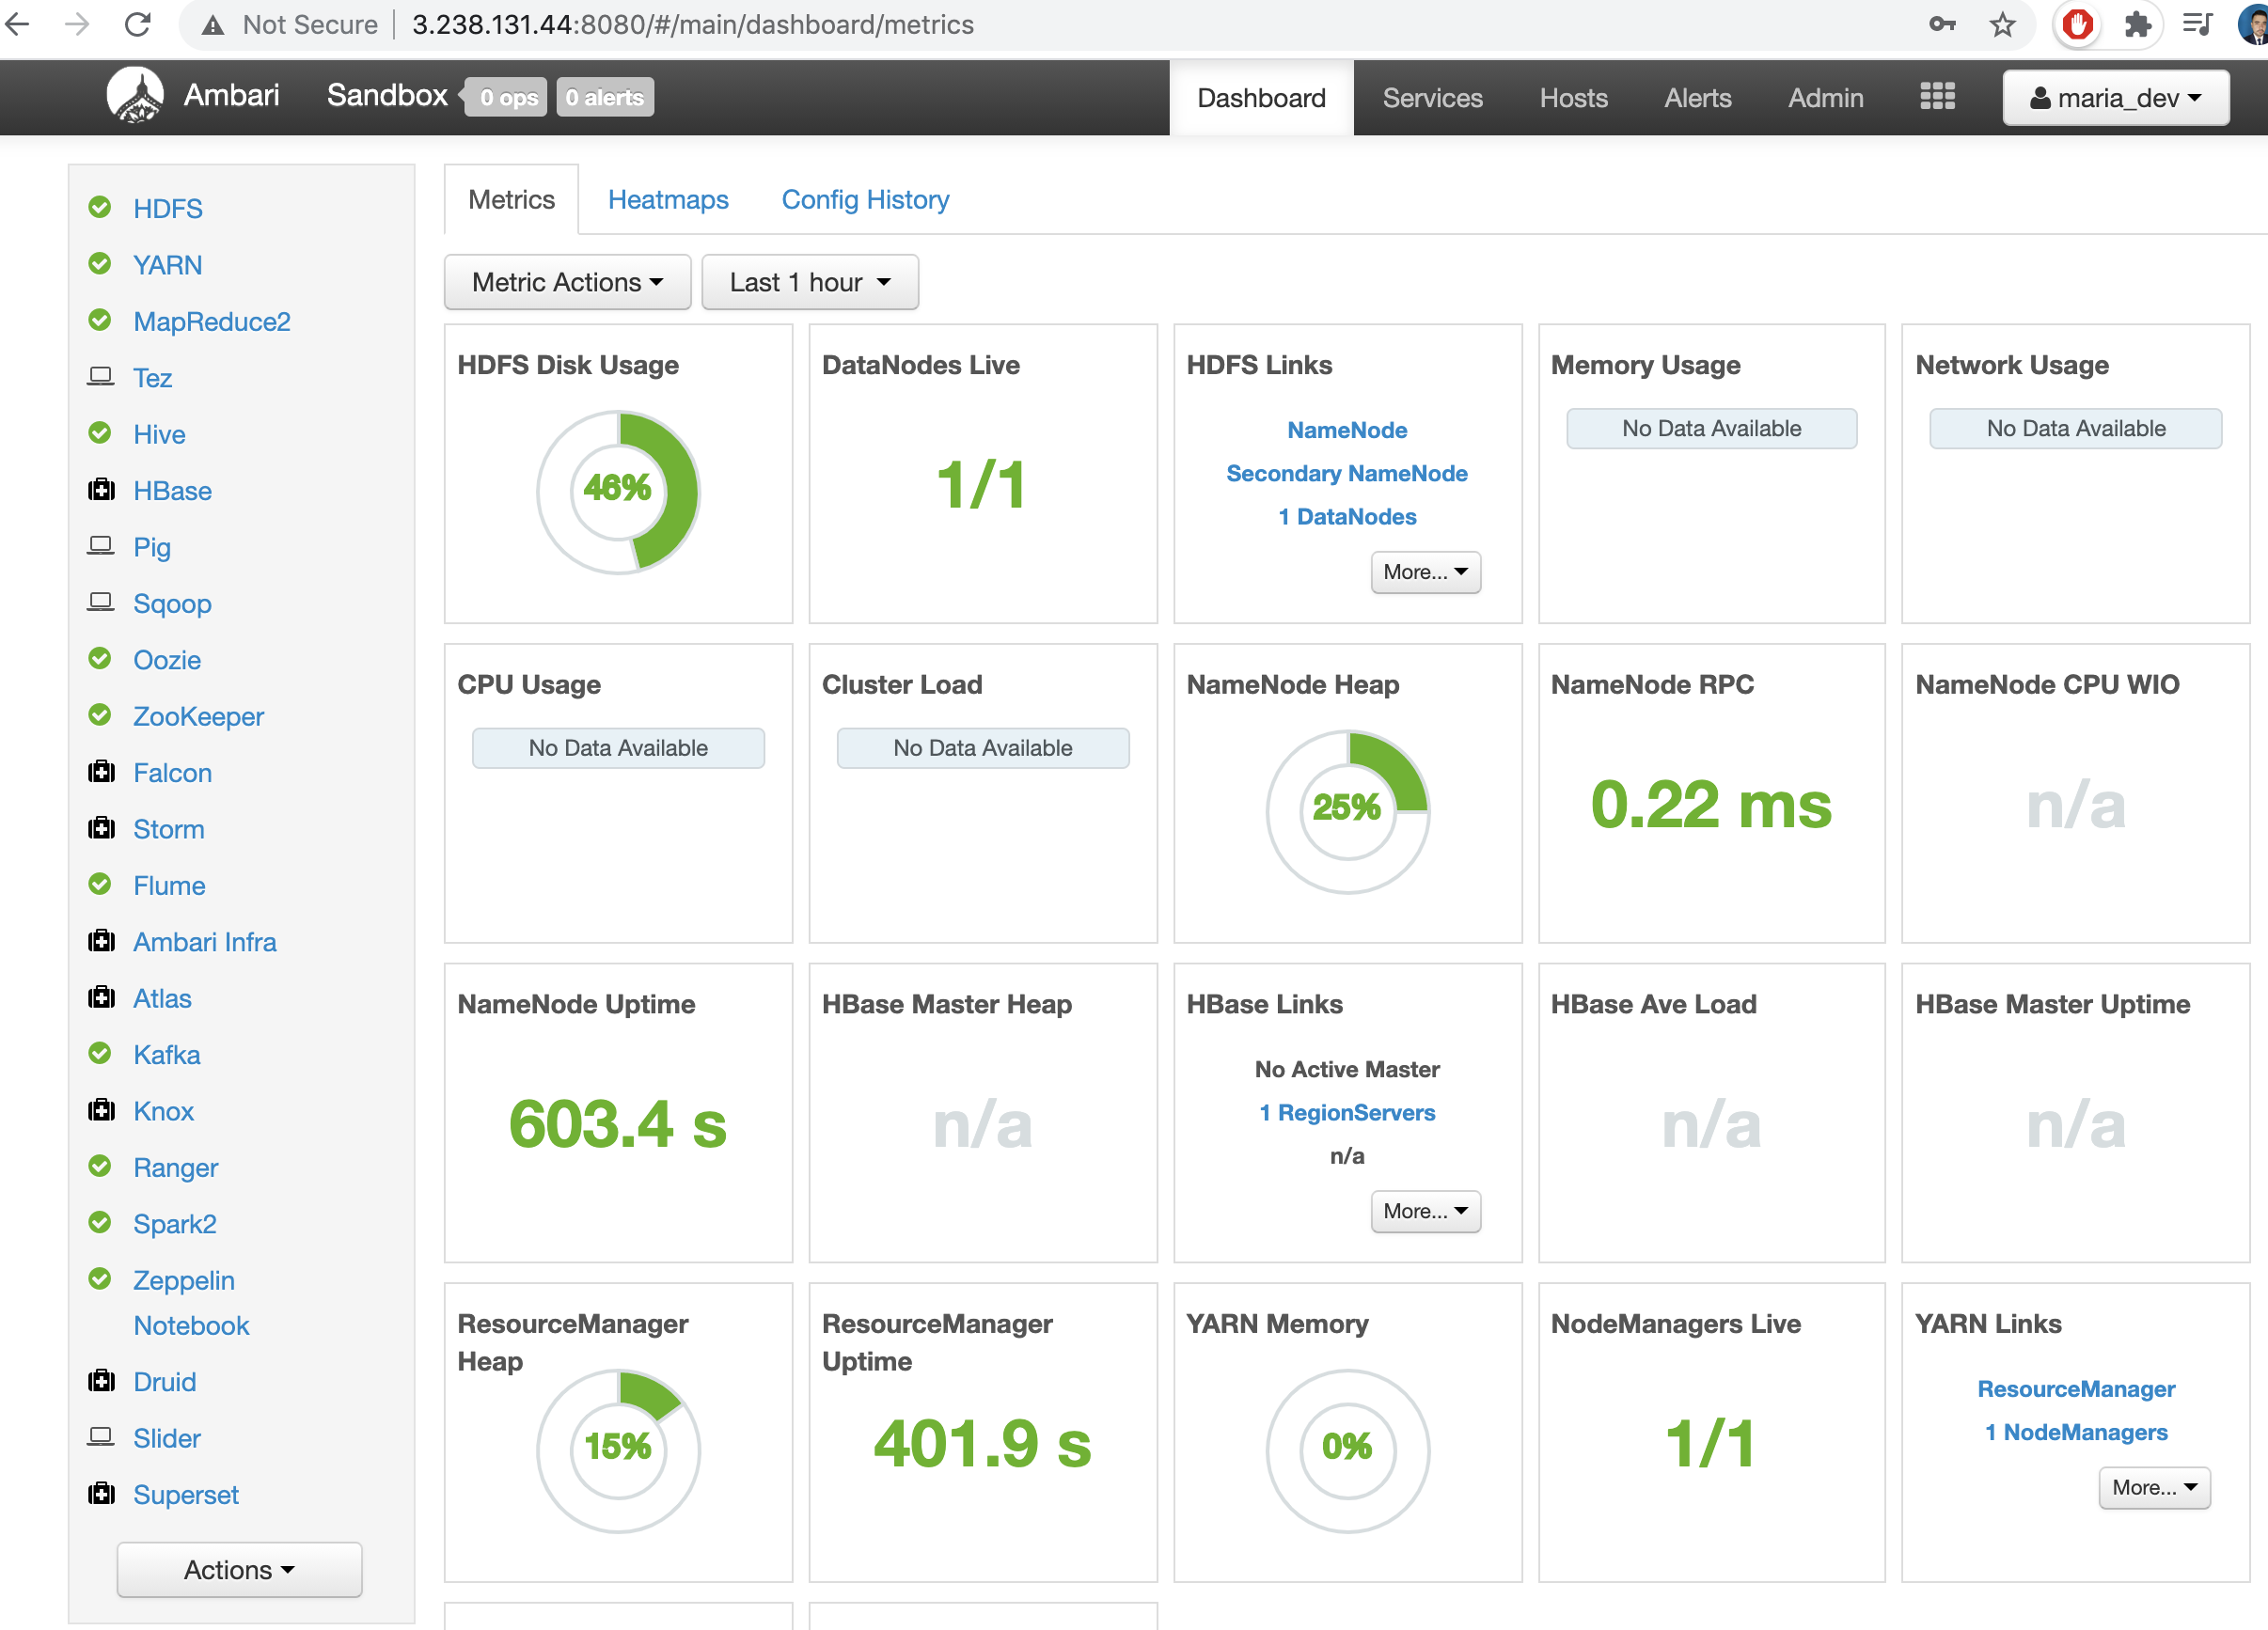
Great finally is running our server on the AWS Cloud with HDP.
Hive View
Just as an example let us visualize a dataset in Hive
We want to use a datset from the GroupLens which has collected and made available rating data sets from the MovieLens web site (http://movielens.org). The data sets were collected over various periods of time, depending on the size of the set. Just a test we will use the MovieLens 100K movie ratings. Stable benchmark dataset. 100,000 ratings from 1000 users on 1700 movies. Released 4/1998
.http://files.grouplens.org/datasets/movielens/ml-100k.zip
We can extract the all the files of the zip file.
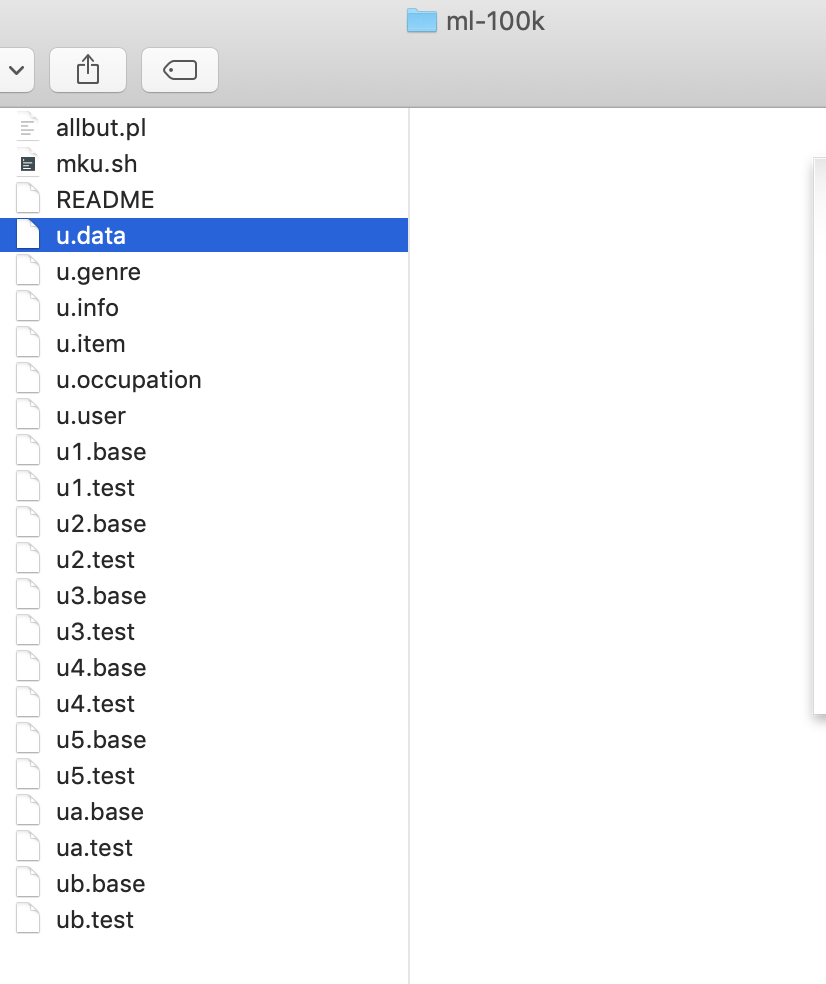
There are two files that we will use, u.data nd u.item
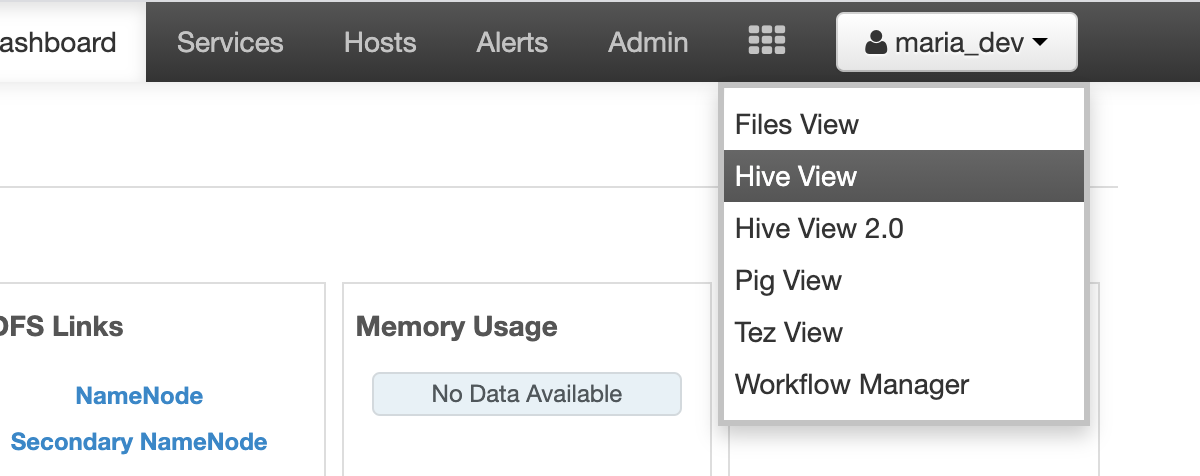
The next step is open Hive View
We prooceed to upload file from local,
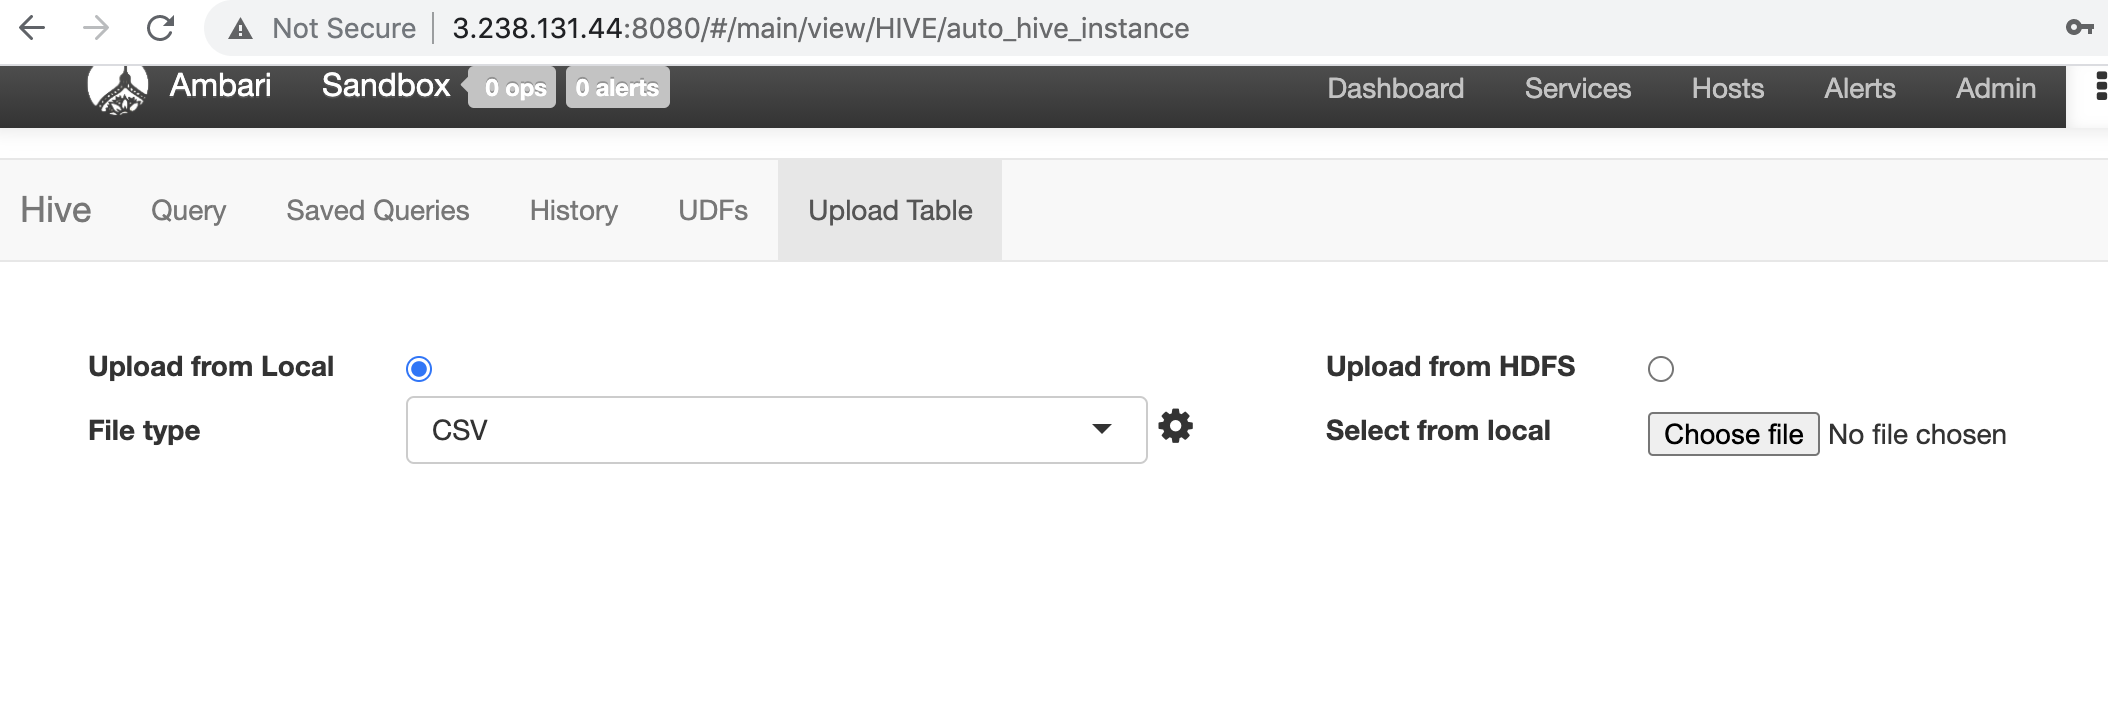 We specify we click on settings for the file type and we choose the Field Delimitar
 TAB
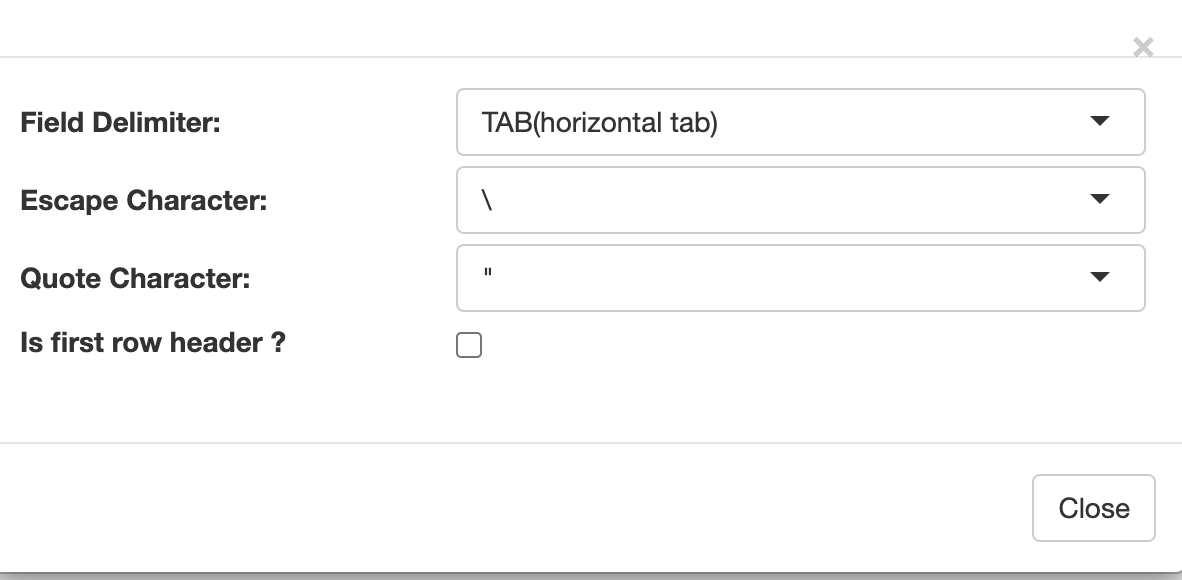
and we select the file u.data
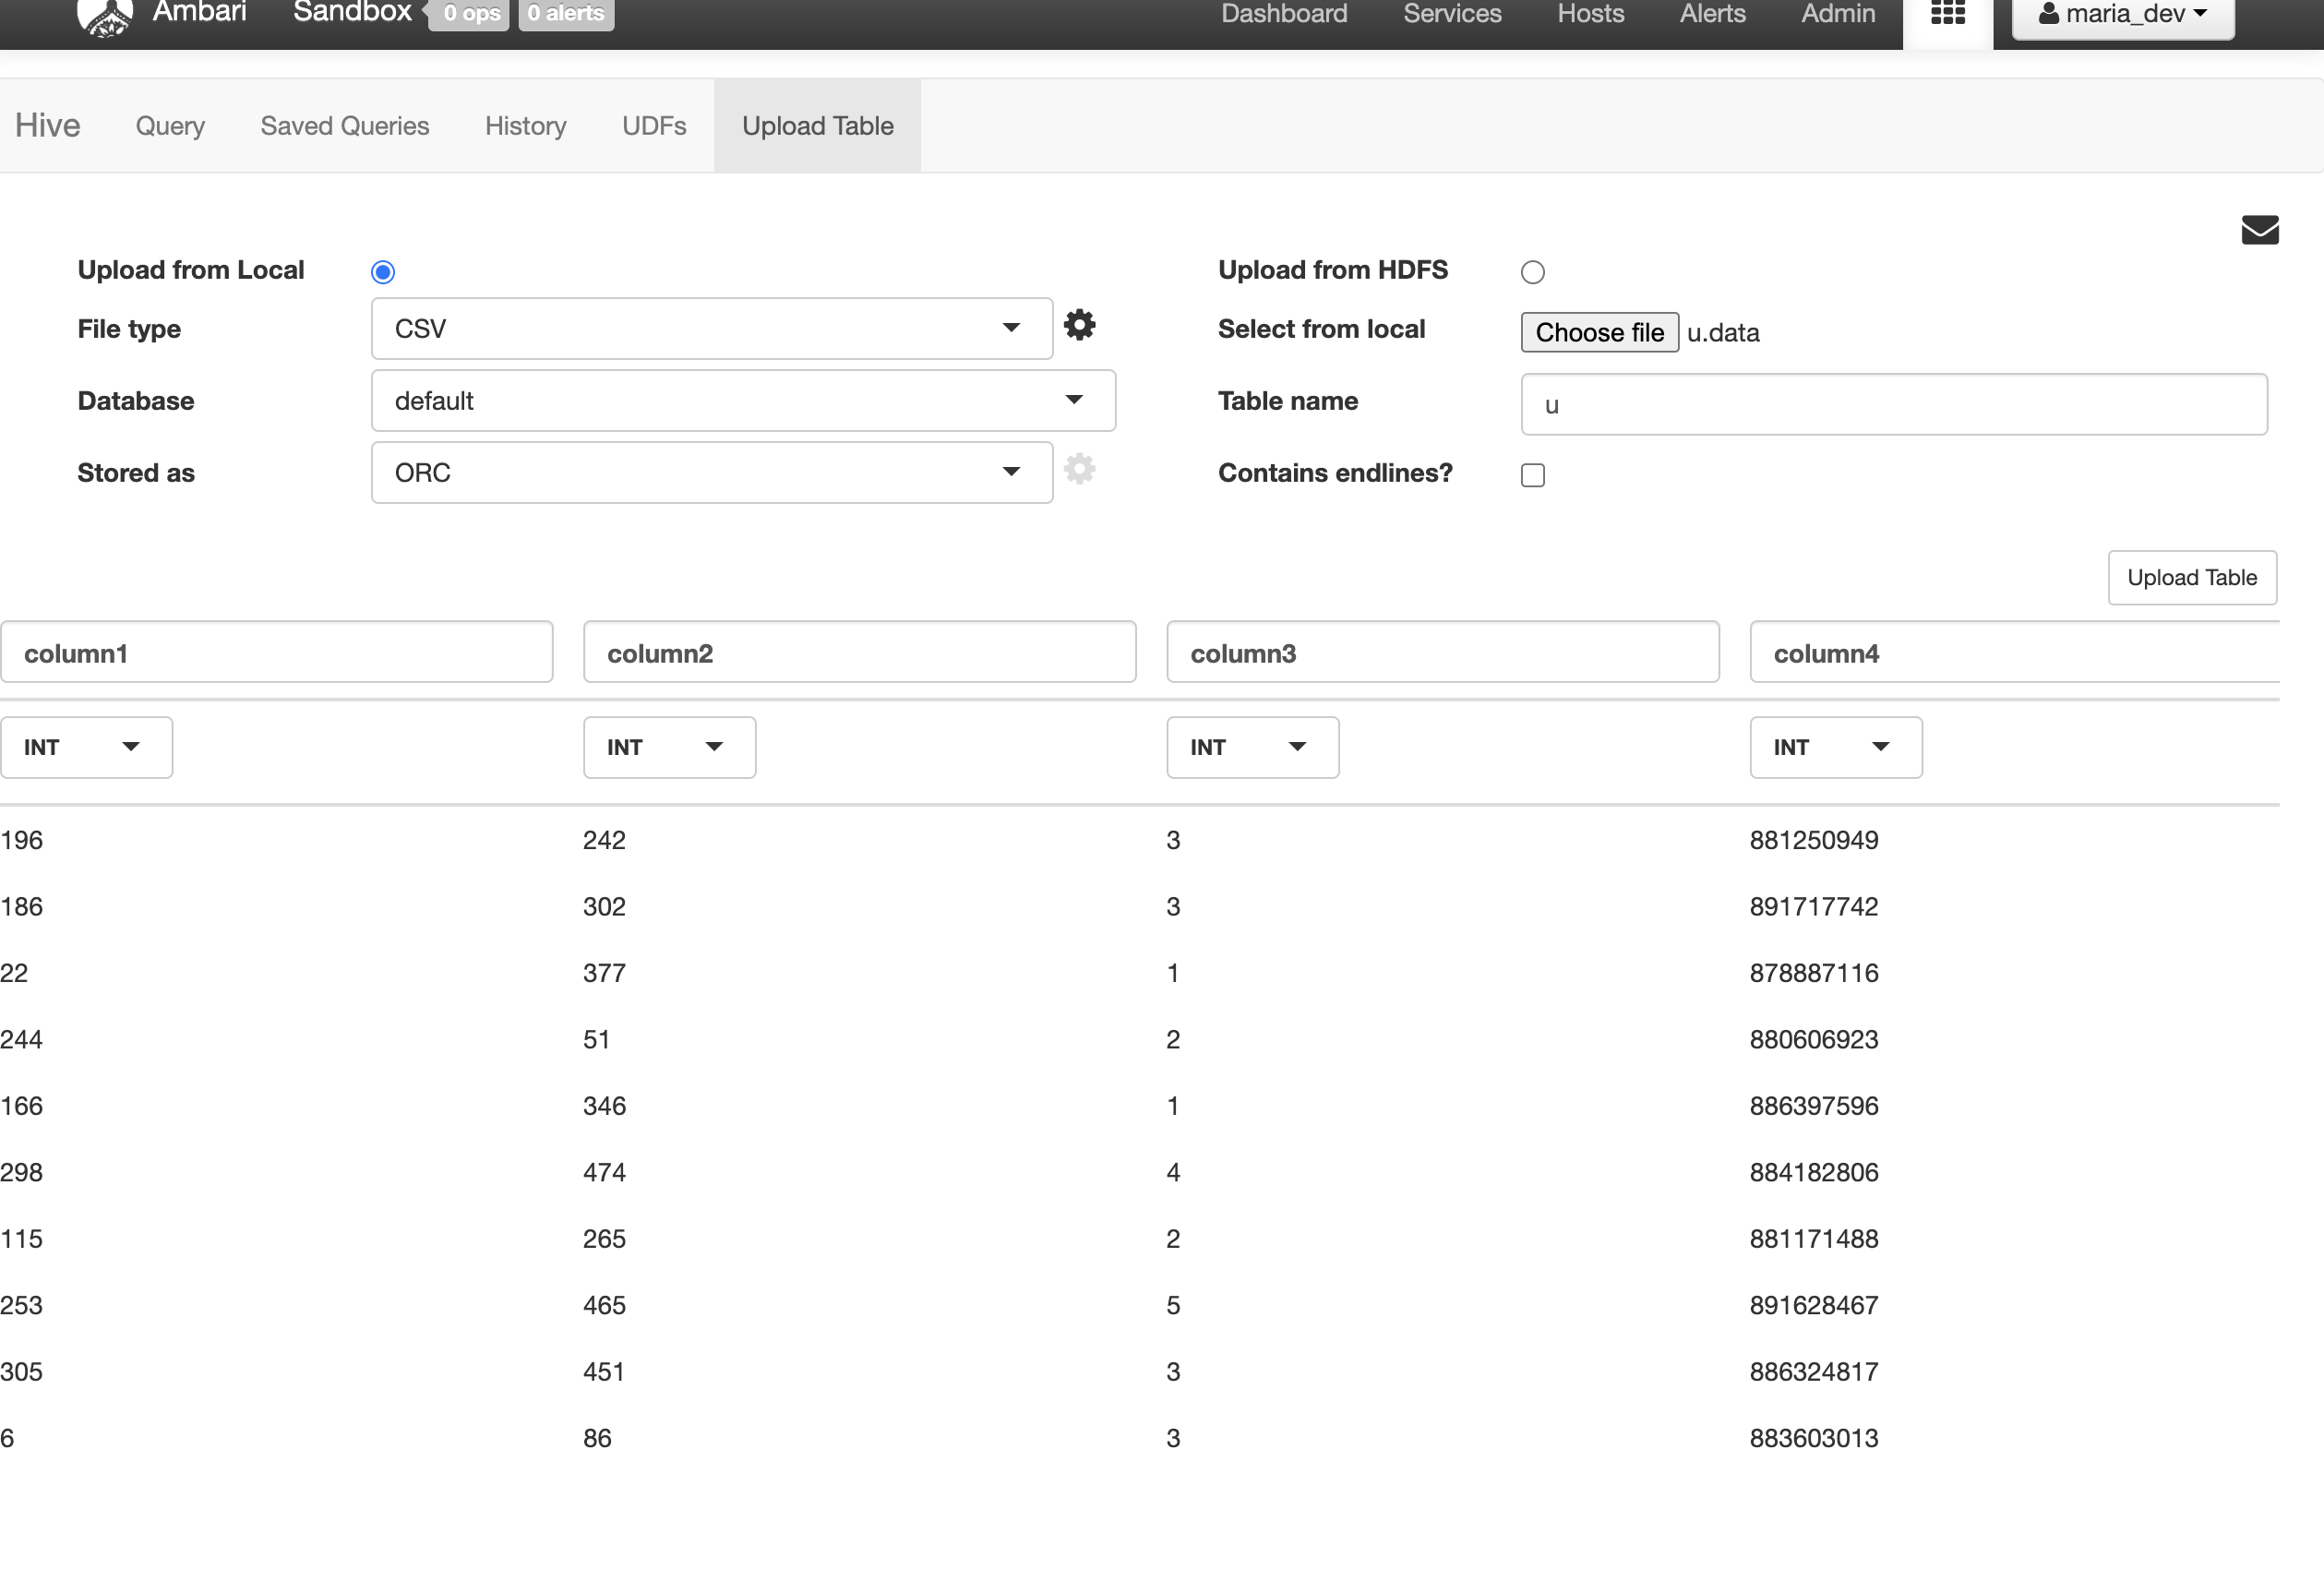
And we rename the columns and table name
u : ratings
column1 : user_id
column2: movie_id
column3: rating
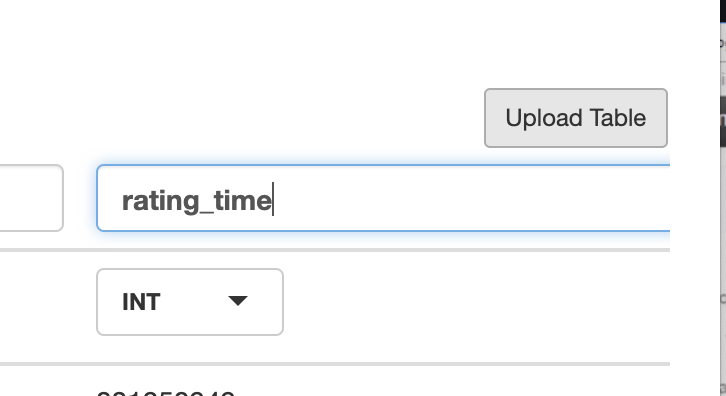
column4: rating_time
and we click upload table
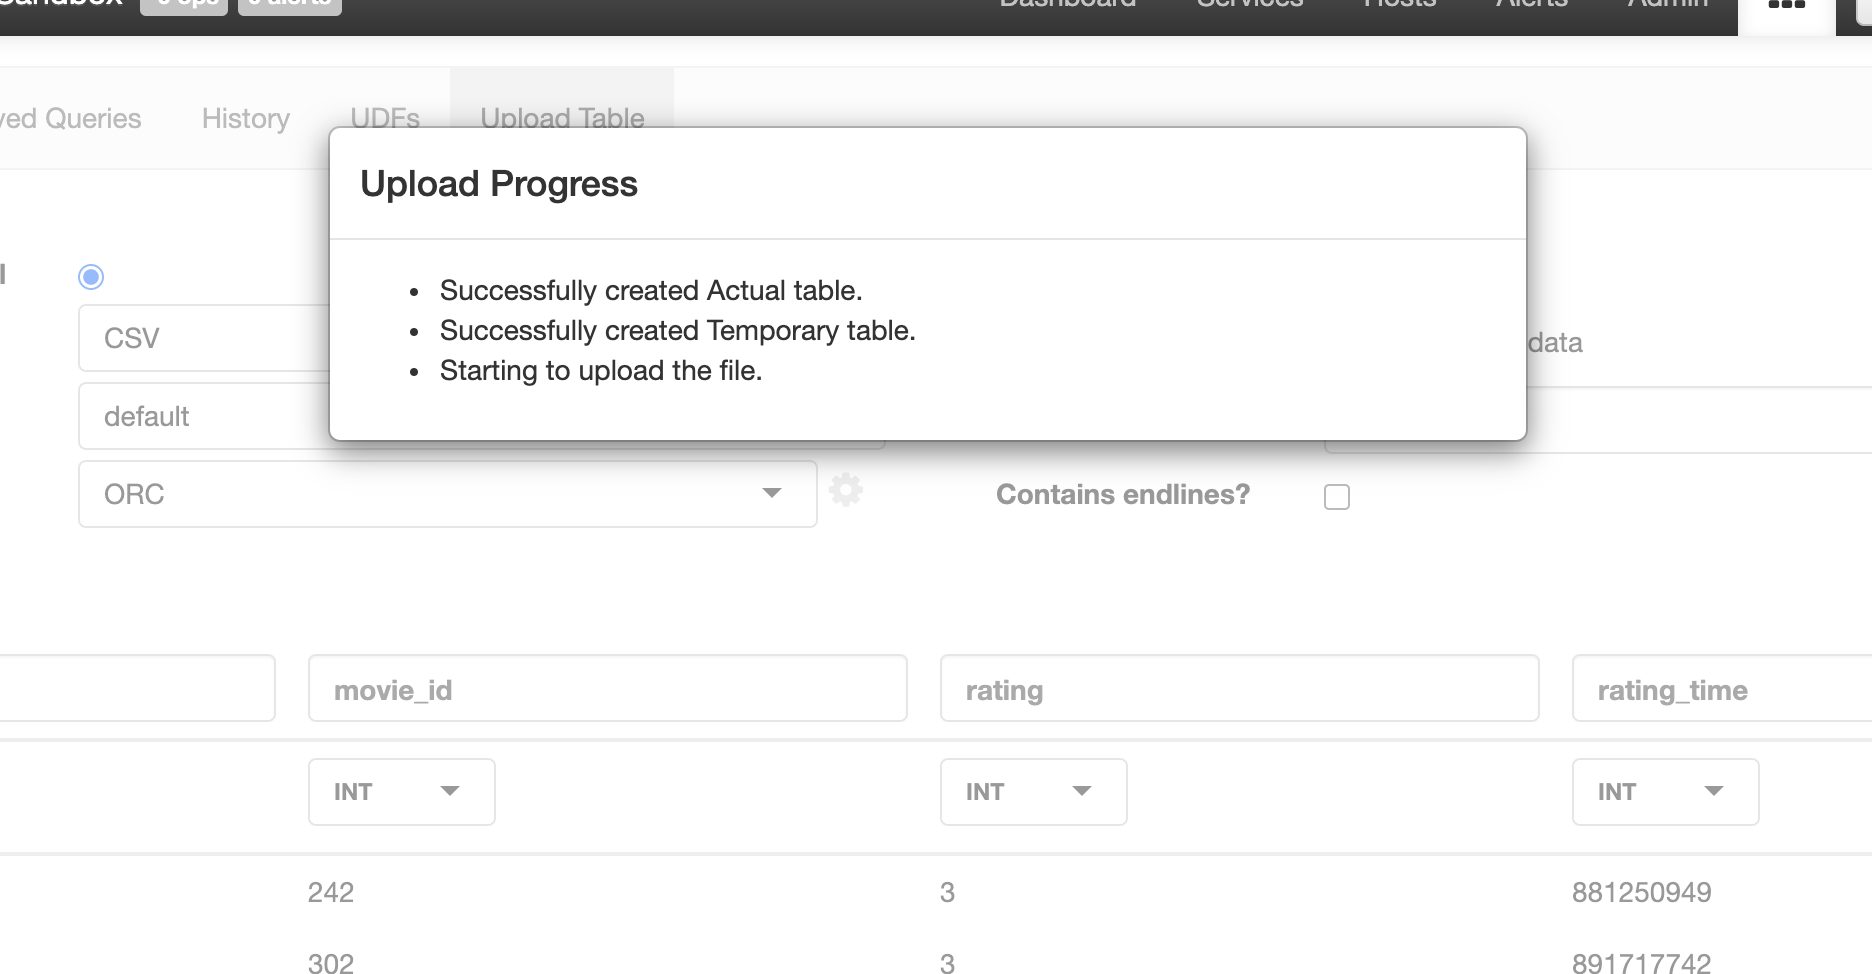
Now we repeat the same procedure, we click on settings for the file type and we choose the filed delimiter
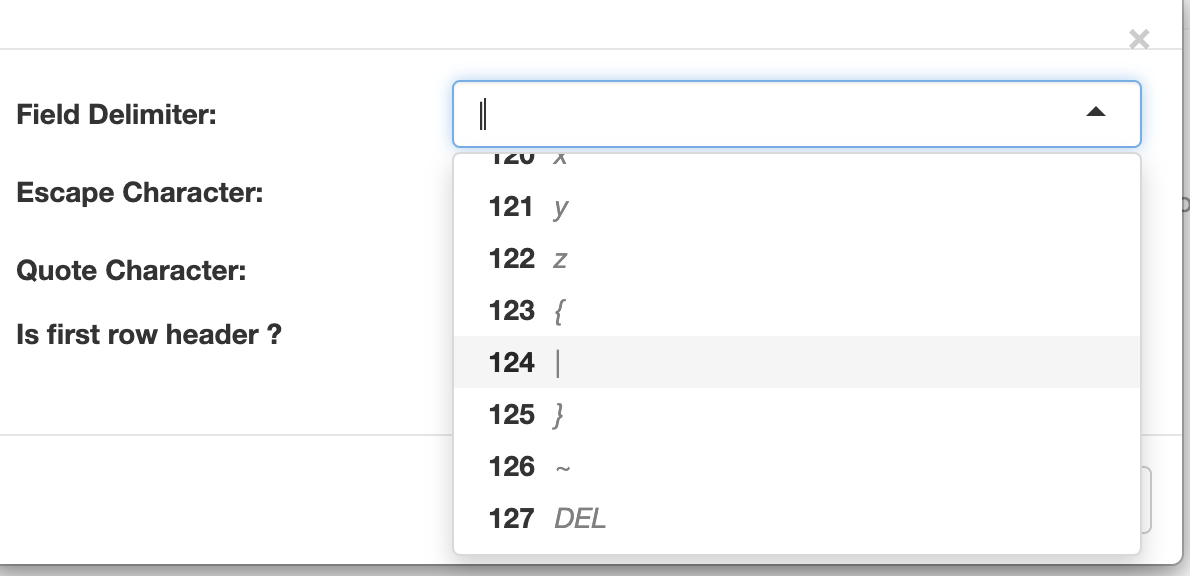
and now we choose the file u.item
and rename the columns and table name
u : movies_names
column1 : movie_id
column2: name
and we upload the table
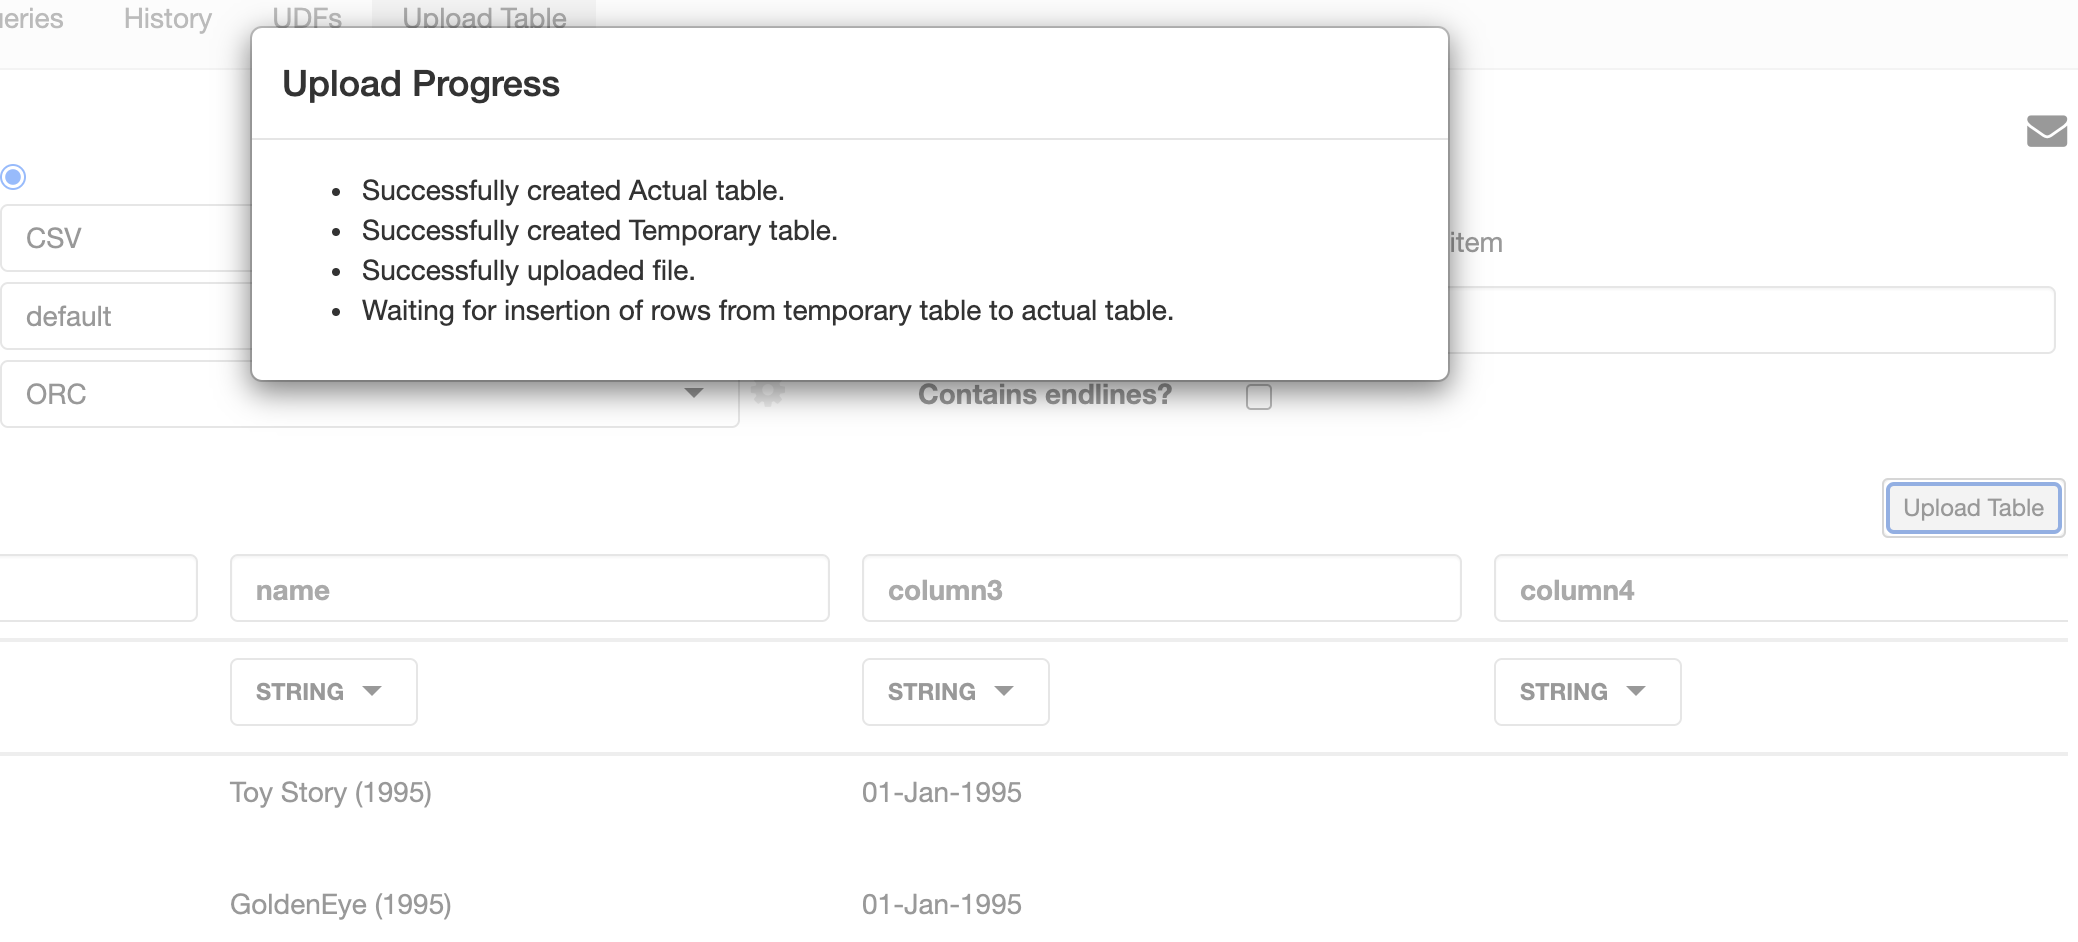
Query in Hive
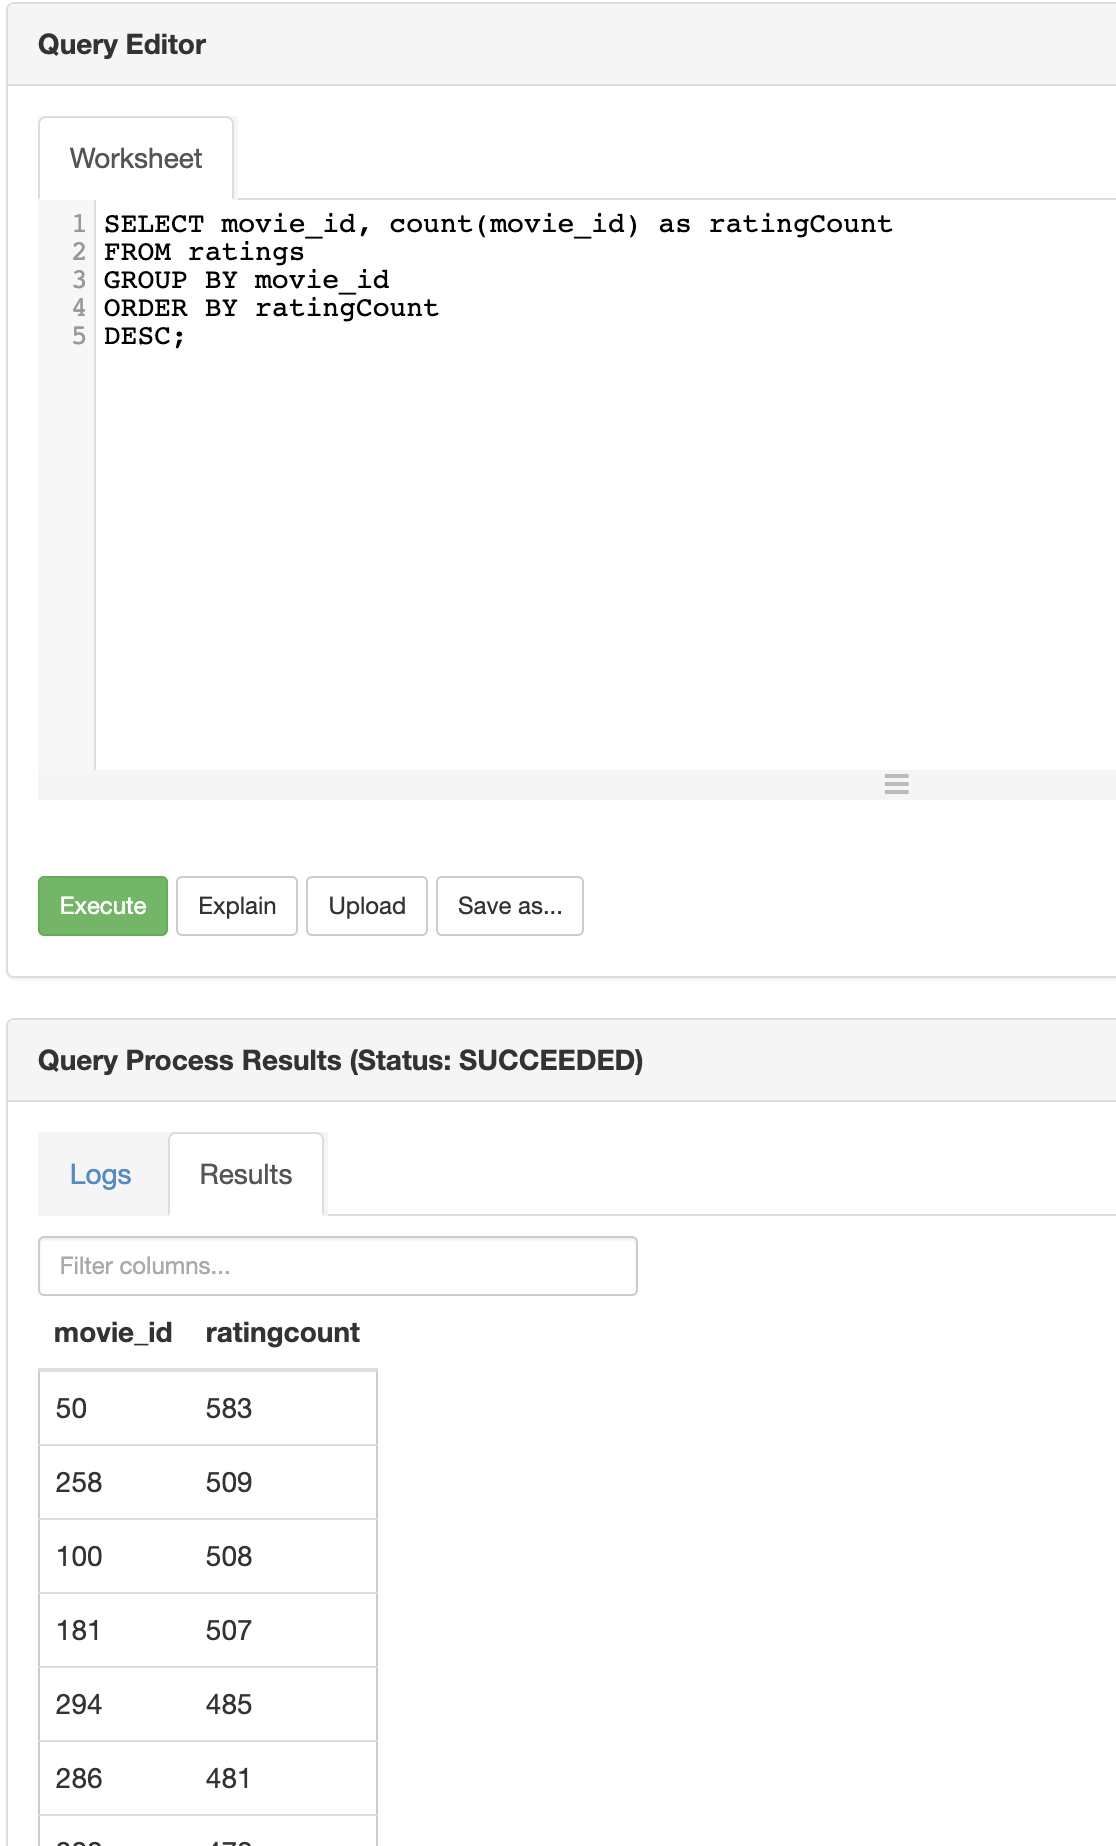
After the tables are uploaded we can open the query editor and execute the following SQL command and execute it.
Data Visualisation
In addition we can visualize the data easily , we choose the x, y vaiables the columns that we want to visualize.
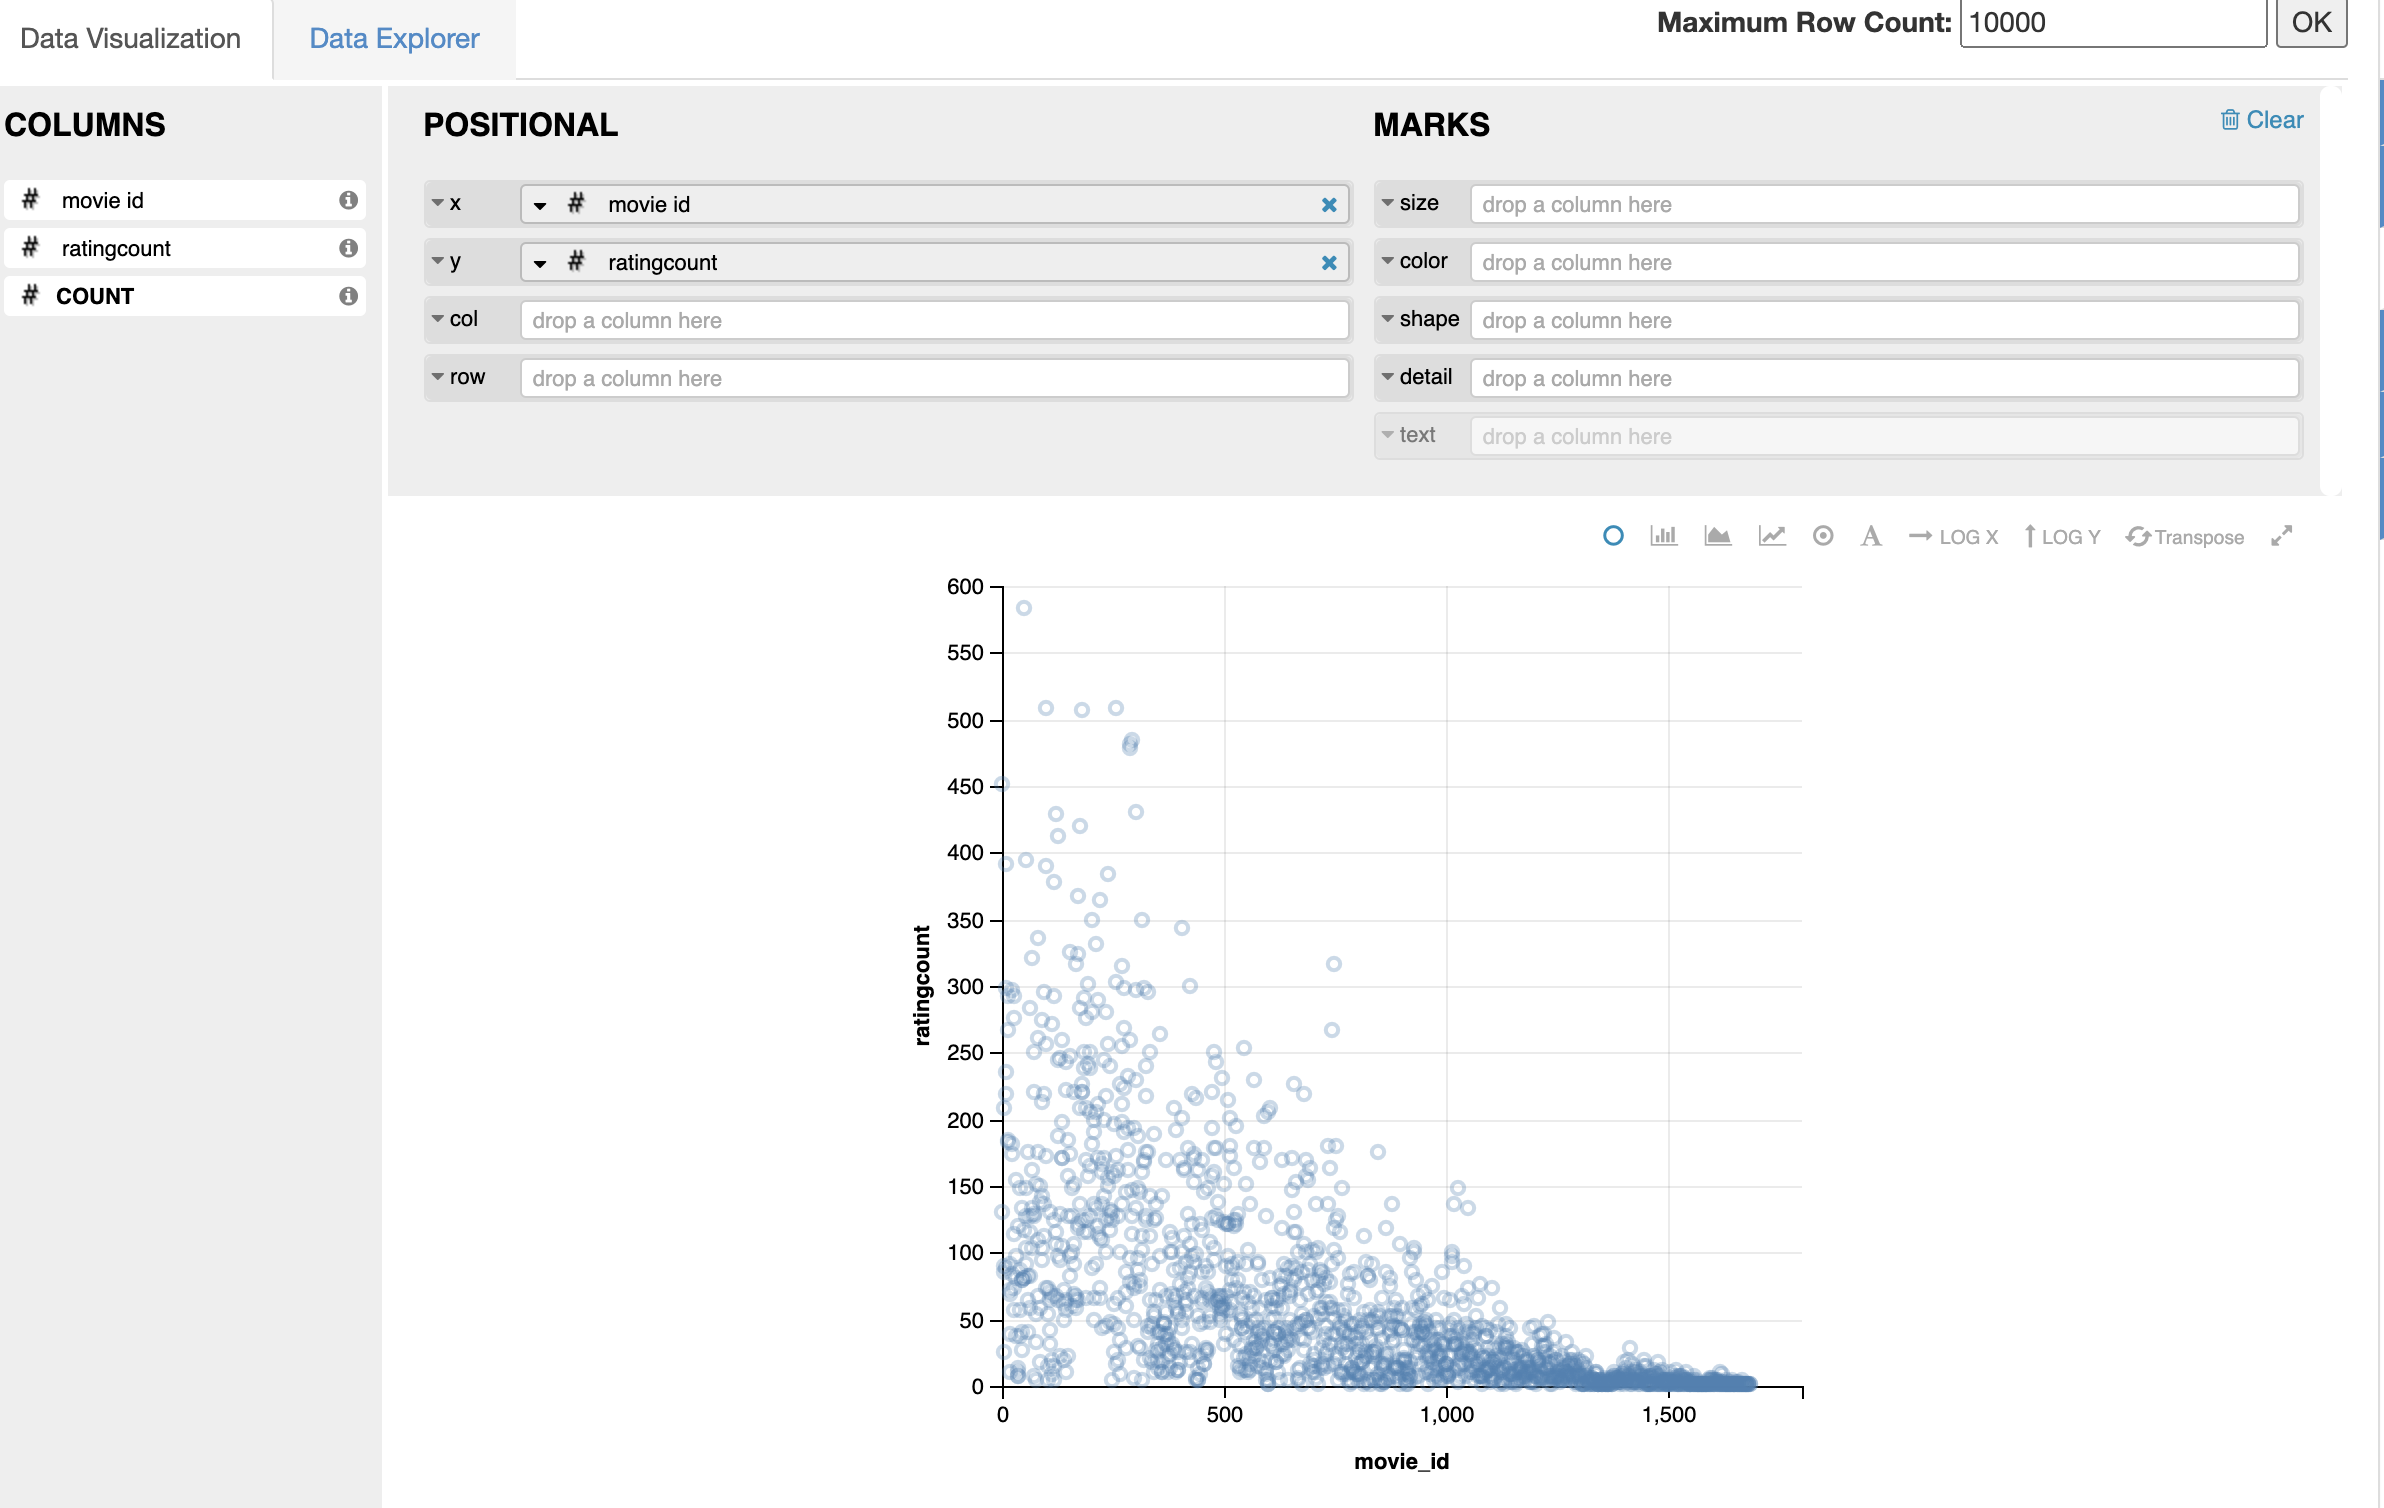
Great now, we are able to plot features of a dataset by using Hive.
Important , after use the aws instance, if you wont use the server,please terminate the instance to avoid charges.
HDP Sandbox Port Forwards
- 2122 -> 22 HostSSH
- 2200 -> 22 HostSSH2
- 2222 -> 2222 DockerSSH
- 7777 -> 7777 Streaming Analytics Manager
- 8585 -> 8585 Streams Messaging Manager
- 7788 -> 7788 Schema Registry
- 8000 -> 8000 Storm Logviewer
- 9995 -> 9995 Zeppelin1
- 9996 -> 9996 Zeppelin2
- 9088 -> 9088 NiFi Protocol
- 61080 -> 61080 NiFi Registry
- 8886 -> 8886 AmbariInfra
- 61888 -> 61888 Log Search
- 10500 -> 10500 HS2v2
- 4040 -> 4040 Spark
- 4200 -> 4200 AmbariShell
- 8983 -> 8983 SolrAdmin
- 42080 -> 80 Apache
- 42111 -> 42111 nfs
- 8020 -> 8020 HDFS
- 8040 -> 8040 nodemanager
- 8032 -> 8032 RM
- 8080 -> 8080 ambari
- 8443 -> 8443 Knox
- 8744 -> 8744 StormUI
- 1080 -> 1080 Splash Page
- 8993 -> 8993 Solr
- 10000 -> 10000 HS2
- 10001 -> 10001 HS2Http
- 10002 -> 10002 HiveJDBCJar
- 30800 -> 30800 DAS
- 11000 -> 11000 Oozie
- 15000 -> 15000 Falcon
- 19888 -> 19888 JobHistory
- 50070 -> 50070 WebHdfs
- 50075 -> 50075 Datanode
- 50095 -> 50095 Accumulo
- 50111 -> 50111 WebHcat
- 16010 -> 16010 HBaseMaster
- 16030 -> 16030 HBaseRegion
- 60080 -> 60080 WebHBase
- 6080 -> 6080 XASecure
- 18080 -> 18080 SparkHistoryServer
- 8042 -> 8042 NodeManager
- 21000 -> 21000 Atlas
- 8889 -> 8889 Jupyter
- 8088 -> 8088 YARN
- 2181 -> 2181 Zookeeper
- 9090 -> 9090 Nifi
- 4557 -> 4557 NiFi DistributedMapCacheServer
- 6627 -> 6627 Storm Nimbus Thrift
- 9000 -> 9000 HST
- 6667 -> 6667 Kafka
- 9091 -> 9091 NiFi UI HTTPS
- 2202 -> 2202 Sandbox SSH 2
- 8188 -> 8188 YarnATS
- 8198 -> 8198 YarnATSR
- 9089 -> 9089 Druid1
- 8081 -> 8081 Druid2
- 2201 -> 2201 SSH HDP CDA
The default Ambari credential is raj_ops:raj_ops and maria_dev: maria_dev . The default AmbariShell login credential is root:hadoop.
Congratulations! We have installed and executed Hive visualizations on an EC2 instance using Cloudera HDP Sandbox.
For further information of HDP you can follow the official tutorials:
https://hortonworks.com/tutorial/sandbox-deployment-and-install-guide/section/3/
https://www.cloudera.com/tutorials/getting-started-with-hdp-sandbox/1.html.
https://hortonworks.com/tutorial/hortonworks-sandbox-guide/section/3/

Leave a comment