
Creation of Relational Database with RDS and loading a Database
Today we are going to create Relational MySQL Database Server in Amazon Web Services and load a database.
Creation of Relation Database with RDS
Let us first create the Relational Database. Sign in to the AWS Management Console and open the Amazon RDS console at
https://console.aws.amazon.com/rds/.
In the upper-right corner of the Amazon RDS console, choose the AWS Region in which you want to create the DB instance.In the navigation panel, choose Databases.
Choose Create database.
In Choose a database creation method,
select Standard create.
In Engine options, we choose MySQL.
To this project le us choose the Free tier.

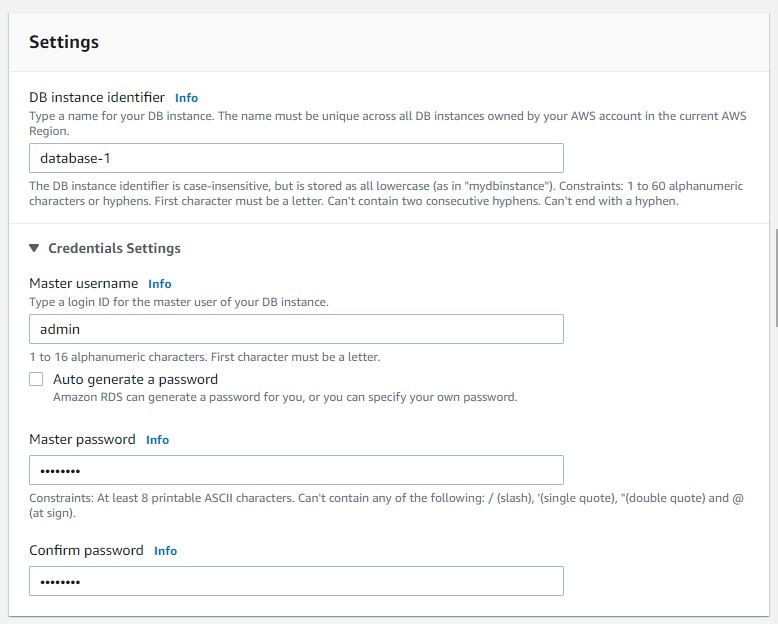
In Settings sections we add the master password,
In Storage section we disable the storage autoscaling, in this example we do not require use this feature

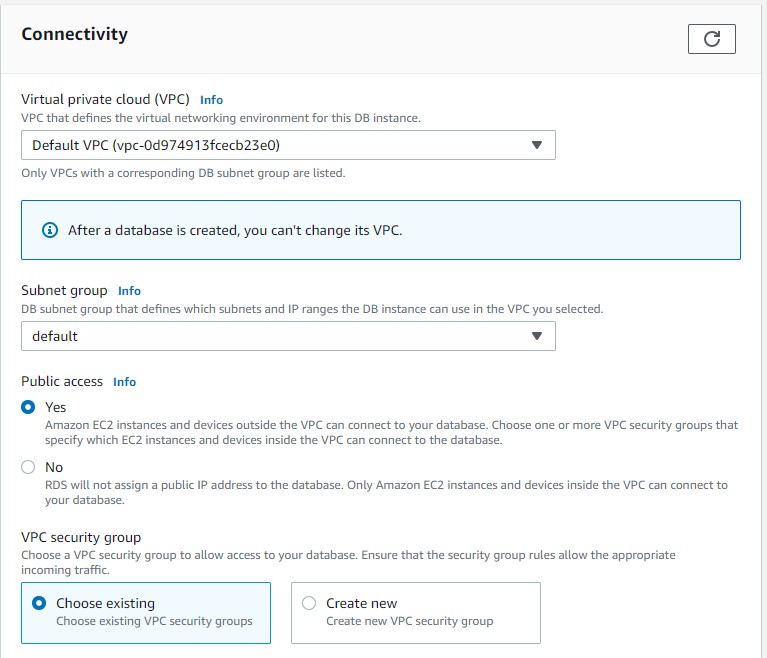
In the Connectivity section we choose for Public access Yes
In Database authentication section and we keep the default settings and press Create database.
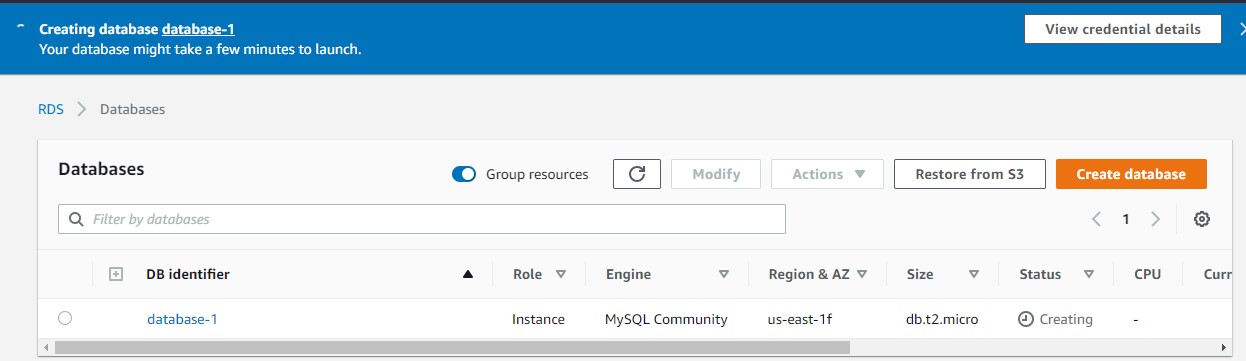
We wait until is created the database.
In order to connect to MySQL, you will have to authorize the IP address of the host from which you plan to connect to MySQL.
You should also revoke access from the CIDR you currently have authorized. If you don’t know your computer’s IP address, you can see it by visiting the site http://checkip.amazonaws.com/.
Note that you will have to add “/32” to the end of this to convert the IP address to a CIDR which contains only that IP address. For example, if your IP address is 192.0.2.10, you should authorize access to the CIDR 192.0.2.10/32.
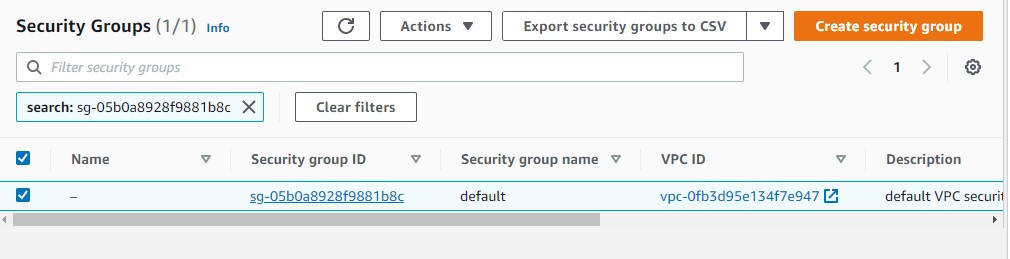
Go to your security group
In Security Groups click on Inbound rules
and then edit inboud rules and add rule

the type we select MYSQL/Aurora and for this project let choose as Source type My IP
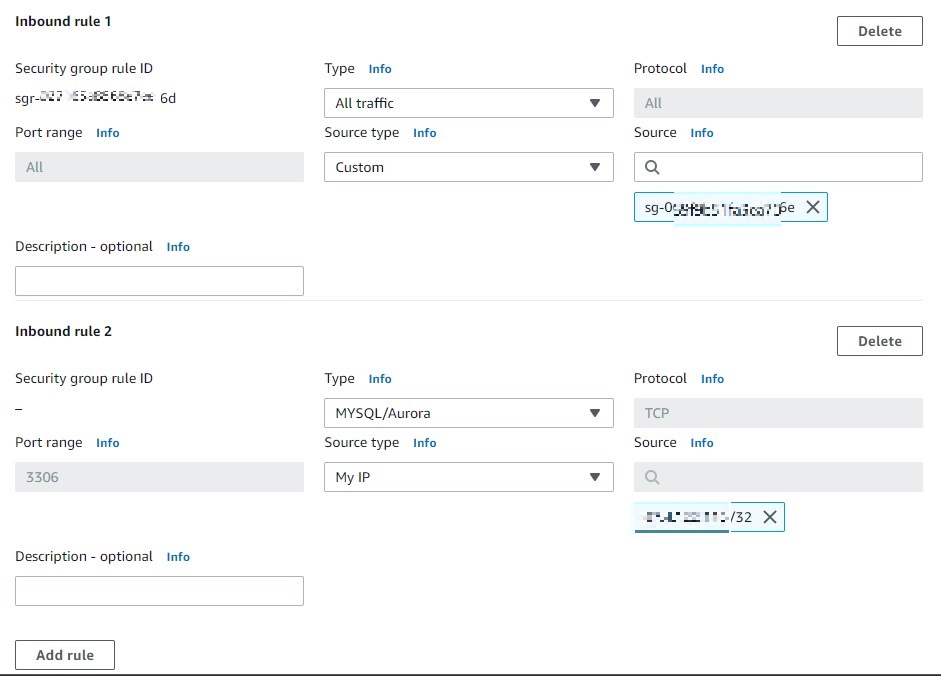
and click save rules.
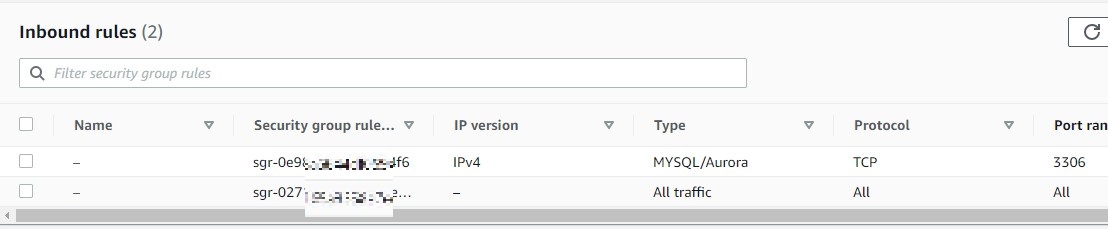
You will have
Now is time to connect with our Database.
Connecting to a DB instance running the MySQL database
After Amazon RDS provisions your DB instance, you can use any standard MySQL client application
Connecting to RDS with Ubuntu 20.04
Let us create a new project folder
mkdir project
cd project
then type
pwd
/home/ubuntu/project
we will use this folder to download the demo database.
To install the MySQL command-line client on most DEB-based Linux distributions, run the following command:
sudo apt update
sudo apt-get upgrade
sudo apt-get install mariadb-client
Working with RDSI prefer the MariaDB-client over mysql-client-8.0
To check the version of your MySQL command-line client, run the following command:
mysql --version
you will get something like
ubuntu@ip-132-34-28-92:~/project$ mysql --version
mysql  Ver 15.1 Distrib 10.3.32-MariaDB, for debian-linux-gnu (x86_64) using readline 5.2
Load the Sample Database into MySQL Server
We use the classicmodels database as a MySQL sample database to help you work with MySQL quickly and effectively. The classicmodels database is a retailer of scale models of classic cars database. It contains typical business data such as customers, products, sales orders, sales order line items, etc.
The MySQL sample database schema consists of the following tables:
- Customers: stores customer’s data.
- Products: stores a list of scale model cars.
- ProductLines: stores a list of product line categories.
- Orders: stores sales orders placed by customers.
- OrderDetails: stores sales order line items for each sales order.
- Payments: stores payments made by customers based on their accounts.
- Employees: stores all employee information as well as the organization structure such as who reports to whom.
- Offices: stores sales office data.
Download the sample database from to this project
wget https://raw.githubusercontent.com/ruslanmv/How-to-create-a-dataframe-in-S3-from-SQL-queries/master/mysqlsampledatabase.sql
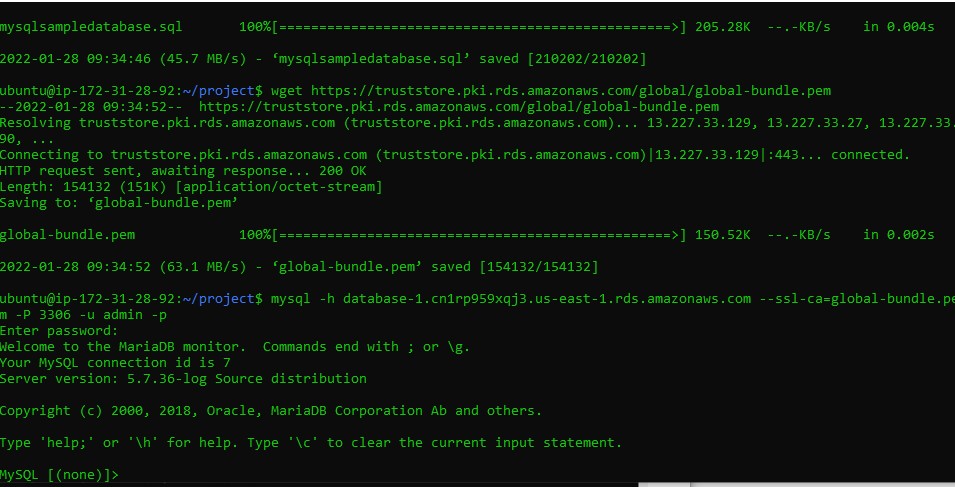
To get a certificate bundle that contains both the intermediate and root certificates for all AWS Regions, download from https://truststore.pki.rds.amazonaws.com/global/global-bundle.pem
wget https://truststore.pki.rds.amazonaws.com/global/global-bundle.pem
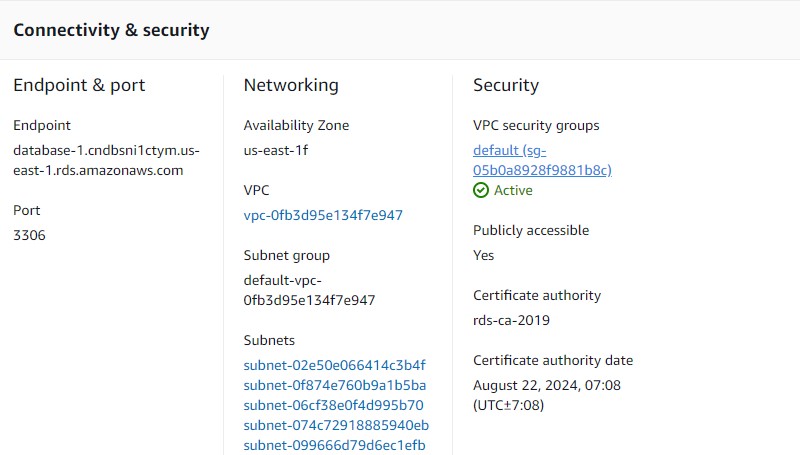
On the Connectivity & security tab, copy the endpoint. Also, note the port number. You need both the endpoint and the port number to connect to the DB instance.
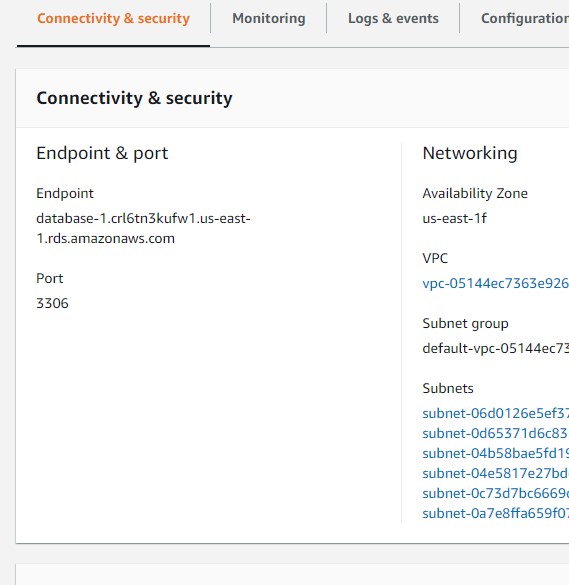
In our example
Endpoint
database-1.cn1rp959xqj3.us-east-1.rds.amazonaws.com
Port
3306
To connect to a DB instance using the MySQL command-line client, enter the following command at a command prompt to connect to a DB instance using the MySQL command-line client.
mysql -h database-1.cn1rp959xqj3.us-east-1.rds.amazonaws.com --ssl-ca=global-bundle.pem -P 3306 -u admin -p
or
mysql -h database-1.cn1rp959xqj3.us-east-1.rds.amazonaws.com -P 3306 -u admin -p
For the -h parameter, substitute the DNS name (endpoint) for your DB instance. For the -P parameter, substitute the port for your DB instance. For the -u parameter, substitute the user name of a valid database user, such as the master user. Enter the master user password when prompted.
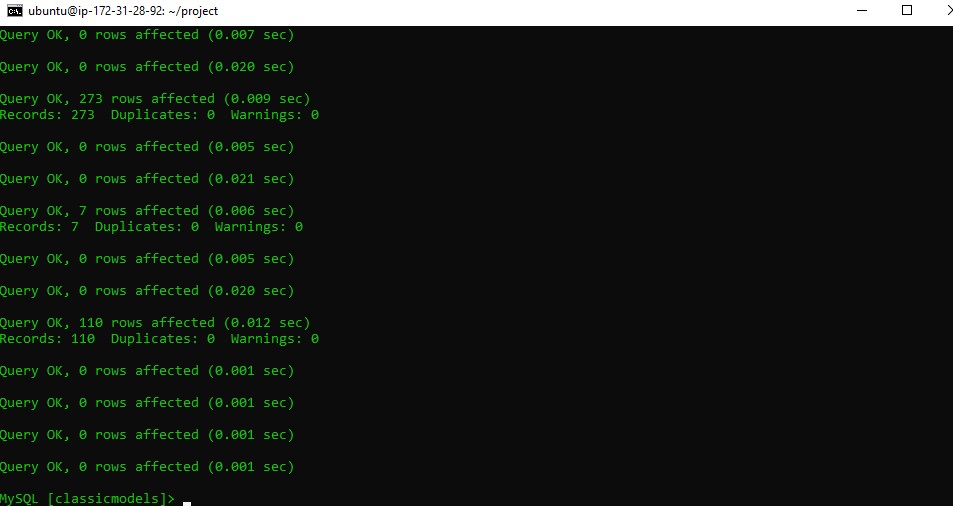
To load to load data into the MySQL Server we can use the source command
source /home/ubuntu/project/mysqlsampledatabase.sql
Use the SHOW DATABASES command to list all databases in the current server:
show databases;
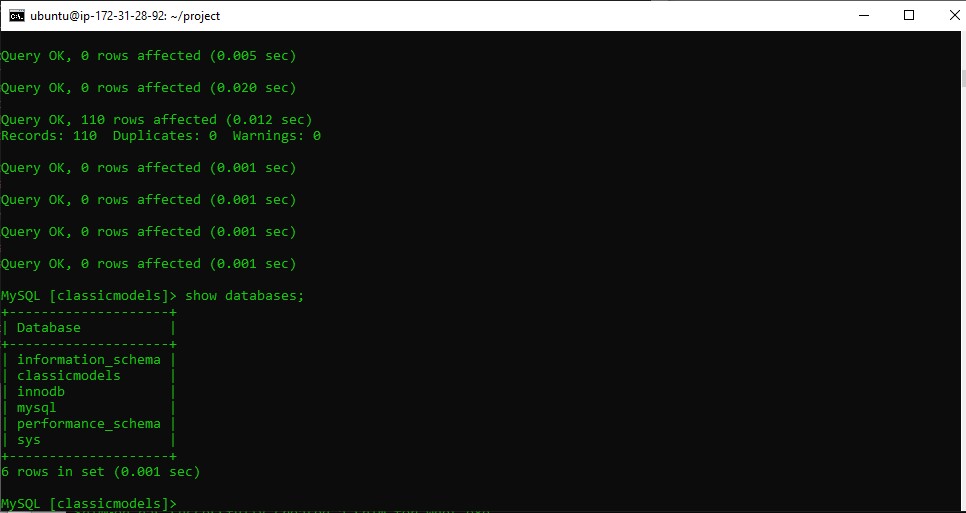
The output will look like the following that includes the newly created classicmodels database:
+--------------------+
| Database           |
+--------------------+
| classicmodels      |
| information_schema |
| mysql              |
| performance_schema |
| sys                |
+--------------------+
USE classicmodels;
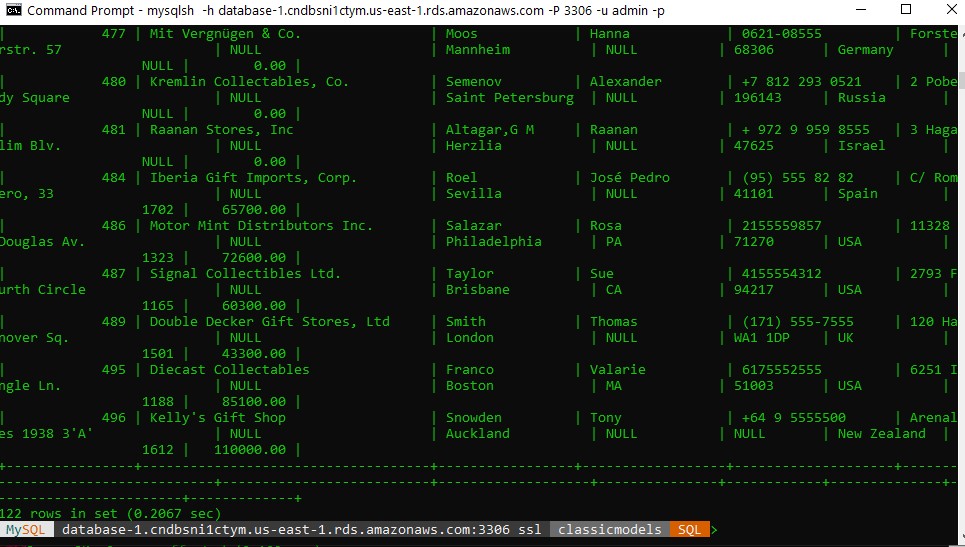
SELECT * FROM customers;
Basically, those statements switch the current database to classicmodels and query data from the customers table.
If you see the customer data returned, you have successfully imported the sample database into the MySQL database server.

Connecting to RDS with Windows 10
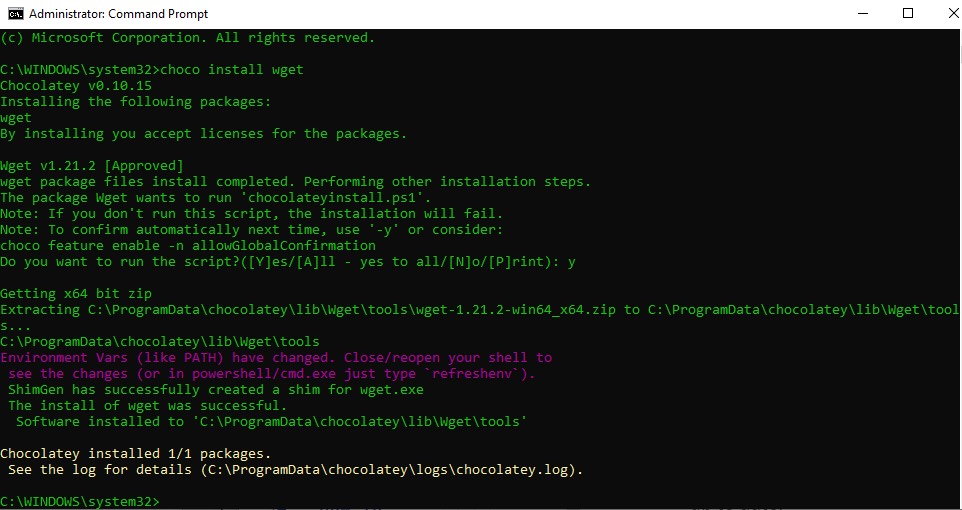
We first need to have installed Chocolatey in Windows as explained here
Then we open the terminal as admin in windows and we install wget
choco install wget
after we installed we can exit from admin and enter again to cmd as normal user and type the following
cd \
mkdir project
Download the sample database from to this project
wget https://raw.githubusercontent.com/ruslanmv/How-to-create-a-dataframe-in-S3-from-SQL-queries/master/mysqlsampledatabase.sql
To get a certificate bundle that contains both the intermediate and root certificates for all AWS Regions, download from https://truststore.pki.rds.amazonaws.com/global/global-bundle.pem
wget https://truststore.pki.rds.amazonaws.com/global/global-bundle.pem
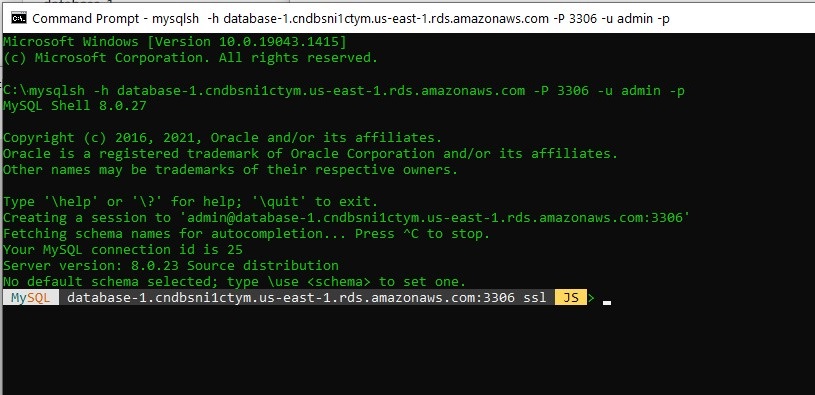
If you are interes we choose MySQL Shell on Microsoft Windows using the MSI Installer, so we download the package from http://dev.mysql.com/downloads/shell/.
When prompted, click Run and follow the steps in the Setup Wizard and finally in the terminal we type
mysqlsh -h database-1.cn1rp959xqj3.us-east-1.rds.amazonaws.com -P 3306 -u admin -p
and finally we load to load data into the MySQL Server we can use the source command
source c:\project\mysqlsampledatabase.sql
and to perform actions in SQL format we type
Use the SHOW DATABASES command to list all databases in the current server:
show databases;
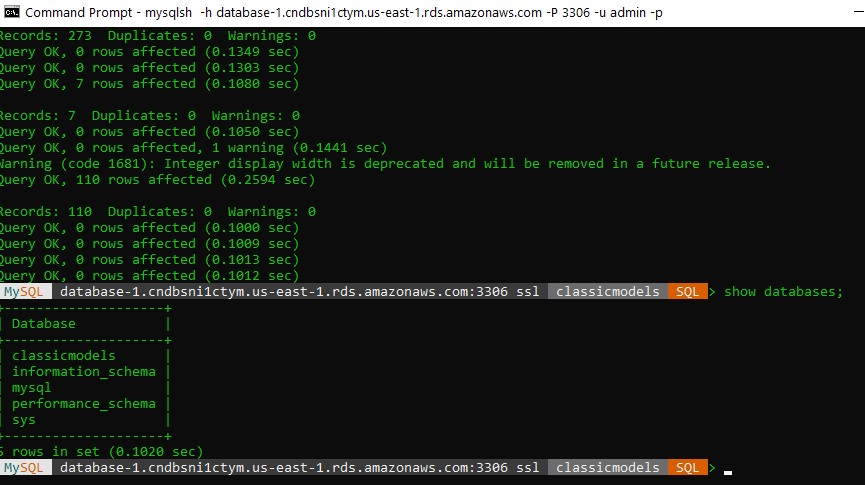
The output will look like the following that includes the newly created classicmodels database:
+--------------------+
| Database           |
+--------------------+
| classicmodels      |
| information_schema |
| mysql              |
| performance_schema |
| sys                |
+--------------------+
USE classicmodels;
SELECT * FROM customers;
Basically, those statements switch the current database to classicmodels and query data from the customers table.
If you see the customer data returned, you have successfully imported the sample database into the MySQL database server.
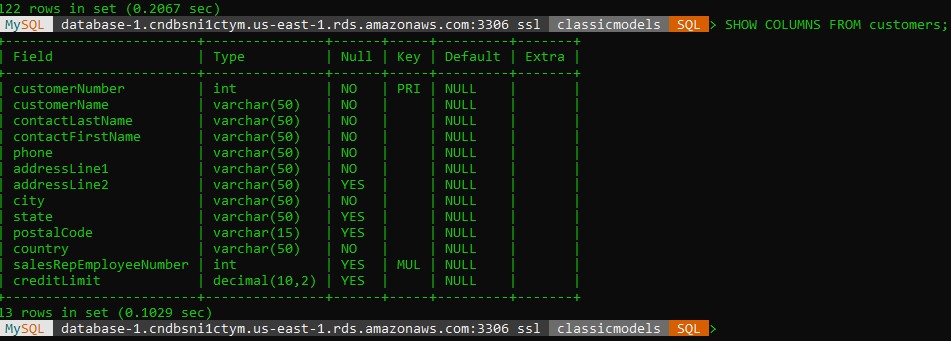
SHOW COLUMNS FROM customers;
Congratulations! We have created a Relational Database and loaded a Database.
Leave a comment