
How to create a Docker Container with Pyspark ready to work with Elyra
Today we are going to create and load different custom Jupyter notebook and JupyterLab application with Pyspark in a docker container.
How to create a Docker Container with Pyspark ready to work.
In ordering to execute the docker containers we need to install Docker in your computer or cluster.
you need perform only three steps:
Step 1. Install Docker desktop in you computer.
https://www.docker.com/products/docker-desktop
Step 2. Select your Custom Pyspark runtime container image that you want to run
This repository has three containers ready to go:
select just one of the following commands:
Container 1:Jupyter Notebook with Apache Spark with Python :
docker run -p 8888:8888 ruslanmv/pyspark-notebook:3.1.2
This container can be used when you wants to work in Jupyter Notebook with Pyspark ,the image is stored at the Docker Hub here
Container 2: JupyterLab with Apache Spark with Python :
docker run -p 8888:8888 ruslanmv/pyspark-jupyterlab:3.1.2
This container can be used when you wants to work in JupyterLab with Pyspark, the image is stored at the Docker Hub here
Container 3: JupyterLab Apache Spark with Python and Elyra :
docker run -p 8888:8888 ruslanmv/pyspark-elyra:3.1.2
This container can be used when you wants to work in JupyterLab with Pyspark and Elyra, This is helpful when you wants to create a Pipeline with Apache Airflow or Kubernet Flow. The image is stored at the Docker Hub here
copy the command and paste in the terminal and press enter
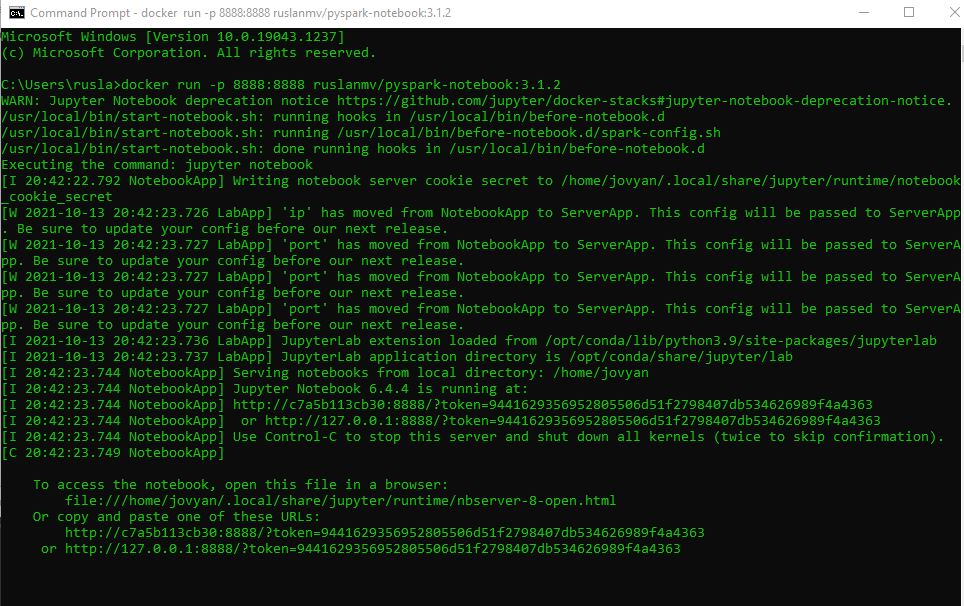
Step 3. Copy the url of the terminal, for example my case was http://127.0.0.1:8888/?token=9441629356952805506d51f2798407db534626989f4a4363 and paste in your browser
and wuala… you can start work.
In the following sections I will teach you how to build them.
Creating a custom Pyspark runtime container image
The Spark Python template image serves as a base image to build your own Python application to run on a Spark cluster.
The base Dockerfile that we will use is the following:
# Copyright (c) Jupyter Development Team.
# Distributed under the terms of the Modified BSD License.
ARG OWNER=jupyter
ARG BASE_CONTAINER=$OWNER/scipy-notebook
FROM $BASE_CONTAINER

LABEL maintainer="Jupyter Project <[email protected]>"

# Fix DL4006
SHELL ["/bin/bash", "-o", "pipefail", "-c"]

USER root

# Spark dependencies
# Default values can be overridden at build time
# (ARGS are in lower case to distinguish them from ENV)
ARG spark_version="3.1.2"
ARG hadoop_version="3.2"
ARG spark_checksum="2385CB772F21B014CE2ABD6B8F5E815721580D6E8BC42A26D70BBCDDA8D303D886A6F12B36D40F6971B5547B70FAE62B5A96146F0421CB93D4E51491308EF5D5"
ARG openjdk_version="11"

ENV APACHE_SPARK_VERSION="${spark_version}" \
    HADOOP_VERSION="${hadoop_version}"

RUN apt-get update --yes && \
    apt-get install --yes --no-install-recommends \
    "openjdk-${openjdk_version}-jre-headless" \
    ca-certificates-java && \
    apt-get clean && rm -rf /var/lib/apt/lists/*

# Spark installation
WORKDIR /tmp
RUN wget -q "https://archive.apache.org/dist/spark/spark-${APACHE_SPARK_VERSION}/spark-${APACHE_SPARK_VERSION}-bin-hadoop${HADOOP_VERSION}.tgz" && \
    echo "${spark_checksum} *spark-${APACHE_SPARK_VERSION}-bin-hadoop${HADOOP_VERSION}.tgz" | sha512sum -c - && \
    tar xzf "spark-${APACHE_SPARK_VERSION}-bin-hadoop${HADOOP_VERSION}.tgz" -C /usr/local --owner root --group root --no-same-owner && \
    rm "spark-${APACHE_SPARK_VERSION}-bin-hadoop${HADOOP_VERSION}.tgz"

WORKDIR /usr/local

# Configure Spark
ENV SPARK_HOME=/usr/local/spark
ENV SPARK_OPTS="--driver-java-options=-Xms1024M --driver-java-options=-Xmx4096M --driver-java-options=-Dlog4j.logLevel=info" \
    PATH="${PATH}:${SPARK_HOME}/bin"

RUN ln -s "spark-${APACHE_SPARK_VERSION}-bin-hadoop${HADOOP_VERSION}" spark && \
    # Add a link in the before_notebook hook in order to source automatically PYTHONPATH
    mkdir -p /usr/local/bin/before-notebook.d && \
    ln -s "${SPARK_HOME}/sbin/spark-config.sh" /usr/local/bin/before-notebook.d/spark-config.sh

# Fix Spark installation for Java 11 and Apache Arrow library
# see: https://github.com/apache/spark/pull/27356, https://spark.apache.org/docs/latest/#downloading
RUN cp -p "${SPARK_HOME}/conf/spark-defaults.conf.template" "${SPARK_HOME}/conf/spark-defaults.conf" && \
    echo 'spark.driver.extraJavaOptions -Dio.netty.tryReflectionSetAccessible=true' >> "${SPARK_HOME}/conf/spark-defaults.conf" && \
    echo 'spark.executor.extraJavaOptions -Dio.netty.tryReflectionSetAccessible=true' >> "${SPARK_HOME}/conf/spark-defaults.conf"

USER ${NB_UID}

# Install pyarrow
RUN mamba install --quiet --yes \
    'pyarrow' && \
    mamba clean --all -f -y && \
    fix-permissions "${CONDA_DIR}" && \
    fix-permissions "/home/${NB_USER}"

WORKDIR "${HOME}"
This application will create a jupyter notebook ready with Pyspark and Spark 3.1.2 with Hadoop 3.2
Building the container
We create a file with this Dockerfile and inside this folder we the container image by running the docker build command in the terminal window,
docker build --rm -t ruslanmv/pyspark-notebook
Running the container
Setting up a Docker container on your local machine is pretty simple. Simply we run the following command in the terminal:
docker run --name pyspark-notebook -it -p 8888:8888 -d ruslanmv/pyspark-notebook
you will see the following in the Docker container

and you click on on it and you can see the link
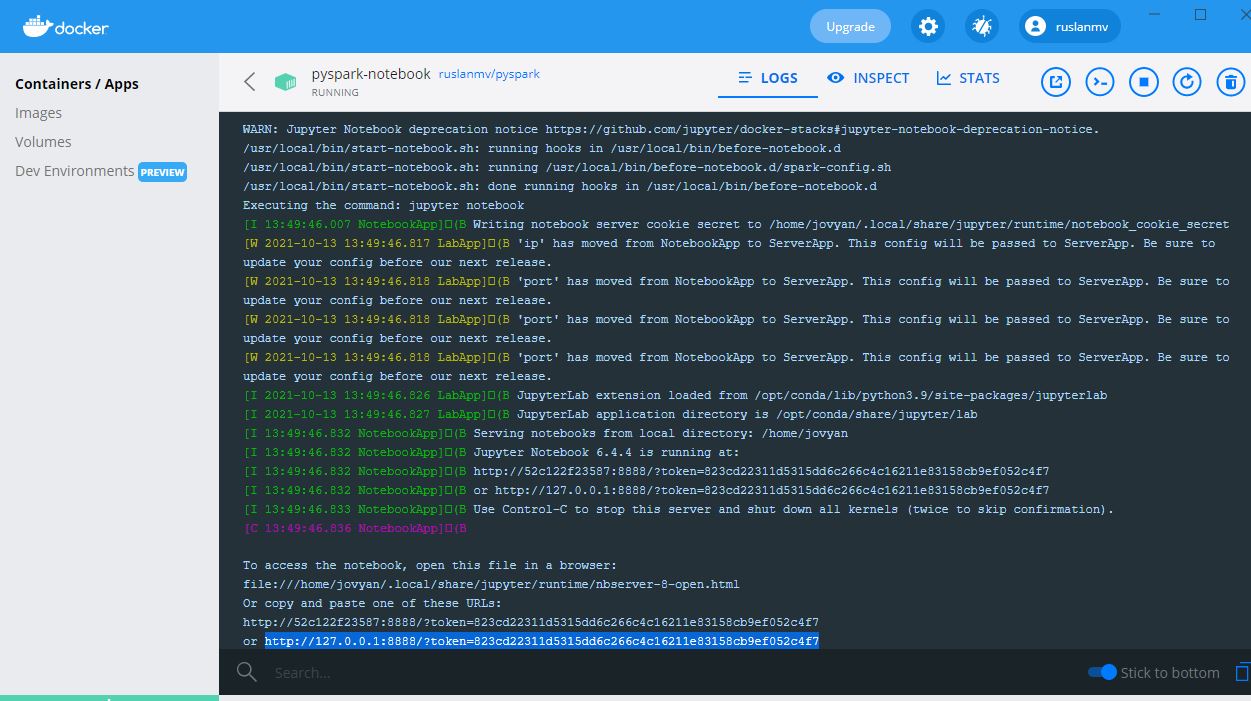
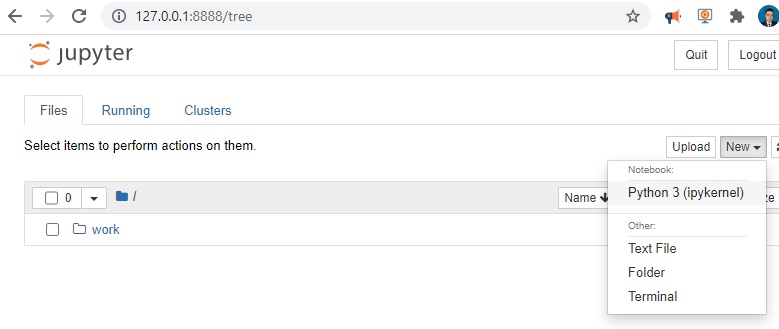
we copy the token number for example http://127.0.0.1:8888/?token=823cd22311d5315dd6c266c4c16211e83158cb9ef052c4f7 then navigate to http://localhost:8888 in your browser and you will see the following screen
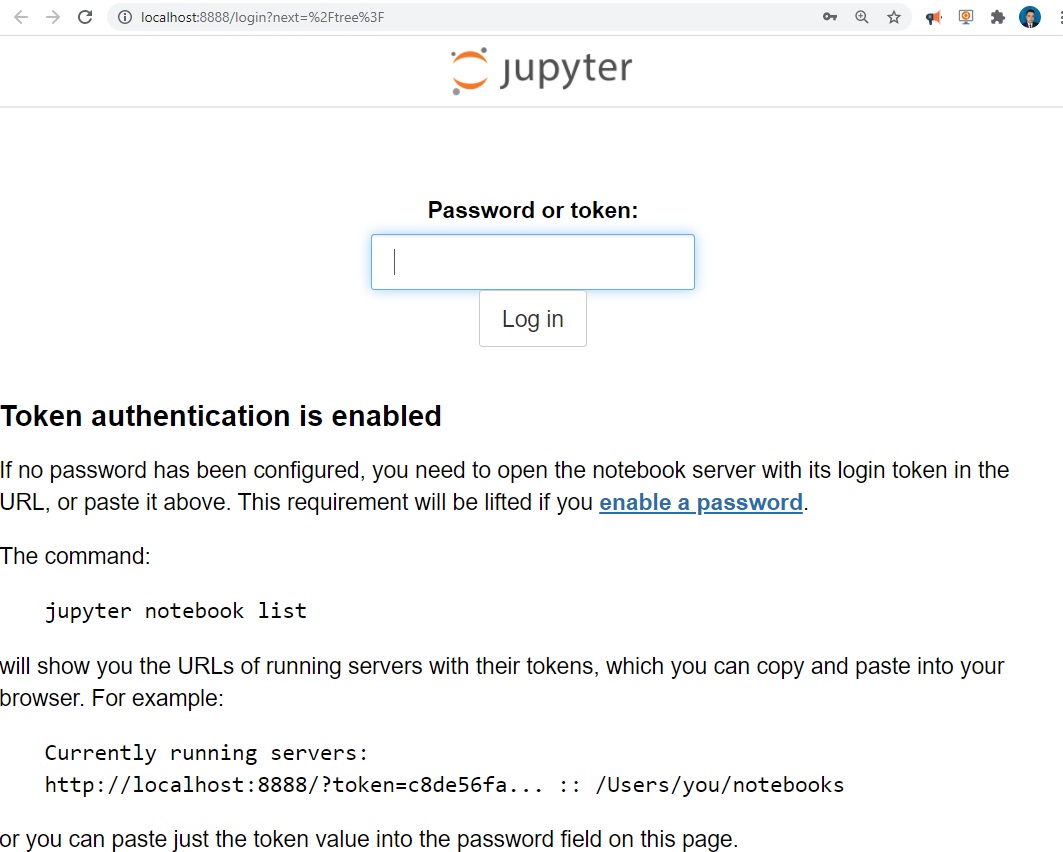
and we paste our code we saw before.
and wuala
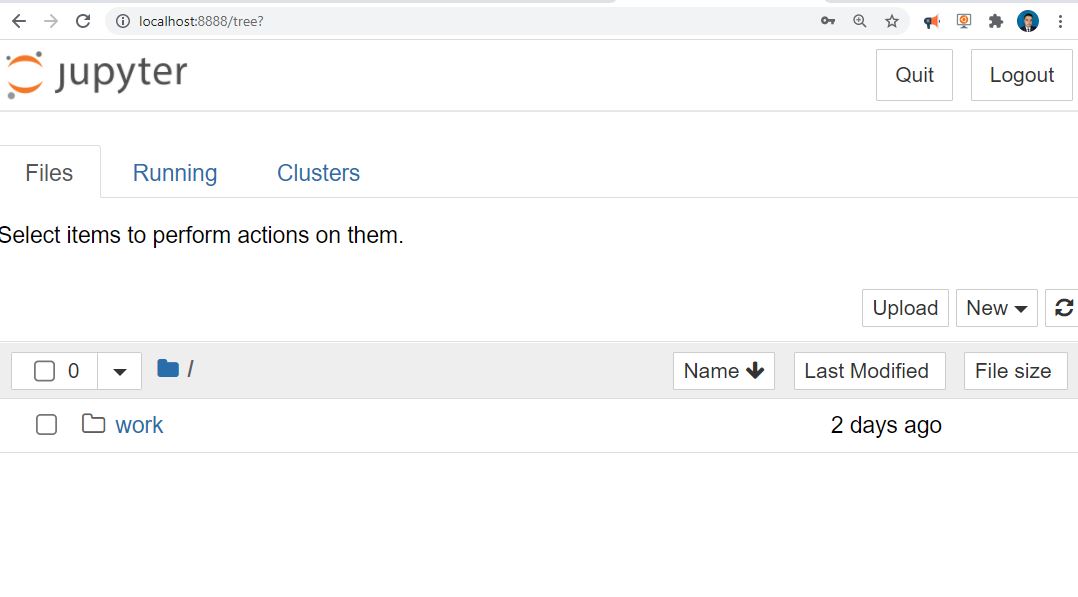 We can create new notebook, let us play, let us create a dataframe in Spark and then parallize numbers and print the version of spark
from pyspark.sql import SparkSession
columns = ["language","users_count"]
data = [("Java", "20000"), ("Python", "100000"), ("Scala", "3000")]
spark = SparkSession.builder.appName('SparkApp').getOrCreate()
rdd = spark.sparkContext.parallelize(data)
dfFromRDD1 = rdd.toDF()
dfFromRDD1.printSchema()
nums = sc.parallelize([1,2,3,4])
print(nums.map(lambda x: x*x).collect())
!spark-shell --version
and you will get

Great we have learn how to create a simple Docker Container and load it.
Create Custom Docker Image with Pyspark with JupyterLab
Now let us modify the previous Docker container by adding Jupyter Lab.
This can be done by passing the environment variable JUPYTER_ENABLE_LAB=yes at container startup
# Copyright (c) Jupyter Development Team.
# Distributed under the terms of the Modified BSD License.
ARG OWNER=jupyter
ARG BASE_CONTAINER=$OWNER/scipy-notebook
FROM $BASE_CONTAINER

LABEL maintainer="Jupyter Project <[email protected]>"

# Fix DL4006
SHELL ["/bin/bash", "-o", "pipefail", "-c"]

USER root

# Spark dependencies
# Default values can be overridden at build time
# (ARGS are in lower case to distinguish them from ENV)
ARG spark_version="3.1.2"
ARG hadoop_version="3.2"
ARG spark_checksum="2385CB772F21B014CE2ABD6B8F5E815721580D6E8BC42A26D70BBCDDA8D303D886A6F12B36D40F6971B5547B70FAE62B5A96146F0421CB93D4E51491308EF5D5"
ARG openjdk_version="11"

ENV APACHE_SPARK_VERSION="${spark_version}" \
    HADOOP_VERSION="${hadoop_version}"
ENV JUPYTER_ENABLE_LAB=yes
RUN apt-get update --yes && \
    apt-get install --yes --no-install-recommends \
    "openjdk-${openjdk_version}-jre-headless" \
    ca-certificates-java && \
    apt-get clean && rm -rf /var/lib/apt/lists/*

# Spark installation
WORKDIR /tmp
RUN wget -q "https://archive.apache.org/dist/spark/spark-${APACHE_SPARK_VERSION}/spark-${APACHE_SPARK_VERSION}-bin-hadoop${HADOOP_VERSION}.tgz" && \
    echo "${spark_checksum} *spark-${APACHE_SPARK_VERSION}-bin-hadoop${HADOOP_VERSION}.tgz" | sha512sum -c - && \
    tar xzf "spark-${APACHE_SPARK_VERSION}-bin-hadoop${HADOOP_VERSION}.tgz" -C /usr/local --owner root --group root --no-same-owner && \
    rm "spark-${APACHE_SPARK_VERSION}-bin-hadoop${HADOOP_VERSION}.tgz"

WORKDIR /usr/local

# Configure Spark
ENV SPARK_HOME=/usr/local/spark
ENV SPARK_OPTS="--driver-java-options=-Xms1024M --driver-java-options=-Xmx4096M --driver-java-options=-Dlog4j.logLevel=info" \
    PATH="${PATH}:${SPARK_HOME}/bin"

RUN ln -s "spark-${APACHE_SPARK_VERSION}-bin-hadoop${HADOOP_VERSION}" spark && \
    # Add a link in the before_notebook hook in order to source automatically PYTHONPATH
    mkdir -p /usr/local/bin/before-notebook.d && \
    ln -s "${SPARK_HOME}/sbin/spark-config.sh" /usr/local/bin/before-notebook.d/spark-config.sh

# Fix Spark installation for Java 11 and Apache Arrow library
# see: https://github.com/apache/spark/pull/27356, https://spark.apache.org/docs/latest/#downloading
RUN cp -p "${SPARK_HOME}/conf/spark-defaults.conf.template" "${SPARK_HOME}/conf/spark-defaults.conf" && \
    echo 'spark.driver.extraJavaOptions -Dio.netty.tryReflectionSetAccessible=true' >> "${SPARK_HOME}/conf/spark-defaults.conf" && \
    echo 'spark.executor.extraJavaOptions -Dio.netty.tryReflectionSetAccessible=true' >> "${SPARK_HOME}/conf/spark-defaults.conf"

USER ${NB_UID}

# Install pyarrow
RUN mamba install --quiet --yes \
    'pyarrow' && \
    mamba clean --all -f -y && \
    fix-permissions "${CONDA_DIR}" && \
    fix-permissions "/home/${NB_USER}"


WORKDIR "${HOME}"
and again we build it
docker build --rm -t ruslanmv/pyspark-jupyterlab .
and run
docker run --name pyspark-jupyterlab -it -p 8888:8888 -d ruslanmv/pyspark-jupyterlab
we copy the full url of the docker and enter to our browser and wuala
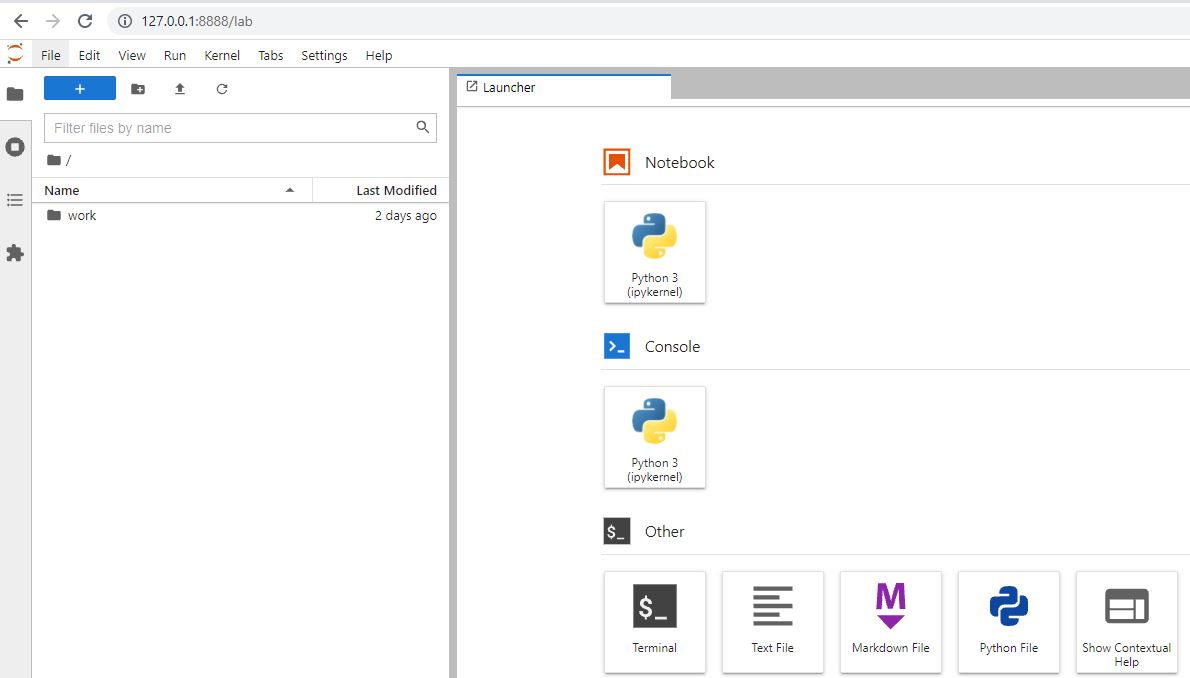
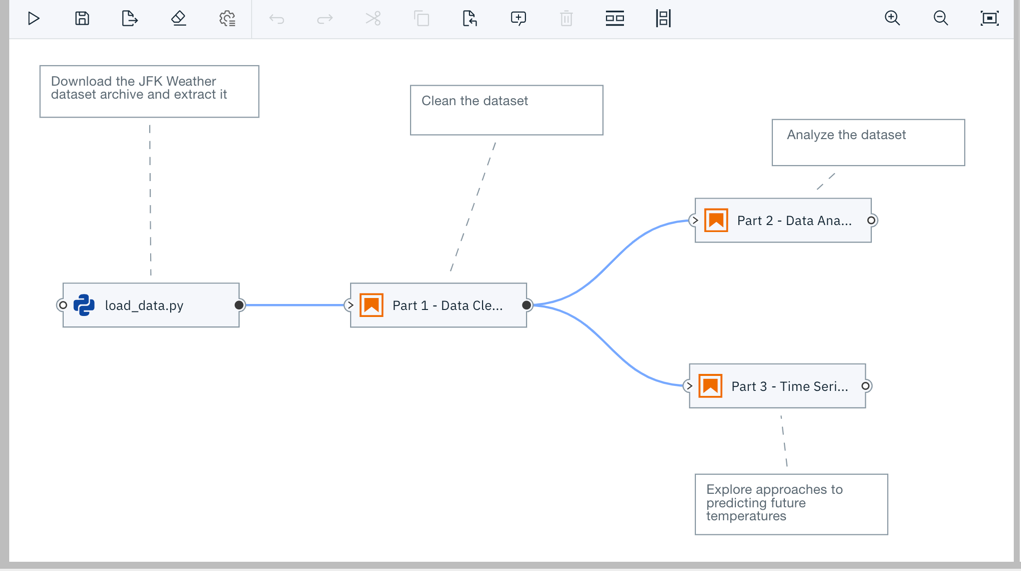
Create Custom Docker Image with Pyspark with JupyterLab and Elyra.
Elyra provides a Pipeline Visual Editor for building AI pipelines from notebooks, Python scripts and R scripts, simplifying the conversion of multiple notebooks or scripts files into batch jobs or workflows.
Currently, pipelines can be executed locally in JupyterLab, on Kubeflow Pipelines, or with Apache Airflow.
When you create a container image using this Dockerfile the default Spark Docker is loaded and the requirements listed in requirements.txt pip-installed.
In the same directory create a requirements.txt file and add the packages your notebooks depend on.
findspark
Note: If your notebooks require packages that are not pre-installed on this image they need to pip-install them explicitly.
we create a new Dockerfile
# Copyright (c) Jupyter Development Team.
# Distributed under the terms of the Modified BSD License.
ARG OWNER=jupyter
ARG BASE_CONTAINER=$OWNER/scipy-notebook
FROM $BASE_CONTAINER

LABEL maintainer="Jupyter Project <[email protected]>"

# Fix DL4006
SHELL ["/bin/bash", "-o", "pipefail", "-c"]

USER root

# Spark dependencies
# Default values can be overridden at build time
# (ARGS are in lower case to distinguish them from ENV)
ARG spark_version="3.1.2"
ARG hadoop_version="3.2"
ARG spark_checksum="2385CB772F21B014CE2ABD6B8F5E815721580D6E8BC42A26D70BBCDDA8D303D886A6F12B36D40F6971B5547B70FAE62B5A96146F0421CB93D4E51491308EF5D5"
ARG openjdk_version="11"

ENV APACHE_SPARK_VERSION="${spark_version}" \
    HADOOP_VERSION="${hadoop_version}"
ENV JUPYTER_ENABLE_LAB=yes
RUN apt-get update --yes && \
    apt-get install --yes --no-install-recommends \
    "openjdk-${openjdk_version}-jre-headless" \
    ca-certificates-java  \
    curl && \
    apt-get clean && rm -rf /var/lib/apt/lists/*

# Install nodejs
# Node
RUN curl -fsSL https://deb.nodesource.com/setup_16.x | sudo -E bash -
RUN sudo apt-get install -y nodejs
RUN echo "NODE Version:" && node --version
RUN echo "NPM Version:" && npm --version
# Install Elyra
RUN  pip3 install --upgrade pip==20.2.4  && pip3 install --no-cache-dir  --upgrade  elyra[all]
RUN jupyter lab  build --dev-build=False --minimize=False
#  Install requirements
COPY requirements.txt ./
RUN pip3 install --no-cache-dir -r requirements.txt
RUN apt-get clean && rm requirements.txt

# Spark installation
WORKDIR /tmp
RUN wget -q "https://archive.apache.org/dist/spark/spark-${APACHE_SPARK_VERSION}/spark-${APACHE_SPARK_VERSION}-bin-hadoop${HADOOP_VERSION}.tgz" && \
    echo "${spark_checksum} *spark-${APACHE_SPARK_VERSION}-bin-hadoop${HADOOP_VERSION}.tgz" | sha512sum -c - && \
    tar xzf "spark-${APACHE_SPARK_VERSION}-bin-hadoop${HADOOP_VERSION}.tgz" -C /usr/local --owner root --group root --no-same-owner && \
    rm "spark-${APACHE_SPARK_VERSION}-bin-hadoop${HADOOP_VERSION}.tgz"

WORKDIR /usr/local

# Configure Spark
ENV SPARK_HOME=/usr/local/spark
ENV SPARK_OPTS="--driver-java-options=-Xms1024M --driver-java-options=-Xmx4096M --driver-java-options=-Dlog4j.logLevel=info" \
    PATH="${PATH}:${SPARK_HOME}/bin"

RUN ln -s "spark-${APACHE_SPARK_VERSION}-bin-hadoop${HADOOP_VERSION}" spark && \
    # Add a link in the before_notebook hook in order to source automatically PYTHONPATH
    mkdir -p /usr/local/bin/before-notebook.d && \
    ln -s "${SPARK_HOME}/sbin/spark-config.sh" /usr/local/bin/before-notebook.d/spark-config.sh

# Fix Spark installation for Java 11 and Apache Arrow library
# see: https://github.com/apache/spark/pull/27356, https://spark.apache.org/docs/latest/#downloading
RUN cp -p "${SPARK_HOME}/conf/spark-defaults.conf.template" "${SPARK_HOME}/conf/spark-defaults.conf" && \
    echo 'spark.driver.extraJavaOptions -Dio.netty.tryReflectionSetAccessible=true' >> "${SPARK_HOME}/conf/spark-defaults.conf" && \
    echo 'spark.executor.extraJavaOptions -Dio.netty.tryReflectionSetAccessible=true' >> "${SPARK_HOME}/conf/spark-defaults.conf"

USER ${NB_UID}

# Install pyarrow
RUN mamba install --quiet --yes \
    'pyarrow' && \
    mamba clean --all -f -y && \
    fix-permissions "${CONDA_DIR}" && \
    fix-permissions "/home/${NB_USER}"
WORKDIR "${HOME}"
Open a terminal to the location where you’ve created the Dockerfile and requirements.txt.
Build the container image by running the docker build command in the terminal window.
docker build --no-cache --rm -t ruslanmv/pyspark-elyra .
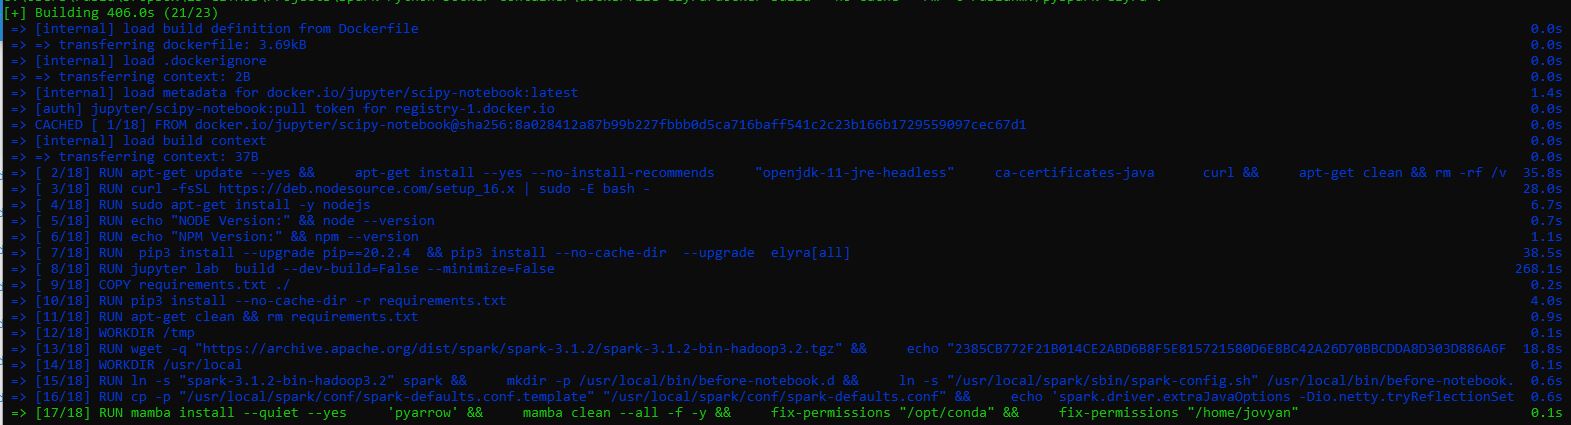
this time will takes more time, and run
docker run --name pyspark-elyra -it -p 8888:8888 -d ruslanmv/pyspark-elyra
navigate to http://localhost:8888 in your browser with the token and you will see the following screen

Setting up a Docker container on your local machine is pretty simple. Simply download docker from the docker website and run it.
Publishing the basic runtime container image
When a notebook is processed as part of a pipeline the associated container image is downloaded from the container registry stated in the URL of the image.
For example, the following steps publish the container image you’ve just created on Docker Hub using docker.
-
Log in to Docker Hub using
docker loginand provide your Docker id and password.docker login -
Run
docker imagesand locate the image id for your Docker image. The image id uniquely identifies your Docker image.docker images REPOSITORY TAG IMAGE ID CREATED SIZE ruslanmv/pyspark-elyra latest 6487c8775d5a 2 hours ago 455MB -
Tag the container image using
docker tag,docker tag 6487c8775d5a ruslanmv/pyspark-elyra:3.1.2 -
Publish the container image on Docker Hub by running
docker pushdocker push ruslanmv/pyspark-elyra:3.1.2
Once the image is published on Docker Hub we can use them wherever we want and reference the published ruslanmv/pyspark-elyra:3.1.2 Docker image.
Cleaning unused data
Remove build cache
docker builder prune
To remove all images which are not used by existing containers, use the -a flag:
docker image prune -a
Congratulation! we have created three ready to go containers with Pyspark and Python.
Leave a comment