
How to run Scala in Visual Studio Code with Jupyter Notebook and Spark
Hello everyone, today we are going to setup Visual Studio Code to run Scala codes from a Jupyter Notebook.
Scala is a strong statically typed high-level general-purpose programming language that supports both object-oriented programming and functional programming. Scala is considered the best language to use for Apache Spark due to its concise syntax, strong type system, and functional programming features, which allow for efficient and scalable distributed computing. Python is also a popular language for Spark due to its ease of use and extensive libraries. For that reason install a Jupyter Notebook with the capability to run Scala and Python is the purpose of this blog post.
Apache Spark is a data processing framework that can quickly perform processing tasks on very large data sets, and can also distribute data processing tasks across multiple computers, either on its own or in tandem with other distributed computing tools.
Step 1 - Installation of Spark and Scala
Let us assume you have already installed property Scala and Spark on your computer, you can follow this tutorial.
Moreover we assume you have installed Python from here and Visual Studio from here you can follow this tutorial.
Step 2 - Creation of Project
Create your project folder:
For example, We open a terminal
cd \
and we create folder called myproject
mkdir myproject
we enter to the folder
cd myproject
then we open VS code
code .
then we open a new terminal there and we choose the Command Prompt
Step 3- Installation of the Environment
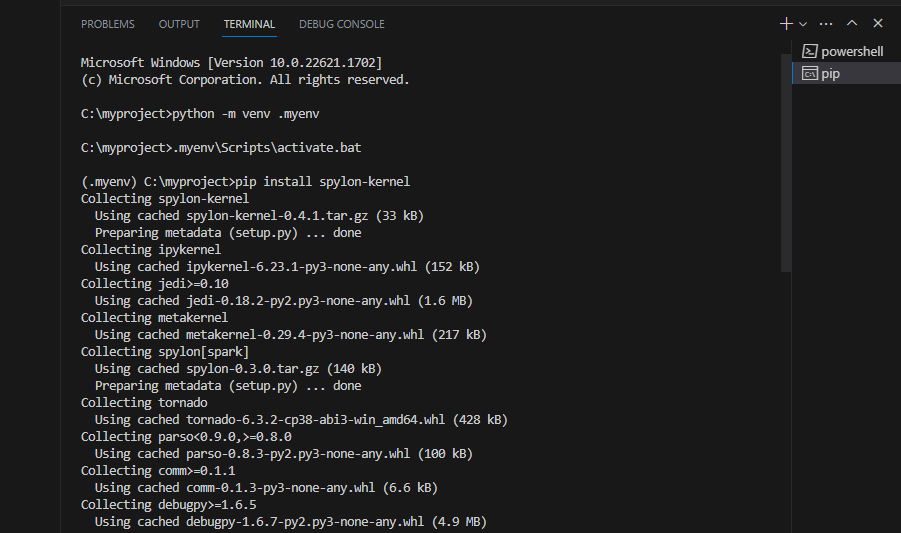
In the Command Prompt we create a virtual environment by typing
python -m venv .myenv
that would create a virtual environment named ‘.myenv’ and then we activate the environment
.myenv\Scripts\activate.bat
then we install the notebook
pip install notebook
and the Scala Kernel
pip install spylon-kernel
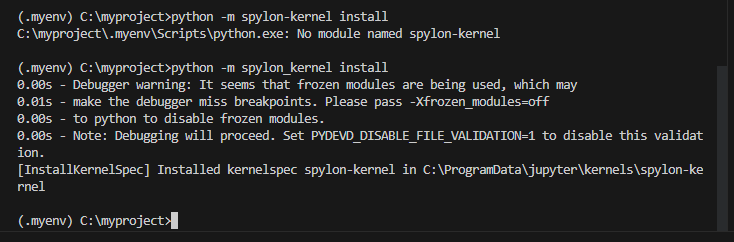
then we create a kernel spec
python -m spylon_kernel install
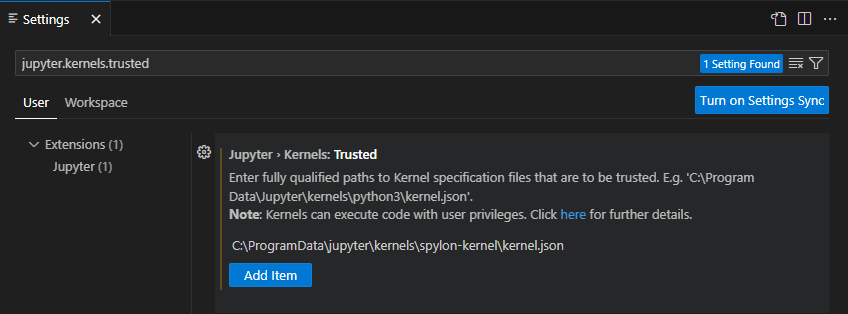
Step 4. Update jupyter.kernels.trusted
Open the VS User Settings UI from the Command Palette (Ctrl+Shift+P) and find Preferences: Open User Settings

Search for the setting jupyter.kernels.trusted

Copy the fully qualified path to the kernelspec,
C:\ProgramData\jupyter\kernels\spylon-kernel\kernel.json
Add Item into the list using the Add button
and we have
 Re-load VS Code, by closing and opening. You can return back to you directory
 C:\myproject> and type
code .
Step 5 Create a Jupyter Notebook for Scala
We create a Jupyter Notebook by running the
Create: New Jupyter Notebook command from the Command Palette (Ctrl+Shift+P)

Step 6 Select a kernel
After a new notebook was created click select Another kernel

then pick Jupyter Kernel
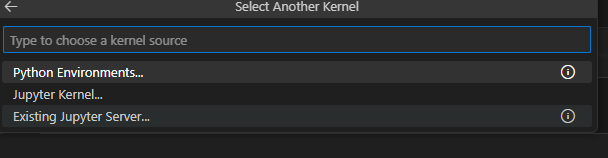
Next, select a kernel spylon_kernel using the kernel picker in the top right.

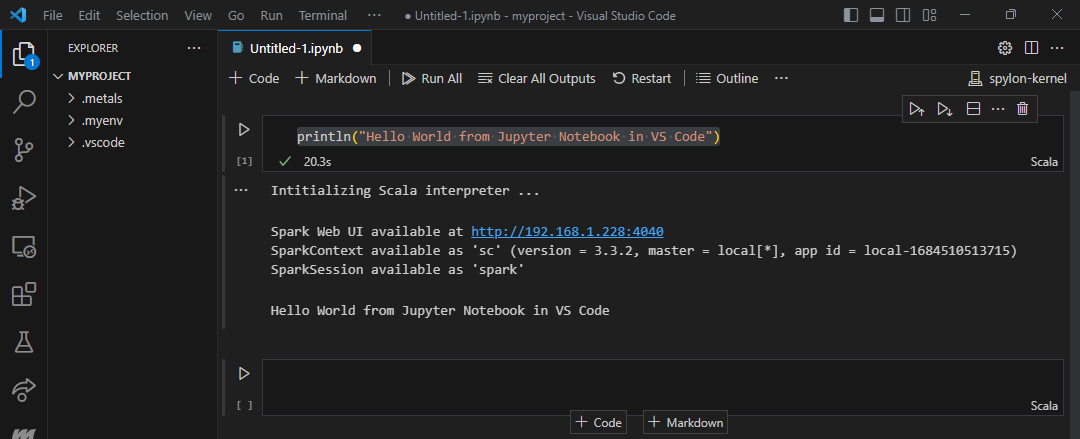
After selecting a kernel, the language picker located in the bottom right of each code cell will automatically update to the language supported by the kernel. you can see your enviroment installed here. We have choosen
spylon_kernel that uses Scala language

Step 7 - Hello World in Scala
Let us test our Scala enviroment in Jupyter Notebook Let us copy the following cell in the notebook.
println("Hello World from Jupyter Notebook in VS Code")
and you will get
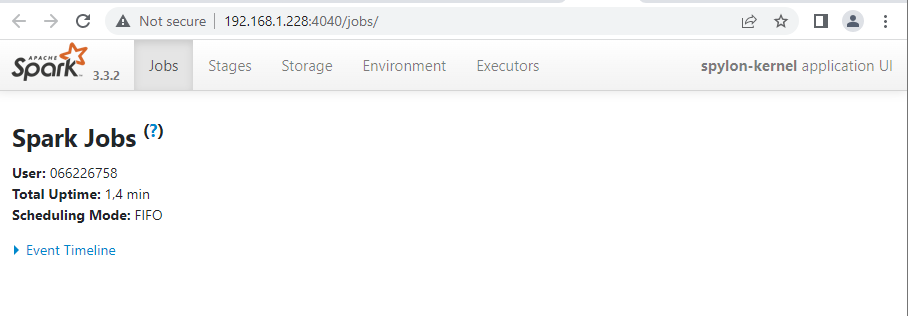
additionally you can see your Spark Job
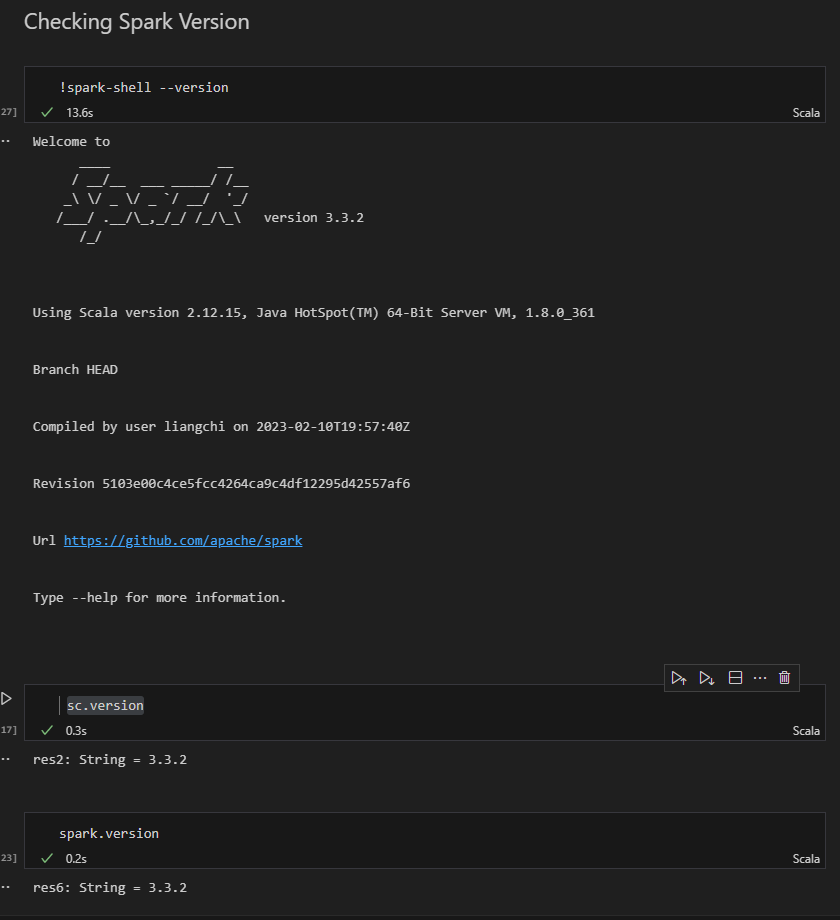
Checking Spark Version
Like any other tools or language, you can use –version option with spark-submit, spark-shell, and spark-sql to find the version.
!spark-submit --version
!spark-shell --version
!spark-sql --version
or simply type
sc.version
or
spark.version
you will have something like this
##
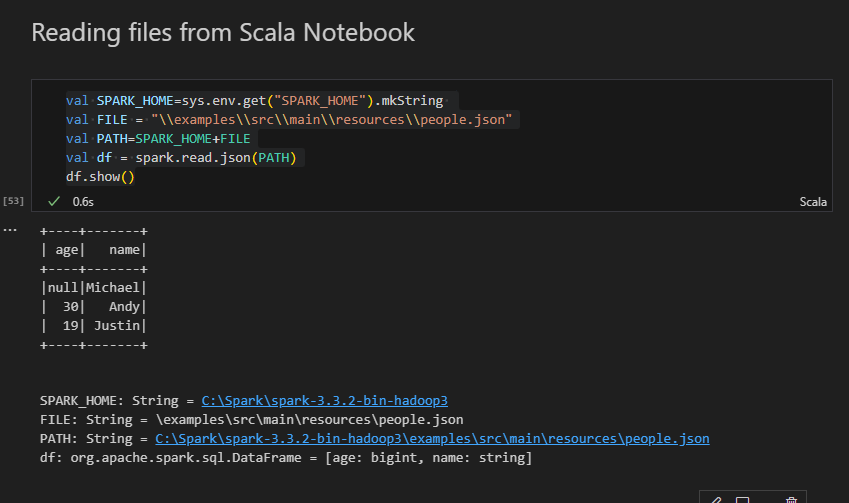
Reading files from Scala Notebook
One of the first importat things during the creation of any software are the Environment variables. Environment variables allow us to define values for given keys on the OS, which applications can read.
val SPARK_HOME=sys.env.get("SPARK_HOME").mkString
val FILE = "\\examples\\src\\main\\resources\\people.json"
val PATH=SPARK_HOME+FILE
val df = spark.read.json(PATH)
df.show()
Other languages
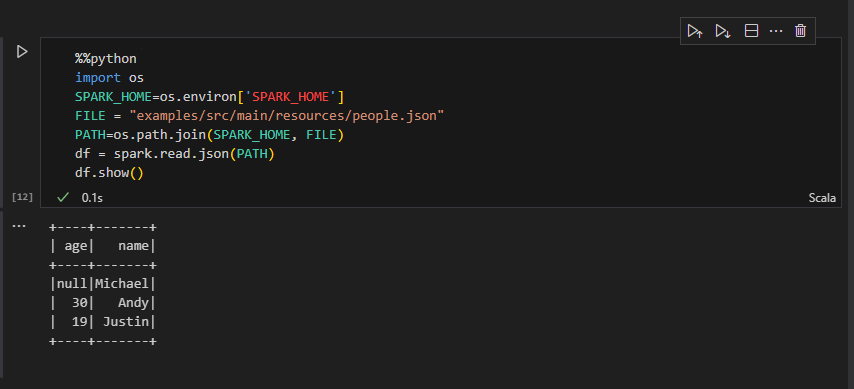
Since this makes use of metakernel you can evaluate normal python code using the %%python magic. In addition once the spark context has been created the spark variable will be added to your python environment.
Reading files in Python from Scala Notebook
The scala spark metakernel provides a scala kernel by default. On the first execution of scala code, a spark session will be constructed so that a user can interact with the interpreter.
%%python
import os
SPARK_HOME=os.environ['SPARK_HOME']
FILE = "examples/src/main/resources/people.json"
PATH=os.path.join(SPARK_HOME, FILE)
df = spark.read.json(PATH)
df.show()
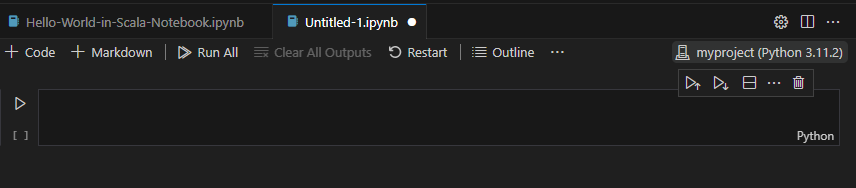
Step 8 Create a Jupyter Notebook for Python with Scala Support
If we want to work in Python with Scala support we can get the Scala code inside the Python Code as a magic.
We create a new Jupyter Notebook by running the
Create: New Jupyter Notebook command from the Command Palette (Ctrl+Shift+P)
After a new notebook was created click select Another kernel
then pick Jupyter Kernel
Next, select a kernel myproject using the kernel picker in the top right.

After selecting a kernel, you can see your enviroment. We have choosen spylon_kernel that uses Python language
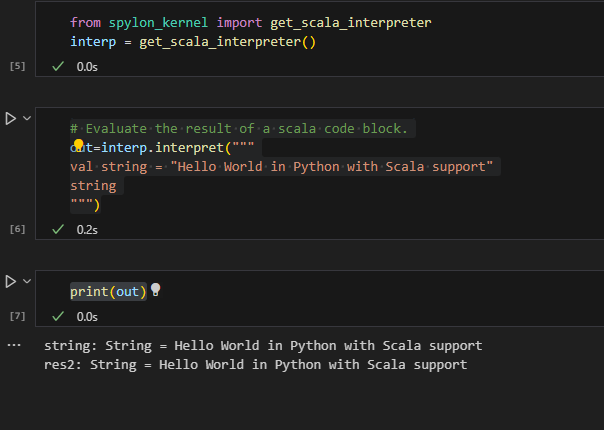
Hello World in Python with Scala support from Jupyter Notebook
Spylon-kernel can be used as a magic in an existing ipykernel. This is the recommended solution when you want to write relatively small blocks of scala.
If you just want to send a string of scala code to the interpreter and evaluate it you can do that too.
from spylon_kernel import get_scala_interpreter

interp = get_scala_interpreter()

# Evaluate the result of a scala code block.
out=interp.interpret("""
val string = "Hello World in Python with Scala support"
string
""")
print(out)
You can download the notebook from Github here.
Congratulations! You have installed Scala and Jupyter Notebook in Visual Studio Code.
Leave a comment